Pages

Sunday, 29 November 2009

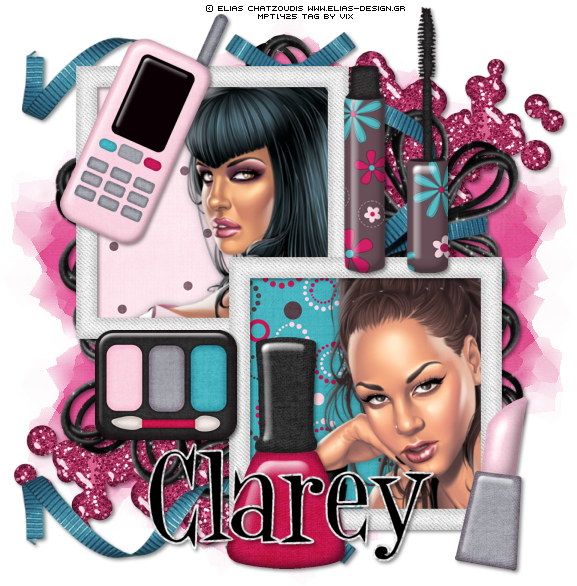
Tag Tutorial - Girly Girl Two - PTU


Tubes of Choice - I used a couple by the fab Elias Chatzoudis
His work is PTU and should be purchased from MPT

Scrapkit - PTU - "It Girl" by my pal Clarey, it's her first
kit in a while and it's v.cool :D Love it hun, thank you xx
If you'd like to purchase it, you can get it from her shop HERE

Mask - WSL_Mask220 by Chelle, it's a fave of mine :D
Can be downloaded by visiting Chelle's tut site which
is linked in Cool Supplies over on the right

Mura Meister Copies

Font of Choice

________________________

The Usual

then

Open White Square Frame

50%

C&P


Move to top left of canvas

Duplicate

Image

Mirror

Image

Flip


Open flower1

C&P

Place in the centre

and

Mura Meister Copies - on Encircle

but change the Number slider to 6

Move down below the frames layers


Over to the papers

Open Paper 10

C&P

Place in the top left frame area

Open Paper 12

C&P

Place in the bottom right frame area

Using Magic Wand with a Selection Delete of with an expand of 6

Delete the excess paper/s

and move the top left paper and frame layers down

the Layer Palette so they are below the bottom right ones


Open Paper 3

C&P

Apply WSL_Mask220


Now

Open eyeshadow

Resize 60%

C&P

Place as mine


Open Lipstick

C&P

Place as mine


Open Mascara

Resize 80%

C&P

Place as mine


Open Phone

Image, Resize 60%

C&P

Place as Mine


Open Varnish

C&P

Place as mine


Take your two face tubes

Resize as needed - I went down about 80%

You want the paper fills to show as well

C&P your tubes

Shadow as liked

and then

use the same Selection Delete with an expand of 6

to get rid of the excess tube/s


Open Glitter Splat 2

Image Resize 40%

C&P

Move to the top right

and move down under the flower layer in the LP

Duplicate

Image

Mirror

Image

Flip


Open Ribbon1

Resize 80%

Move to the top middle of the canvas

Line up as mine and

then move down the LP to just above

the flower layer

Duplicate

Image

Flip


Now add a dropshadow to all element layers

except the papers and mask

Shadow of 2, 2, 45, 5.00 Black


Then Crop the canvas

and add your Name in a style or font of choice

I used a glitter fill for the stroke - Stroke of 2.00 and

Black fill for my name and then shadowed as before

then

Add the artist info

and delete the White background

and save as .PNG

All done :D

Thanks for Looking xx

Tag Tutorial - Girly Girl One - PTU


Tube of Choice - I am using a gorgeous one by Keith Garvey
which is PTU and can be purchased from MPT

Scrapkit - PTU - a fantastic new kit from Clarey called "It Girl"
Gorgeous! And can be purchased from Clarey's shop HERE

Chelle's Mask WSL_Mask177 which can be downloaded
from her tut site which is linked in Cool Supplies

Xero Graphics - Greytinter

VM Extravaganza - Transmission

Font of Choice


______________________________

The Usual

then

Open heartframe1

60%

then

C&P

Place to the top left of the centre of the canvas


Repeat for heartframe2 and place as mine


Open WireHearts

C&P

Place as mine

Erase the excess wire on the top and bottom if liked

I used a small eraser on a round setting on 25 then changed to 5 when

I got closer to the hearts


Open Paper12

C&P

Move under all the other layers

and Chelle's Mask WSL_Mask177


Duplicate the Mask layer

and on the bottom layer

Adjust, Blur, Gaussian Blur, 10.00

then

VM Extravaganza, Transmission,

Line Width 3

Offset 2

Contrast 40

OK to Apply


Open Papers 9 and 11

C&P

Place as liked within the heart frames

then using Magic Wand

do a Selection Delete with an expand of 4

and delete the excess papers


Open glittersplat1

60%

C&P

Place as mine on the bottom right of the tag

Duplicate

Image

Mirror

Image

Flip


Open the tube you've chosen to use

Resize as liked

and C&P

Place where looks best then

Duplicate the tube

and on the top layer

Adjust, Blur, Gaussian Blur, 3.00

Change the Blend Mode to Soft Light

and

on the Bottom tube

Xero Graphics Greytinter

and change to the settings and Apply to the tube


Add Dropshadow of

0, 0, 40, 10.26 Black


Open tinysparkleoverlay

Resize 90%

C&P

Drop down the LP to just under both tubes


Now add a dropshadow of

2, 2, 45, 5.00 Black to all the element layers except

the sparkles and paper layers


Now

Add your Name in a colour and font of choice

Dropshadow as before

Add your Artist info

On a Layer above the White Background

Floodfill with a colour from the tag

and taking care not to crop the sparkles

Crop the canvas now to a more taggy size

and then delete the colour fill and White Back layers

and save as Transparent .PNG

Thanks for Looking xx

Wednesday, 25 November 2009

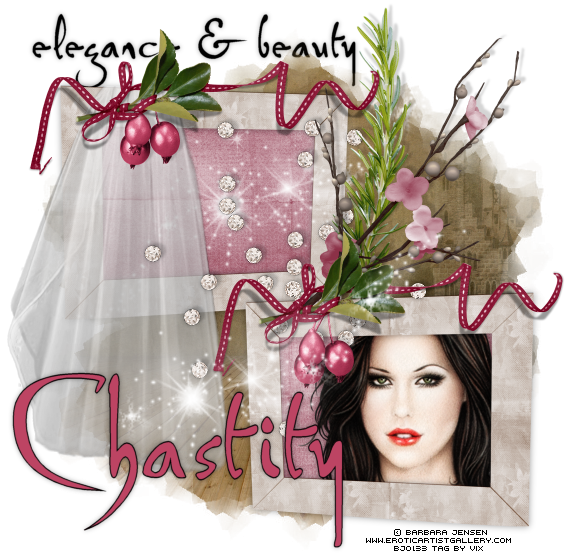
Tag Tutorial - Sparkly Elegance - FTU (Time Limit)


Tube Close Up of Choice - I'm using one by Barbara Jensen

which you can get from her site HERE (Over 18's only as the site

contains artistic nudity)


Scrapkit - "Framboise" by Latham, Lya and digiscrap.ch HERE

It's a FULL SIZED Collab from www.digiscrapbooking.ch and at

the time of writing (25th Nov)it was a freebie to download...so be quick!

If it is PTU when you see this tutorial, then I'm sorry 'bout that and

if you really want to do this tutorial, then you'll need to purchase it...or

not do the tut lol xx


Mask - I'm using WSL_Mask220 by Chelle Weescotslass which

you can download from her tut site which is linked over on the right

under Cool Supplies


Mura Meister Copies


Scripty Font of Choice


This tag is for Chas, who writes amazing tuts and makes
gorgeous tags :)

________________________________


The Usual

then

Open Lya Design (19)

Image, Resize, 20% SS

C&P

Move to the top left-ish of the tag canvas

Duplicate

Image

Mirror

Line up as mine on the bottom right


Open latham_element36 - (ribbon and leaves)

Image, Resize 10% SS

C&P

Place as mine


Open latham_element32

Resize 5% (yup, small!)

C&P

Place UNDER the element 36 as mine


Open Lya Design (p4) a stunning paper!

Image Resize 15%

C&P

Place just above the White Background in the LP

and apply Mask - Chelle's Mask WSL_Mask220

Layers, Merge, Merge Group on the mask layer

and

then Duplicate the mask layer


open latham_element25 (it's in the other folder)

Image, Resize, 10%

C&P

Line it up under the ribbon and leaves element on the right


Open latham_element20

Resize 10%

C&P

Line up as mine under the previous elements (not the frames though)


Open latham_element19

Resize 10%

C&P

Move to the top of the LP

(Layers, Arrange, Bring to Top)

and

apply a dropshadow 0, 0, 35.00, 7.00

and then

Mura Meister Copies

set to

Star Cluster preset and change the Shift X and Shift Y sliders to 64

OK to Apply

and once applied, Adjust, Sharpness, Sharpen

and move under all the elements in the LP except the frames


Open latham_element37

Resize 20%

C&P

Place as mine lined up with the top left frame

and move down the LP

so it's under the scattered gems


Now let's fill the frames and then finish off with a few

more elements lol!

OK - choose a paper

I used

latham_papier8

Image, Resize 15%

C&P

Do a Selection Delete with an Expand of 8 on the frame layer

and delete the paper excess

Selections None


So now your frames have a paper fill

so choose your image/close ups to use


I chose to use just one

and placed it in the bottom frame

I also duplicated, blurred and soft light on the Top tube

and applied Xero Greytinter to the bottom tube

and also a drop shadow

then

did a Selection Delete as before


Tip: I also deleted two of the gems that were covering

her eyes lol!


Now for some shadows

See which elements you think need a shadow and add one

I used

-3, 5, 17, 3.00 Black to the berries, lavender, gems and cherry blossom


Open Lya Design (5)

Image, Resize

30%

C&P

Place as mine

I placed one under the gems in the top frame area

and then

Pasted again and placed over the bottom of the curtain


Tip: you may want to floodfill the White Back

with a dark colour so you can see where the white sparklies are

You don't want to chop them off when done - so

I tend to do this so I can check lol - once checked, you can change back to White


Crop the canvas now to a more taggy size and take care

not to chop off the white sparklies or shadow edges

On the Frames layers,

Apply a shadow of 0, 0, 40.00, 10.26 Black


Now taking a favourite scripty font, type some wording that

applies to the tag and place on the top left as mine

and add a subtle shadow (the one I added to the gems first will do)

Then

use a colour from the tag and Stroke of 1

and add the name

Then Shadow as before

Add your artist info etc

and

Delete the White Background

All done :)

Thanks for looking xx

Wednesday, 18 November 2009

Tag Tutorial - Flaky - FTU


Tube of Choice - I'm using one of the wintery ones

Artwork © Jessica Dougherty

If you'd like to use the same tube, it must be purchased via CILM

However, feel free to use what you'd like to use instead


Scrapkit - FTU - a gorgeous wintery one by Tamie @ Addictive Pleasures

called "Snoeflake" - thanks hun xx

If you download it, please leave a little love

Mask - by Chelle @ weescotslasscreations - called WSL_Mask117
You can download it from Chelle's tut site which is linked in the
Cool Supplies section of this blog

Mura Meister Copies


The Usual

then

Open bg

Image, Resize, 75% SS

C&P

Crop to the canvas size 600 x 600

then apply Chelle's mask WSL_Mask117

Layers, Merge, Merge Group


Open ribbonframe

Image, Resize, 80%

C&P

Place centrally if not already there


Open the bg again

Resize 60%

C&P

Place under the ribbonframe layer

and do a Selection Delete with an expand of 5


Open bench

Image, Resize 60%

C&P

Place as mine


Move under the ribbonframe

and apply a shadow of

0, 7, 17, 30.00, Black

and

Select and expand again using magic wand on the ribbonframe

then

Hit Delete on the bench layer

Selections None


Now add your tube - resized as you like

I resized 90% and made it look like she's sitting on the bench :D

Apply same drop as before to it


Open hangingflake3

70%

C&P

Place on the left

Duplicate

Image

Mirror

Move both under the tube layer in LP

and apply 0, 0, 35.00, 7.00 Black

Open string3

40%

Place in the centre of the left flake

Duplicate

Image

Mirror

Shadow both as before

and make sure both are below your tube layer


Open the icecones

Image, Resize 80%

C&P

Apply same shadow as before

Move under the ribbonframe in the LP

Leave for the minute as we'll do a mass delete in a sec...


Open flower4

50%

C&P

Apply same shadow

then

Place centrally and go to

Mura Meister Copies

look for Encircle

Change the Shift X and Shift Y slider to 60

and the ANGLE slider to -10

Click OK to apply


Move down under the ribbonframe and icecones in LP

Open ribbon3

C&P

Move over to the right a bit

so the bottom of it is lined up with the bottom know

in the ribbonframe

Place above the flowers layer

but below the icecones

Duplicate

Image

Mirror

then

Image, Free Rotate

Left, 90 degrees

then

move up the tag a bit

then

add the dropshadow to both of these


Now using Selection Delete with the same expand

Delete the flowers that are in the frame

and the ribbons that are in the frame

then

Selections Invert

and Delete the icecones that are OUTSIDE of

the frame


Now apply a shadow to the ribbonframe layer

I used 0, 0, 40, 10.26 Black


Open snowflakes

80%

C&P

Place just above the bg layers

and line up as mine on the left

(there should be a flake placed between the trees on the left and the flowers and ribbonframe -

if you get that, you'll be lined up as mine is)

Duplicate

Image

Mirror

Image

Flip


Now, add your name as liked and a phrase/saying if liked too

I used Century Gothic, Black

48 for the phrase and 72 for my name and stretched it, subtle shadow as before

then your artist copyright info

Crop the Canvas

and

Delete the background

and save as a transparent .PNG

All done :) Hope you enjoy xx

Saturday, 14 November 2009

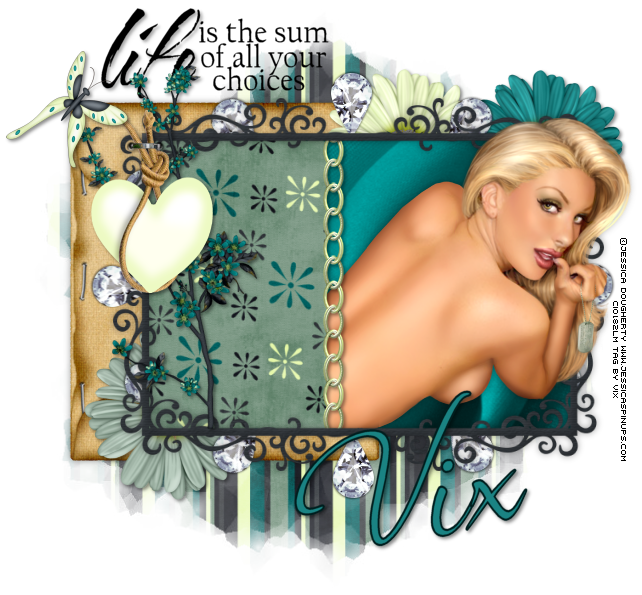
Tag Tutorial - Decisions - FTU


For this tag, you will need...

Tube of Choice - I'm using one of my faves
Artwork © Jessica Dougherty
If you wish to use the same tube you must purchase it from CILM

Scrapkit - FTU - Alone by Bel Vidotti
This kit is available from her blogsite HERE
Thank you Bel for your fab kits x

Mask of Choice - I'm using Chelle's WSL_Mask220 which you
can get from Chelle's tut site - link is in my Cool Supplies section

Mura Meister Copies - optional


___________________


The Usual (except this time the width is 650 pixels)


Open alonee39 bv (Envelope)

C&P

Move over to the left of the tag canvas


Open alonee48 bv (Frame)

80%

C&P

Line it up over the Envelope as mine


Choose one of the flowers

I used alonee33 bv

50%

C&P

Move to the top right of the frame

and down the LP to underneath it


Choose another coloured flower

Repeat as above and move over to the left of the first

flower

Choose another

Repeat as above and place on the bottom left


Open alonee44 bv (the heart element)

50%

C&P

Place as mine


Choose one of the papers

I used alonep14

85%

C&P

Move under the frame layer

and

Using Selection Tool, set to Rectangle

Draw out a selection over the frame

then

Selections Invert

Delete the excess paper


Open alonep19 bv

85%

C&P

Place above the White Background in the LP

and

Apply the WSL_Mask220

Layers, Merge, Merge Group


Open alonep18 bv

85%

Copy

then

Draw out another Selection rectangle

on the left of the frame area

Paste

Selections Invert

Delete

Move down below the Frame


Open alonee42 bv

C&P

Place under the Frame layer

and above the Papers

Line it up with the edge of the 2nd paper section as mine

then

Erase the excess chain which hangs outside the top

and bottom of the frame

(My eraser settings are in the Glossary of Terms section over on the right)

Merge the Chain and 2nd Paper section together


Open your tube

Size if needed

C&P

Place where you want it to be within the Frame

Duplicate

and Move

one down below the Frame, Chain and 2nd Paper section layers in the LP

and apply a shadow to the bottom one

I used 0, 0, 40.00, 10.26 Black

Hide the top one for now

Take your eraser again

and delete the excess tube which hangs

outside of the left and bottom of the frame

Unhide the top tube

and erase as needed so

the tube is emerging from the frame layer

(See my tag for ref)


Apply any extra elements that you might like

to use

I used one of the Teardrops 20%

then Mura Meister Encircle

with the X Shift on 70

and the Y Shift on 60

and then moved this under the frame and paper layers

Flower Branch 60%

Butterfly 30%

and I applied a dropshadow of 2, 2, 45.00, 5.00 Black

to the Butterfly, Flowers, Flower Branch, Chain and

Heart Element

and

To the Envelope and Frame layer

Apply the same shadow as the tube


Crop the Canvas now

to remove the excess canvas not needed


Add any wording you'd like to add - text brush or similar

and your name


Add Artist info

Delete White Background

and

save as transparent .PNG

All done :)

Tag Tutorial - Sweetly - FTU


Tube of Choice - I'm using a beautiful one by Ismael Rac who's
work is available for PSP usage from his store HERE

Scrapkit - FTU - A gorgeous one by Mere @ Scraps by Mere
The kit is called Rouge Delight and can be downloaded
from her blog. Please leave some love if you do xx

Mask of Choice - I used my mask 147 (yes...again hehe!)


Mura Meister Copies

_______________

The Usual

then

Open RougeDelightFrame2

C&P

Place centrally on the tag canvas


Open Frame4

90%

C&P

Place under the frame in the LP

and line up as mine


Open Paper4

C&P

Place under the frame and above the doodle frame in the LP

then

do a Selection Modify Expand by 20

and Delete the excess paper


Open Paper1

C&P

above the other paper layer

Move down the tag canvas

so that the top two thirds of the inner frame is black paper

and bottom third is red

Repeat the Selection Delete for this paper


Back to the Elements

and open the RicRac1

C&P

Merge this Ric Rac down

onto the Red paper segment

And apply a dropshadow of

Minus 10, 10, 30.00, 7.00 Black

Then

Once more, click inside the frame layer

and do a Selection Delete on the merged red paper and ric rac layer


Open your chosen tube now

Paste as a new layer

move over to the right of the tag

and move under the frame and red paper layers

but above the rest

Duplicate

and move above all the other layers


on the Bottom one

Apply a dropshadow of minus 5, 5, 30.00, 7.00 Black

Hide the top one for now

On the bottom one, take your eraser on a medium sized hard setting

and erase the tube that sticks out from the bottom of the main tag area

Unhide the top tube

and

Erase the same again and this time take it right up

to the ric rac area

and erase so the tube looks as though it's

coming out of the frame behind the paper and ricrac layer

Nifty eh?! lol...well, I've always liked it hehe

OK


Open Rouge Delight Flower6

C&P

Place centrally in the tag canvas if not already

and

Mura Meister Copies

Look for the Encircle preset

then

Apply


Move this layer down the LP

to just above the White Background

Make sure the doodle frame layer is above it

and on the flower layer

apply a shadow of

0, 0, 40.00, 10.26, Black


Open Star2

C&P

Place as mine


Open the Tag 1

C&P

Image, Free Rotate, Left 90

then

Move it down below the star layer in the LP

and

take your eraser

and erase the part of the tag that shows

on the other side of the the star

then

Open Paper 6

C&P

Move down the LP to just above the White Background

and apply a favourite mask

I used my mask 147


Crop the canvas now so you

can see what your final size is

Also gets rid of any excess paper or tube that

might be lurking

then

Apply the drop you used for the tube

to the Star and Tag layers

Apply the shadow that you used for the flowers Encircled layer

to the Frame layer now

And finally

Add your name as liked and your artist copyright info as needed

Delete the White Back

Save as .PNG

Enjoy your tag!

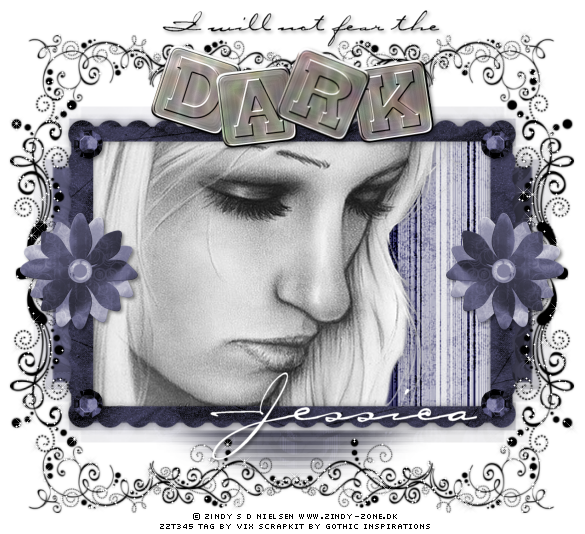
Tag Tutorial - Fearless - PTU


Tube of Choice - I'm using a free one from the fabby Zindy :)

If you'd like to use the same - go to her site HERE

and download from the Free Tubes page


Scrapkit - PTU - I'm using Dark of the Night by Jessica @ Gothic Inspirations
Thank you hun, love the colours of this kit


Mask - Chelle's Mask WSL_Mask145 from her site weescotslass which is
linked in my Cool Supplies section

Xenofex 2 Constellation


_________________________


The Usual

Open FrameBlue

Image, Resize, 70% SS

C&P

Place in the middle of the tag canvas


Open FrameDesign2

C&P

Move down the Layer Palette under the Frame


Open Paper2Blue

Image, Resize 70% SS

C&P

Move under the original frame layer in the LP

Clicking inside the Frame layer with Magic Wand

do a Selection Delete with an Expand, Modify of 7

and Delete the paper that's outside of the Selection

Selection None


Open Paper10Blue

Resize as before

C&P

Apply Chelle's mask WSL_Mask145

Layers, Merge, Merge Group

Then move down the Layer Palette so it's

just above the White Background

and maybe using Move tool, jiggle the placement

a litte to compliment the FrameDesign layer


Open your Chosen tube or image now

C&P

Place within the frame area (under it)

Resize if needed

Apply a favourite shadow (if your image fills the frame area, don't lol!)

and

Repeat the Selection Delete process to remove the excess tube


Open GemBlue

Image, Resize 20%

C&P

Place as mine on the top left of the frame

Duplicate

Image

Mirror

Duplicate and Flip each of the top gems

So you have 4 corner placement like mine


Open Flower3

Image Resize 40%

C&P

Place on the left side

Duplicate

Image

Mirror


Now add a dropshadow of choice to the flowers and gems layers

I used 2, 2, 45.00, 5.00 Black


Add a larger, more blurry dropshadow to the frame layer

I used 0, 0, 40.00, 10.26, Black


Now, click on the Frame Design Layer

And using Xenofex 2 Constellation

Look for the It's Full of Stars preset

then change the Overall Star Density to 1

and make sure that Keep Original Image is Selected

OK to apply

then

add a v.subtle dropshadow to this layer

Something like 0, 0, 35.00, 3.00


Open WordartDarkPlain

Image, Resize, 50%

C&P

Place as mine

and apply the same shadow used for the elements


And then perhaps add some extra wording

"I will not fear the"

and shadow as liked


Add your name as prefered and shadow

Add your artist copyright info etc

Crop the tag canvas

Delete the White Background

and save as a transparent .PNG

All done :)

Friday, 13 November 2009

Tag Tutorial - Ready for Romance - FTU


For this tag, you'll need...

Tube and Image/Close Up of Choice - I'm using the fab work of Mr Keith Garvey
To use the same - please visit MPT for more details

Scrapkit - FTU - "Night Passion" by Doris Nilsa @ Scraps Dimensions
To get the kit, go HERE and please leave a little thanks when you
take it xx

Mask - by Chelle, WSL_Mask148 - can be downloaded from her site HERE

Xenofex 2 Constellation - not a free filter

Xero Graphics Greytinter - free filter


__________________________

The Usual


Open NP Doodle Big

C&P

Place on the canvas


Open NP Butterfly1

Image, Resize 10%

C&P

Place as mine


Open NP Old Clock

Image, Resize 30%

C&P

Place as mine


Open your Close Up

C&P

Paste as a new layer

over the Clock

Xero - Greytinter on the default settings

then

Drop the Opacity

so you can see the clockface underneath

and

take Magic Wand with a Feather of 2

Click outside the Clock face on the clock layer

then

back to the Close Up layer

and hit Delete twice

Selections None


Now Drop the Opacity a bit more on your Close Up layer

I went down to 34


Paste your tube as a new layer now

and move over to the right of the tag

Either resize if needed or

Erase some of the tube if needed

I wanted to keep my tube large

but still wanted the background to show so

just see what it looks like for you


Once you've placed your tube

Xero Greytinter as before

and

Shadow of your choice


Note: If you, like me, keep the tube

largish, but erase the bottom

Use NP Ruffle, Resize 60%

and paste this as a new layer

over the tube layer

so it hides the erased bottom :)


Open the Champagne Bottle

Image, Resize 50%

C&P

Place as mine


Open Flute Glass

Image, Resize 30%

C&P

Place as Mine

Duplicate

and move the other one over to the right


Open Paper 4

Resize 75%

C&P

And Move down the layers to

just above the White Back

Apply Chelle's mask 148

Layers, Merge Group

and

Image, Resize 90%

and move down the tag canvas a bit if needed

then

on the Mask layer

Xenofex 2 Constellation

Look for the Preset called It's Full of Stars

and Drop the Overall Star Density to 1

and

make sure in the Background Fill section

that Keep Original Image is chosen

OK to apply


Open the Rose

Image, Resize 20%

C&P

Place as mine


Now

Apply a shadow to the

Rose

Bottle

Butterfly

Ruffle

Use, 2, 2, 45.00, 5.00 Black

On the Clock layer

use 0, 0, 40.00, 10.26 Black


Now

Using Black Fill and No stroke

Take a favourite font

and add some words behind your tube


I used

Ready for Romance (!) lol!

But use whatever you like

and then dropshadow

1, 1, 20.00, 2.00 Black

for the words

Not too blurry :)


OK

Now your name

Shadow as liked


and add artist info as needed etc


Crop the tag now to elimate some of the no longer needed space

Delete White Back

Save as .PNG

Have fun!

Thursday, 12 November 2009

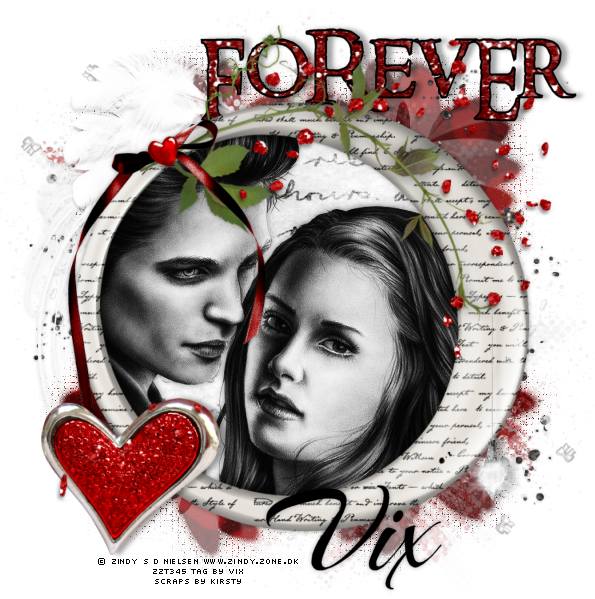
Tag Tutorial - Obsession - FTU


I am happy to admit, I love Twilight. In fact, it's Edward
who I love hehe. So this gorgeous kit just screamed Twilight
at me. Hence this tag :)

For this, you will need...

Tube or Image of your Choice - I'm using a free - yaaars free lol! -
tube by the fantastic Zindy - get it from her site HERE if you'd
like to use the same

Scrapkit - FTU and it's a complete stunner! It's part
of the Fangtastia blogtrain and this part was created
by Kirsty - it's superb hun, thank you xx
Get it from her blog HERE and please leave some love
if you take it.

Masks - both by me - Vix_Mask307 and Vix_Mask336
both of which can be downloaded from my tut site HERE

That's it - no filters as this kit is so lush it
doesn't need any help hehe xx

_______________

The Usual

then


Open KISM_Fangtasia_Frame2

Image, Resize, 80% Smartsize

C&P

Place centrally to the tag canvas


Open Fangtasta-Paper2

Image, Resize 75% SS

C&P

Move under the Frame layer

Apply my mask Vix_Mask336

Layers, Merge, Merge Group

Move the mask layer up and slightly to the left

Duplicate Mask layer

Move the duplicate down and slightly to the right


Open Fangtasia-Paper10

Image Resize as before

C&P

Take your Selection Tool, on Freehand Selection, Point to Point

and draw around the inner circle part

Once you've got a circle selected

Selections, Invert

and hit Delete on the paper layer


Open your chosen tube, or image

C&P

Place where it looks best for you

Duplicate

Adjust, Blur, Gaussian Blur, 2.00 on the top one

and change the Blend Mode to Soft Light

then

Apply a dropshadow to the bottom tube layer (if needed)

and use Selection again to delete the excess


Open Feather1

C&P

Place as mine

(move it down the Layer Palette so it's under the paper fill layer

but above the masks layers)


Open the FeatherSplatter (stunning!)

Image, Resize 80%

C&P

Tip: for the Moment, floodfill the Background Layer BLACK

so you can see what you're doing but floodfill White when you

see this ***

Move the FeatherSplatter over to the Top left

take care not to touch the edges of the canvas

Once placed,

Duplicate

Image

Mirror

Image

Flip

Now, move both of these layers down the LP

so they're just above the Masks layers

Jiggle them about if necessary so the flecks aren't touching the canvas edge

***

Open GlitterRosePetal-1Shad

Image, Resize, 80% SS

C&P

Place as mine

then

take your Eraser tool on a hard small setting

and erase any of the petals that are overlapping

too much of your tube/image

(I used my eraser on a square setting, Size 102, Hardness 100, Step 5, Density 100, Thickness

100, Rotation 0, and Opacity 100 - this setting is good for leaving nothing behind lol - I

then erase some of the petals that were over Bella's face)


Open GlitterSplatter-1

Image, Resize 90%

C&P

Move down the layer palette to just above

the masks layers


Open Heart3

C&P

Place as mine

Move it under the Petals layers


Open Light1

Image, Resize 30% SS

C&P

Line up under one of the petals over on the right


Open Paper1

Image, Resize 75%

C&P

Drop this layer below all the others

except the White Background layer

and

apply

my mask Vix_Mask307 to this paper layer

and merge group


Open Glitter2

Image, Resize 75%

then

Go to your Materials Palette

and find the KISM_Fangtastia-Glitter2

Move this to the Background Box

Have your Foreground box on Black, 2.00 Stroke

And taking a favourite font of choice

Type out a word to go with your tag

As I'm using Edward and Bella, I used Forever

Type it out

Stretch if needed

and

Convert to Raster

Take care to move this word down the Layer Palette

so that it's below the Petals and Frame layers


Now on the Heart, Word and Light layer

Apply a dropshadow of

0, 6, 35.00, 7.00 Black

or choose one of your own favourites to use


For the Frame layer

0, 0, 35.00, 7.00 Black


Now add your name in Black fill, No Stroke

in a scripty font of choice

I used my full name - for once lol!


Apply your artist info now

Don't forget, if you use Zindy's free tube

and you DON'T have a ZZT license - then use zzt free art

as well as her Copyright info


Crop the excess canvas now - though there isn't much

to crop as there's lots of lovely scattered bits, so take care when chopping!

Delete the background layer

and save as transparent .PNG for

optimum quality

Enjoy!

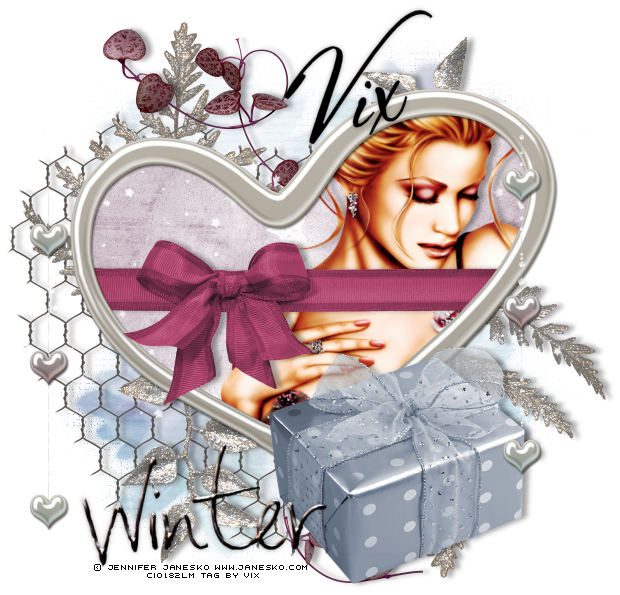
Tag Tutorial - My Gift - PTU


You will need...

Tube/Close Up of Choice - I'm using one © Jennifer Janesko
If you'd like to use the same, you can purchase it from CILM

Alternatively, use one of your choice or a freebie :)

Scrapkit - PTU - It's mine lol. It's called Frozen
Beauty and can be purchased for a quid (£1.00) HERE


Optional: Mask of Choice - I used my mask Vix_Mask307
which can be downloaded from my tut site HERE

Font of Choice


________________________

Open a New Image in PSP - 650 x 600 (we'll crop
later but if you need it smaller, then
start much smaller and resize elements as needed)

Add New Layer

Floodfill White

Open the FrameHeartPearl

C&P

Paste as a New Layer

Place centrally in the tag canvas


Open FrostedLeaves

C&P

Move down the tag canvas to line up as mine have

done on the bottom left

Duplicate

Image

Mirror

Image

Flip

And now move both of these down the Layer Palette below the pearl frame


Open the FrostedLeaves2

C&P

Place as mine on the top left of the pearl frame

Duplicate

and repeat the Mirror Flip as before

Move both of these layers

down the Layer Palette to below the pearl frame


Open LeavesSwirl

C&P

Place as mine

and move down to under the pearl frame


Open WireFence

C&P

Place as mine to the bottom left

and move down below all the other layers

apart from the White Back


Now over to the Papers and choose one to use - I used

Paper8

C&P

Place just under the Pearl Frame Layer

Hide for now


On each of the elements - except the pearl frame

Add a Dropshadow

I used

0, 6, 35.00, 7.00 Black


Now click inside the Pearl Frame with Magic Wand

and do a Selection Delete with a Modify, Expand of 10 on

all of the element layers except Pearl Frame

Don't Deselect

Selections Invert

Unhide the Paper Layer

and hit Delete to get rid of the excess paper

Selections None


OpenGiftRibbonBow2

C&P

Place under the Pearl Frame layer

as mine

Duplicate

and

move one of the ribbon layers up

above the Pearl Frame Layer

On the bottom one, apply the same shadow as before

and on the top one

Erase the hard edges that

overlap the Pearl Frame

on the top one (and if any is showing outside the edges

of the Pearl Frame on the bottom one, erase them too)


Open your chosen close up or tube

C&P

Shadow and delete using Selection Delete as before


Back to the kit

Open one of the gift boxes

C&P

Place as mine and shadow as before


Open the DropletHeartStrings

C&P

Place as mine on the left

Paste again and place on the right

No need to shadow these


Open Sparkles2

C&P

Place as mine and then

move down the Layer Palette if liked

I did :)

then

Duplicate

Image

Mirror


Open the Winter wordart

Image, Resize 70% Smartsize

C&P

Place as mine

and add a subtle dropshadow

I used 0, 0, 35.00, 7.00 Black


Optional: I also used another Paper

Paper15

C&P

and applied my mask - Vix_Mask307 to it

and placed just above the White Back

but this is optional

Now

Add your Name in a font and style of

your choice

and apply the same subtle shadow as before

Crop the tag canvas now

apply the Artist info

and delete the White Background and save as a .PNG

Thanks for looking xx