Showing posts with label Tag Tutorials - FTU. Show all posts

Wednesday, 13 March 2013

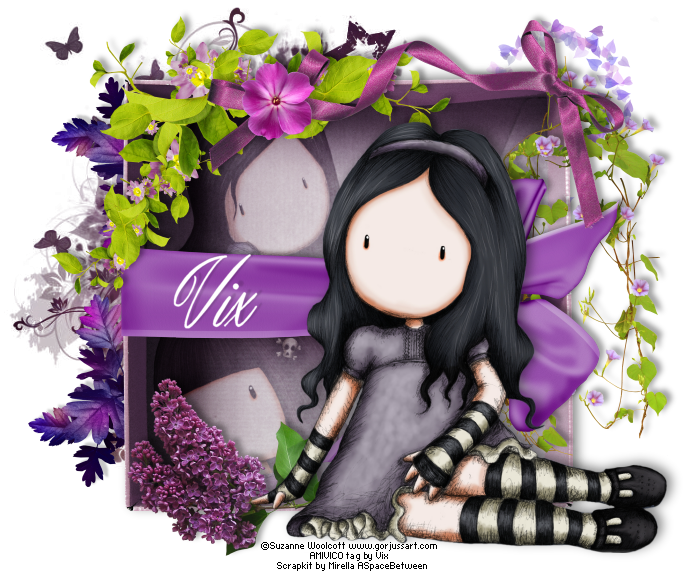
Tag Tutorial - FTU - Box of Gorjussness


SUPPLIES NEEDED

Tubes/Close Ups of your Choice - I'm using some tubes by Suzanne Woolcott aka Gorjuss who as of 14th March 2013 will no longer be selling tubes.
Thank you for all the gorgeous goodies over the years, Suzanne and best wishes with the new adventures!
My license to use these particular tubes is from the now closed AMI - so if you don't have these or any of Suzanne's work, then use a different set of tubes instead.

Scrapkit - I'm using an amazing freebie scrapkit called "Because of You" by Mirella @ A Space Between HERE
I love this kit, it is superb so when you download it, please take a moment to leave some love for the fab creator - thank you xx

Mask of Choice - I'm using my own mask called Vix_Mask363 which can be found amongst my older masks at my tutorial site HERE

No Filters Required - this is a real copy and paste tut...yeah!
BUT! Not that slap dash yannow :p
You'll need some experience of using the Selection Tool for this tutorial,
so not really one for tagging beginners - some tag experience, using layers and selections knowledge is desirable :)

Font of your Choice - I'm using Masterics Personal Use font

________________________

Open a New Image in PSP - 700 x 600 pixels
Add a New Layer
Floodfill White

Open Element25 - the Box Shelves
Resize 25%
C&P
Place to the centre left of the tag canvas

Open Element 15 - the leaves and flowers
Image, Resize 20%
C&P
Place as mine top left of the tag canvas

Open Element 16 - the dangling leaves and flowers
Resize as before, C&P and place top right

Open Element 24 - the bi-coloured leaves branch
Resize as before etc etc and place on the bottom of the box
Image
Flip
Image
Mirror
Place as mine on the left side of the box
and move this element layer below the box layer in the LP

Duplicate
Image
Flip
and move this 2nd leaves layer up the tag area and place lined up as mine with
the gap in the leaves and flowers

I'm not going to keep saying C&P, you know that by now lol!
So, from here on in, just assume that when I've said Resize, the next thing you do is to Copy and Paste the resized element
Marvellous!
OK then

Open Element29 - the lilac
Resize at 10%
Place as mine on the tag canvas
and move to line up with the bottom edge of the box

Open Element 26 - the faded leaves swirl brushy element
Resize 15%
Place as mine on the top right area of the tag and line up as I've done
Move down the LP so it's just above the White Background

Open Element 7 - the bow ribbon
Resize 15%
Place lined up as mine

Open Element 5 - the pinky flower
Resize 3% - yup, that's 3%
Place as mine on the tag canvas above the ribbon layer in the LP

Open Element 45 - the ribbony bow
Resize 15%
Place on the tag canvas lining up the flat side on the left of the ribbon
with the left side of the box edge and slightly over it but not much lol!
- zoom in and drop the opacity of the ribbon layer if you need to see it better
Once lined up as liked, duplicate this ribbon layer
Move one of the layers down the LP so it's below the top left leaves and flowers element from right back at the beginning of the tut
And move the next one (if not already) so it's positioned beneath the top swirly purple ribbon layer in the LP but above most of the others
OK?
Now take your eraser tool on this top ribbon layer and erase the ribbon which covers the line of the leaves and flowers element
Happy with all the placements so far? Check against my tag to see if you've got an exact or close approximation -have you? Yaaaay! Excellent.

SO now - Right click on the box shelves element layer and choose View, Current Only
This is where we do something different to C&Ping only - oh yes!

Take your Selection Tool, you want it on Freehand Selection - Point to Point - Add
with a Feather of 3
Zoom in to about 200% so you can see better and you want to Select the top back section of
the box - don't include the sides or shelf area - you just want the back panel
I started at the top left and went along the top and down the side then back along the bottom and up to meet the start point. Go steady and use the box as your guide

OK?

Once selected, Selections, Load/Save Selections, SAVE Selection To Alpha Channel, Save then Selections None
Repeat this sequence for the bottom back panel of the box too and Save your 2nd selection, Selections None

Right then
Once you've done this, the choice is yours!
You can either paste lots of tubes within the 2 selection areas, or you can have a close up in both, same top or bottom or different (same artist and license though, o'course loL!)

OK, so let's do the top selection first
Selections, Load/Save Selection, Load Selection from Alpha Channel
Load
And there's your first selection once more
Fill the selected area with tube/tubes/close up of choice
Make sure these layers are just above the Box layer in the LP
Once happy with Placement, Selection, Invert and Hit Delete twice on each of your tubes layers
Selections None
Once you've done this - change the Blend Mode of your tube or tubes layer to Soft Light or similar

Repeat this step for the lower selection - when you go into Load Selection, use the drop down menu on the left and look for your 2nd Selection and load that one
Then repeat the last step/s
Once done and you're happy
Right Click on the Box layer in the LP once more and choose View, ALL

Happy with how everything is looking? Hope so!
Final touches....
Open Paper4 (or whichever you'd prefer)
Resize 15%
C&P (aaargh, I can't help it, it's a disease loL!)
Position this paper layer above all the others and then apply a favourite mask to it - I used my mask called Vix_Mask363
Apply your mask and move it just above the White Background in the LP - duplicate it if you want a stronger effect
Open a full bodied seated tube to compliment your other ones and place over on the rightish of your tag and then apply a good dropshadow of choice
I used
-3
5
45
15.84
Black
(you need these sorts of angles to not shadow underneath the tube which if it's seated, would look floaty and weird)
Apply this same shadow to the Box layer
To all the elements on the "front" of the box - apply the same shadow but change the last settings to Opacity 36 and Blur 7.92
For the elements behind the box - ie. the two branches on the left side
Same shadow but change the Opacity and Blur to 22 and 2.97
Don't shadow the Mask/s or the top right brush swirl layer

Finally -
Use a colour from your tag so far or White like me - and apply your name in a favourite font of choice and place it over the ribbon area to the left and apply the same shadow but change to 15.00 and 2.00

Add your artist copyright info, URL and any license needed along with your "Tag by..." etc
Crop the excess canvas
Delete the White Background Layer
Save as PNG
All done!
Thanks for looking and have fun trying xx

This tutorial was written on the 13th March 2013 by Vix
It is a tutorial written as I went along this morning
trying to come up with things which I've never done before and therefore
and any potential similarities to other tag tutorials that
may be available is wholly unintended, completely coincidental
and bleddy astonishing!
Any items supplied to use to create your own tag with this tutorial are supplied
in good faith - if I have used something not intended
for usage in this way, please contact me via email.
Any items created by me for the purposes of this tutorial MAY NOT be used in
any other tag tutorials or for PSP Supplies you create (wordart, brushes, masks, templates, kits)
Links to tube/scrap blogs or PTU tube sites are added either through necessity or creator courtesy,
and it is entirely up to the individual (ie. You!) if you choose to visit these sites and/or download/purchase from them.
Scraps used in my tutorials that I've obtained from PTU purchased scrap kits are NOT supplied
in my tutorials supplies.
This website is intended for educational/entertainment purposes only
NO linking to my tut examples, screen shots, files or graphics permitted
All of my tutorials are registered with TWI

Wednesday, 27 February 2013

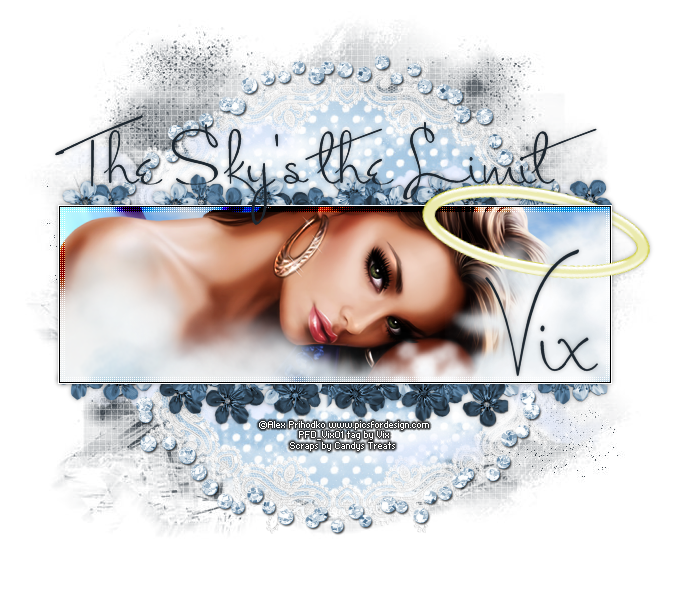
Tag Tutorial - FTU - The Sky's The Limit


Another Nik inspired tag - check out this beautiful song HERE

SUPPLIES NEEDED

Close Up or Tube of Choice - I'm using "Butterfly" by Alex Prihodko which should be purchased
if used in a tag - you can get it HERE

Cloud Tubes - by Rainbow Coffi which you can get from PSP-Playground HERE
Look for Cloud Formation and Cloud Formation 2

Angel Mini Freebie Kit - by Candy's Treats - a gorgeous FTU mini from Diane which you can get HERE
Please leave some love if you download it

Masks needed are

My mask called BigMask_019 - you can download the zip of my masks HERE

and also

Chelle's mask called WSL_Mask196 which you can get from her site HERE

Xenofex 2 - Little Fluffy Clouds

Xero Graphics Greyscaler and Radiance

Penta.com Colour Dot

Font of Choice

______________

Open a new image in PSP
550 x 175
Floodfill White
Change the two Material Palette boxes to White as well
Now
Add a new Layer
and go to Xenofex 2 - Little Fluffy Clouds
on the default settings
(If you haven't got this filter - not to worry, just
floodfill with some sky blue colour or use a sky paper etc)
OK to apply

Open the Rainbow Coffi tube called Cloud Formation
Copy and Paste and place to the left of the tag canvas
then
Open Cloud Formation 2
and
Copy
And paste as a new layer on the tag canvas to the right
See my tag for positioning reference
OK

Now choose your Close Up image of choice
Copy and paste your image as a new layer on the LP
Place this above the cloud layer
Make sure it's not so massive that you can't see any of the blue sky behind
so resize now if needed

Duplicate it
and
On the top copy
Adjust, Blur, Gaussian Blur, 10.00
then
Apply Xero Graphics - Greyscaler on the default settings
and then Radiance on the default settings
Change the Blend Mode of this layer to Soft Light
Now crop to canvas size
and then
Layers, Merge, Merge Visible

Now
Selections All
Selections, Modify, Contract and choose 5
Selections, Invert
and then go to Penta.com - Colour Dot on the default settings
Apply
Keep Selected
Selections, Promote Selection to Layer
Selections None
If this effect doesn't show up much for you then
change the Blend mode of this layer to Burn or something else
that shows up on your colour scheme/chose tube area
Layers, Merge Visible

Now
Image
Add Borders
And add a 1 pixel black border (symmetric ticked) and then a 1 pixel White Border
OK

Layers
Promote Background Layer
then
Image
Canvas Size
and let's whack it up to a big tag size!
700 x 600

Add a New Layer
Floodfill White
Move to the bottom of the Layer Palette

Open the Candy's Treats Paper called ct-paper 7
Image, Resize, 70%
Copy and Paste as a new layer above the white background
and
Apply the WSL Mask called WSL_Mask196
(apply it as Fit to Layer not Canvas)
Layers, Merge Group
Open the ct-lace
Copy and paste as a new layer above the Mask layer
Open the Glitter Circle
Copy and Paste above the previous 2 layers (mask and lace)
Open the ct-clouds
Copy and Paste
Position as mine and make sure these are above the mask
layer but below the glitter circle in the LP
Duplicate
Image
Flip
Image
Mirror
Open the ct- flower cluster
Copy and Paste
Position to the bottom of the tag area
Duplicate
Move this next one and position as liked
I mirrored my one
When happy with the placements
Move both of these layers down below the tag layer

Keep going, you're doing great!

Open the candy's treats Angel halo
At the top of the LP, paste as a new layer
Move over to the right hand side of the tag layer area
Position exactly as mine and
Once happy with the placement
Duplicate this layer
move the duplicate down the LP below the tag layer
On the top halo layer
Erase the top right corner section so it looks like the halo is emerging
and apply a subtle dropshadow to the bottom halo layer only

Add a new layer above the White Background
Floodfill with a darker colour to compliment your tag
and apply
Vix_BigMask019 to it
Layers, Merge Group

Ready for some finishing touches?
Cool
Ok
Take a favourite scripty font and in the same colour we used for the last
mask, type out your wording and name layers
Apply
Subtle Shadow as liked
(I used a subtle shadow - see my previous older tuts for the settings)
Now shadow the two flower layers the same
and also the tag layer
And now add your artist information
and crop to 674 wide by 589 high
Delete the White Background layer
Save as a PNG
All done! :)
Thanks for looking, have fun trying and enjoy!

This tutorial was written on the 27th February 2013 by Vix
It is a tutorial written as I went along this morning
painstakingly trying to come up with new things lol so
I hope I did and therefore
and any potential similarities to other tag tutorials that
may be available is wholly unintended and completely coincidental
and would bleddy astonishing!
Any items supplied to use to create your own tag with this tutorial are supplied
in good faith - if I have used something not intended
for usage in this way, please contact me via email.
Any items created by me for the purposes of this tutorial MAY NOT be used in
any other tag tutorials or for PSP Supplies you create (wordart, brushes, masks, templates, kits)
Links to tube/scrap blogs or PTU tube sites are added either through necessity or creator courtesy,
and it is entirely up to the individual (ie. You!) if you choose to visit these sites and/or download/purchase from them.
Scraps used in my tutorials that I've obtained from PTU purchased scrap kits are NOT supplied
in my tutorials supplies.
This website is intended for educational/entertainment purposes only
NO linking to my tut examples, screen shots, files or graphics permitted
All of my tutorials are registered with TWI



Monday, 25 February 2013

Tag Tutorial - FTU - These Tears


This tutorial was inspired by my current listening choice - the superb album "Ei8ht" by Nik Kershaw
I make no attempt to hide my Nik mania having loved him and his
music since 1984 and his most recent album has gradually worked it's way
into my heart

And that's good news. If I'm inspired - I tag and also tut!

So, I hope to be similarly inspired by other tracks on there.
Wanna know what I'm on about? Check out Spotify or Amazon

Anyway, if you'd like to make this tag?

SUPPLIES NEEDED

Tube/Close Up/Image of Choice - I'm using "Angel Tears" by Zindy S D Nielsen which can
be purchased from Zindy's tube shop HERE

A few scraps - I'm using a FTU kit by the fabby Kittz called "Misfit Style" and it's available
from the Misfits blog HERE
Please take a moment to leave some love if you download it - thank you

My Wordart - HERE

Mura Meister Copies

Toadies - What Are You?


Both of these filters are freely available on the Internet

Eye Candy 4000 - Gradient Glow

Not a freebie, so don't worry if you haven't got this

Font of your Choice

_________________________

Open PSP
Change your Materials Palette (the two colour boxes) to White #FFFFFF
Now, open a new image canvas in PSP
250 pixels wide by 100 pixels high
So, you've got a rectangle canvas
Excellent

Open your chosen Image or Close Up tube
Copy the image
Paste as a New Layer on the small canvas
OK, so
Position your tube within the small rectangle as you like it
Once you've positioned
Right click on this layer in the Layer palette and hit Duplicate
and on the new top layer in the Layer Palette
Adjust, Blur, RADIAL BLUR on the default settings
now change the Blend Mode of this layer in the LP to Soft Light
or similar - something that compliments your tube

Now
Image
Add Borders
2 on all settings
White
Symmetric ticked
OK to apply
then
go back in and set 1 on Black
then once more
3 on White
and finally
2 on Black
So, that's 2 - White
1 - Black
3 - White
2 - Black
OK?
Coolio!

Layers, Promote Background Layer
and
then
Image
Canvas Size
and change to 450 wide by 300 high
with the image we've got in the middle and a transparent background

So you should still have the "tube/image" on your Clipboard
So, Paste this once more as a new layer in the LP
Make sure it's underneath the current tag layer we've been playing with
Move it over to the Right side of the Canvas
(If you've used a huge image - just paste where it looks best and improvise with the
next few steps)
Once you've pasted over to the right
Right click in the LP
Duplicate
Image
Mirror
Hide the rectangle tag layer for the moment
Layers, Merge Visible the two tube image layers
then
Duplicate this layer
and
on the bottom one
Adjust, Blur, Gaussian Blur on 40.00 - yup, 40.00
then
Effects, Texture Effects - Mosaic, Antique
on the default settings

Add a new Raster Layer to the tag canvas
Move this down to the bottom of the LP
and
Floodfill with White
then
Add another layer above this
and floodfill with Black
Back to the merged tube images layer
Duplicate
and on the top one
Adjust and once more apply the Radial blur setting we used earlier
and again, change the Blend Mode to Soft Light or similar
then
on the lower version of this layer
Add the following drop shadow
4
-4
43
17.82
Black
Make sure the rectangle tag layer is hidden still
and now Layers, Merge Visible all the other layers

Back to the Layer Palette, you should now only have 2 layers
the small tag layer we made
and the Merged layer we just did?
Cool - on we go
Duplicate the rectangle image layer
and on the top copy
Effects, Image Effects, Seamless Tiling
and apply the Default Setting
which should be as follows
Tiling Method - Corner
Direction - Bidirectional
Transition - 50
and
Corner Style - Linear
OK to apply
and then apply the drop shadow we used earlier

Now
Image
Add Border
and apply the sequence we used earlier - the Whites and Blacks
Once you've done this
Layers, Promote Background Layer once more
then
Image, Canvas Size and once again, we're upping it - this time
650 wide and 600 high

Now, duplicate the tag layer
and on the bottom one
(Make sure that both your Materials Palette boxes are on White)
Effects - Toadies - What are You?
and change the sliders
Top slider (X-dose) to 30
and
bottom one (Y-dose) to 15

Now add a new Raster Layer
and floodfill it with White
Move to the bottom of the LP
Back to the Toadies layer
Duplicate it
On the bottom one
Image, Free Rotate
Left, 90 degrees
then
Image, Resize, 80%
All Layers Unticked
Duplicate this resized layer
Mura Meister Copies
Look for the Preset called Wave (Horizontal)
and change the Number slider at the top to 1
Yup, we just want one :)
Click OK to apply
and then resize this layer 80%
Then
Duplicate it
and Mirror it

OK, we're getting towards the end

On the main tag layer at the top
Duplicate this one again
and Apply the Mura's once more to the duplicate one
Move this under the main tag layer
But don't duplicate it or mirror it
Now, apply the same dropshadow we used before to both of these tag layers
OK, now find a black and white scrapkit you'd like to use - or use the one I did
And I used
MS-2 - the butterfly - resized to 50%
MS-9 - the doodled frame - used as is and moved
down the Layer Palette to just above the Toadied layers
then positioned as mine over on the bottom left
Duplicate this and move the duplicate to the top right as mine
MS-44 - the rose - resized to 70% twice, then placed as mine
and sharpened
Apply the same dropshadow we used before to the rose and butterfly but
NOT the frame layer

Now the final bits

Open my Wordart I've provided
Copy and place as liked on the tag canvas

Then find a lovely scripty font to add your name with
I used Angilla Tattoo
with a contrasting colour - no stroke
and then applied a Gradient Glow to it
Now add your artist information
Crop the tag to remove the excess area
Delete the White background layer
Save as a PNG
All done!

Hope you enjoyed this simple tut xx

This tutorial was written on the 25th February 2013 by Vix
It is a tutorial written as I went along this morning
and any potential similarities to other tag tutorials that
may be available is wholly unintended and completely coincidental.
Any items supplied to use to create your own tag with this tutorial are supplied
in good faith - if I have used something not intended
for usage in this way, please contact me via email.
Any items created by me for the purposes of this tutorial MAY NOT be used in
any other tag tutorials or for PSP Supplies you create (wordart, brushes, masks, templates, kits)
Links to tube/scrap blogs or PTU tube sites are added either through necessity or creator courtesy,
and it is entirely up to the individual (ie. You!) if you choose to visit these sites and/or download/purchase from them.
Scraps used in my tutorials that I've obtained from PTU purchased scrap kits are NOT supplied
in my tutorials supplies.
This website is intended for educational/entertainment purposes only
NO linking to my tut examples, screen shots, files or graphics permitted
All of my tutorials are registered with TWI


Monday, 18 October 2010

Tag Tutorial - Bite Me! - PTU


Supplies Needed

Tube and Close Up Image of Choice - I'm using a fave from Ismael Rac
I got mine at AMI but you can now get this (I believe?!) from Rac's
Store HERE

Scrapkit - "Pinked" by me, you can get it from Clarey's store HERE
is now a FTU kit which you now get from HERE

Mask - by me, It's the first of the set HERE

Xero Graphics Greyscaler and Porcelain - fab freeware filters!

Font of Choice


_______________________


The Usual - 700 pixels by 600 pixels

Add New Layer

Floodfill White


Open the Pinked Frame - CircleGlitter

C&P

Move over to the right of the tag canvas


Duplicate

Image

Mirror

Open Pinked Paper13 or another from the kit

Resize 86% SS

C&P

Move over to the left of the tag canvas and

place below the frame on the left

Do a Selection Delete with an expand of 6

and hit Delete on the paper layer

then

Duplicate the paper part

Image

Mirror

Position as needed so both paper parts are

directly below their respective frames


Paste your large tube as a new layer

below the frame and position within the left one*

Duplicate

Image

Mirror


You may need to paste your main tube and position centrally so you

get a good idea where to place your image tubes


OK

Now repeat the Selection Delete for the tube layers

Now

on the left tube

Duplicate

and on the top copy - Adjust, Blur, Gaussian Blur 3.00

and change the Blend Mode to Overlay

and on the bottom tube layer

Apply Xero Greyscaler on the default settings

Repeat this for the right tube


Once you done this for the two big tubes - you

might want to do a canvas crop to

get rid of excess blurred tube that was hanging outside

of the tag canvas - so just crop the canvas then

Image

Canvas Size

and put it back to 700 x 600

And floodfill the White Background again :D


OK

Copy and Paste your main tube (if you haven't already done so)

and place centrally to the two frames (see my tag for ref)

Duplicate

and on the top tube - Adjust, Blur, Gaussian, 3.00 and set the blend mode to Overlay

then

On the bottom tube - Xero Porcelain on the default settings


Open PinkedPaper17

C&P

Move down the tag canvas so it's just above the White Back

Crop to canvas size 700 x 600

then

Apply my mask - Layers, Merge Group


Open the BradCluster (yeah, I know I used it in my last scrap tut - but me likes lol!)

C&P

Place under all the layer except the mask layer

and position as mine on the right

Image

Duplicate

Image

Mirror


Open the Circle of Pearls

70% SS

C&P

Place just below the main tubes layers in the LP

and on the left of the circle frames

Duplicate

DON'T mirror

Just move across to fit the right frame


Open the PinkedFrame-CircleBeads

Resize 70% SS

C&P

Place this just below the Brad Clusters in the LP

Move over and place to the top left (see my tag for ref)

Im, Dup, Im, Mirror


Open the Dotty Doodle

C&P

Place under all the circle frames in the LP

and position as mine on the top right

Right click the layer in the LP and choose Duplicate

then, Image Mirror


Open the Pussycat png

Resize 70%

C&P

Place to the left of the tag

Im, Dup, Im, Mirr


Open the paper flower

50%

C&P

Place as mine on the left

Im, Dup, Im, Mirr

I also flipped these but that's optional :)


Open the Scatter-GlitterSparkles

C&P

Place just above the BradCluster layer

and position as mine


Open the PinkedTagBackStudStrips

Cut out the bottom or top strip (doesn't matter which, they're the same lol!)

C&P

And place as mine, front and bottom centre of the tag canvas

Excellent for covering tube edges


Now, crop the canvas taking care not to edge off any mask or

glitter or any of the layers


I only cropped to 693 x 587 - big tag!


Now add some shadows of choice to the elements you'd

like to shadow

I'd suggest cats, flowers, bradclusters, frames, NOT the pearls (already shadowed)

and of course, the main tube bottom copy

I also added the White Sparkles but this is optional

then Add your name as liked

Add your artist info

Delete white Background

and

Ta-daaaaaaaaaaaaaaaaaa!! All done :) xx

I hope you enjoyed this simple tut, and if you purchase my
kit in order to make it the same as mine - then huge hugs and many thanks xx
You have no idea how much I appreciate it ((hugs))

This tutorial was written 16th October 2010

Tag Tutorial - Rememberance - Was PTU now FTU


Supplies Needed

Image or Tube of Choice - I'm using a fantastic one by Zindy Zone
Please visit her site and purchase IF you'd like to use the same one

Scrapkit - it's mine called "Pinked" and available from Clarey's shop
for the next week, not sure where it'll be after that lol - so if you'd
like it - please go HERE

This kit is now a FTU - freebie!! Go HERE

Basic Sans Serif Font of Choice

This tut is a copy and paste tut, no filters needed


________________

The Usual - but make your Tag Canvas 700 x 600 pixels

You can either crop later or start smaller :)

Add New Layer

FF White


Open Pinked BradCluster

C&P

Place to the top right of the tag canvas

Duplicate

Image

Mirror

and move this one over a little more to the left


Hide Background Layer

Merge Visible the two cluster layers

Keep hidden for the moment

Then

Duplicate this merged layer

Image

Flip

and

Move this flipped layer down the LP so it's below the first cluster layer

Merge visible these two cluster layers

Now, unhide background layer


Open Paper12 (or another of your choice)

C&P

Move under the frame layer in the LP and position as liked

then

Do a Selection Delete on the frame layer expanding by 6

and hitting Delete on the Paper layer


Open PinkedCurtains

Resize 80% SS

and then

C&P

Place under the frame layer in the LP

and apply a favourite shadow to it

I used 0, 0, 40, 10.00 Black

No need to do a Selection Delete on this layer, it doesn't show under the frame :)


OK


Open ChickenWire

C&P

Place to the top right of the tag canvas under all layers

except the White Back

then

Duplicate

Image

Mirror


Open the PinkedFlower (the action made one, it's pink!)

Resize 60% SS

C&P

Place as mine to the top right of the tag canvas between

over the pink brad part of the cluster

Duplicate

Image

Mirror

Open the PinkedRibbonBow

It comes pre-shadowed

C&P

Place it under the right flower

Duplicate

Image

Mirror

I erased the pieces of ribbon that were showing above the flowers

but this is personal choice - if you'd like them to stay, then fab :)

OK


Open SplatPinkGlitterBall

C&P

Image

Flip

Place to the right of the tag canvas

Under all layers except the White Back...well, obviously lol!

Duplicate

Image

Mirror


Now

Open your chosen Image or Tube if you're using one instead

Then

C&P

Place under the frame AND curtain layers in the LP

and do a Selection Delete as before for the tube layer


Crop the tag canvas now - I got down to 673 pixels by 580 pixels

Tick to Crop


Now - shadows!

OK, add a shadow of - 0, 0, 35, 7.00 Black to

the flowers, chicken wire and splats layers

and

Add the same shadow used for the curtains layer, to the frame layer


Using your dropper tool

Find a light colour in the tag you like (or dark, we're going

to be placing this across the middle section of the frame so

choose what will look good with your image)

and

add this to the Background Materials box

Have the Foreground box on Null

Go to Text Tool - and find a good basic sans serif font (plain, no squigglies lol!)

and

If you've a short tag name like mine, up the Kerning as needed - I went to 200

then

Type your name

and once happy with size and placement

Add a dropshadow, I used 1, -1, 52, 2.00 Black


Add your artists info

then

Delete the white back

and

save as a PNG!

All done :)

This tutorial was written 14th October 2010

Wednesday, 6 October 2010

Tag Tutorial - Lost - PTU


And now I can't stop singing that Michael Buble song!!

Supplies Needed

Tube and Image of Choice - I'm using one of last year's Hallowe'en ones by Barbara Jensen
Barb has some new ones out for this year so check them out too! But I love this tube
so am using it hehe

Scrapkit - yeeerrrrs! It's mine again - and if you'd like to buy it, it can be
purchased from Clarey's store HERE - Thank you if you do, it's very appreciated xx

and it's now a FREEBIE! FTU kit - you can get it HERE

Mura Meister Clouds

Mask - Vix_Mask341 available from my
tutorial site under Goodies HERE

Wordart - by me, made specially for this tutorial - please do
not use it in any other tag tutorials, or in the creation of
templates, masks, scraps, etc...you know the score :) PU only xx Thank you
You can get it HERE

____________________


Open a New Image in PSP

650 wide by 600 high in 72 pixels/inch resolution

Add new Layer

Floodfill White

then


Open FrameCircle

C&P


Open the GreenCurtains

C&P

Place under the frame layer

and move slightly off centre then

Add a good dropshadow of choice

and

do a Selection Delete with an Expand of 6

Note: you can adjust the colour of the curtains if liked - I did :)


Then open Paper5 (Orange Chequered Pattern)

Image Resize 86% SS

C&P

Place under the Frame and Curtain layers

and

repeat the Selection Delete for this layer


Open Paper 21

Resize as before

C&P

Move down the Layer Palette just above the White Back

and Crop the Canvas to it's size (this gets rid of the 2 pixels excess from the paper lol!)

and the apply Vix_Mask341 to this paper layer


OK So now open your chosen image and tube

Place them as mine

If you want to have your tube emerging from the frame

please see my previous tut on the method for doing this

then

Move the image tube under the frame and curtain layers

but above the paper fill layer

then

Take your magic wand

Click outside the tube area on that layer

then

Selections Invert

then

In your Materials Palette, have your top box on a colour from the

tag and the bottom box on Black

then go to

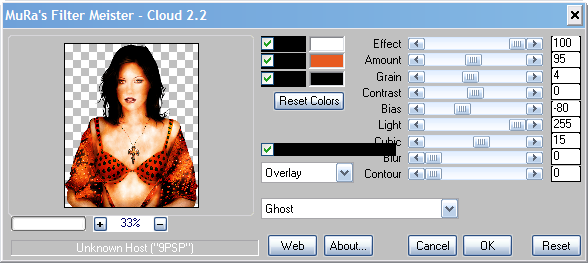
Mura Meister Clouds

and

look for the Ghost Preset

Apply as mine below


(you may need to hit Reset Colours before applying)

then when applied

Change the Blend Mode to Screen

and

Do a Selection Delete for the excess image area

See what's happened, the Ghost effect has added some lush shading

around the tube's face...well, it did on my one, I hope it does on yours too :)


Open OrangeDoodleSwirl

C&P

Place as Mine

Above the mask layer in the LP

and position as mine

Then I erased the pointy part of the doodle that was showing

at the bottom left

then

Duplicate

Image

Mirror

Image

Flip


Open the Piece of Tulle

C&P

Place as mine under the curtain layer

and have it sticking out over the tube image face

but in a subtle way :D

Then

Do a Selection Delete to get rid of the excess

(No need to shadow, the element is pre-shadowed)


Open StringFlower2 (the orange one)

Position as mine on the left

then

Duplicate

Image

Mirror

Image

Flip


and move these two flowers layers down the LP to just above the

Doodle swirls layers


Then optional - add some sparkles or glitters from the kit

I used the Silver Scatter, I resized 70% and Adjust, Sharpness, Sharpen

then positioned, dupl, mirrored and flipped


Open my Wordart as provided

Recolour if needed and C&P and place as mine


So now - shadows!

Apply a dropshadow of 0, 0, 40, 10.00 Black to the frame layer

also apply to your bottom tube layer

then

for the Doodle Swirl and String Flowers - 2, 0, 50, 5.00 Black


So now crop your tag canvas if needed

Add your name in a font and style of choice

Add Artist info

Delete White Background

and

Save as a PNG

Ta-daaaaaaaaaaaaaaa!!!

Simple, but nice :) xx

This tutorial was written 6th October 2010.

Tag Tutorial - Oh She Rocks! - PTU


SUPPLIES NEEDED

Tube/Images of Choice - I'm using Rocker by Keith Garvey...love it!
You must buy Keith's work if you wish to use it in PSP tags - so go HERE for more details
But of course, feel free to use whatever tube/images you like


Scrapkit - by er..me :) It's called "Hallo-Rockin'-We'en" and you can purchase
it from Clarey's store HERE


and it's now a freebie FTU kit - go HERE

Xero Graphics Greytinter

That's it!

_______________________________


Open a New Image in PSP - 700 pixels wide by 600 pixels high 72.00 pixels/inch resolution

Add New layer

Floodfill White


Right, now for the good stuff

Open FrameChequeredPlain

C&P

Image, Free Rotate, Right 90


Open GlitterFrame

C&P

Move down the LP so it's under the first frame


Open Paper14 (the red altar)

Image Resize 86% SS

C&P

Line up under the chequered frame but above the glittered one

and position as liked within - I had the altar slightly off to the right

then

Do a Selection Delete to remove the excess paper, with an expand of 6


Open Image 4 - (Chequered)

Resize as before

C&P

Place under the glitter frame layer in the LP

And repeat the Selection Delete


Open your tube now

Position as liked above all the other layers

Once happy with position, duplicate

and on the top copy

Adjust, Blur, BLUR MORE - aha!! You thought I was gonna say Gaussian?!?!!! hehe
Nope, for this, we just want blurred detail - So it's Adjust, Blur, Blur More

then on the bottom tube layer

Xero Graphics - Greytinter and change the Overall Tint slider to 85

Apply

then

on the top tube layer

Change the Blend Mode to Overlay or Soft Light - whichever you prefer

I used Soft Light

Now right click on the Tinted tube in the LP - and choose View, Current Only

Unhide the tube above, then click on the tinted layer again and

and choose Merge, Merge Visible

then

Right click on it again and choose View, All


Now, if you want you tube to look neatly

tucked into the frame in parts...read on, if not - skip to *

OK, so duplicate the tube layer

and move one layer down below the Chequered frame layer

Hide the top tube layer

Take Eraser on my hard settings - See Glossary of Terms over on the right

for good eraser settings

and all I did was erase part of the guitar wing.

But if you're using a different tube, see if there's a bit of it you want to erase

for it to look like it's emerging from the frame

Once you've erased, unhide the top tube

and I repeated the erase of the guitar wing - so it looks like it's tucked "in" the frame

and I also

got rid of the bottom edge of her legs and the guitar so again, it looks neatly tucked into the frame

BUT this is something I love to do, if you are happy with your tube as it is - well, then don't do any of the erasing part lol!!


*OK

Open your large tube image

C&P

Position on the left of the tag under the glitter frame layer

Then

Duplicate

BUT don't Image Mirror

Just

Move the duplicated one over to the right

(See my tag for ref)

and then

once happy with placement, do a Selection Delete for these two layers

with an Expansion of 6 like before

Then

Crop the tag now to get rid of excess image tube - I had loads overhanging the canvas lol!

Once you've cropped, Image, Canvas Size and put it back to 700 x 600

You'll need to floodfill the White background layer again


OK


Now

Apply Greytinter as before to the two image layers

and drop the Opacity of the layers to 75


Open the Red Bow (Bow3) from my Elements folder

Resize 20% SS

C&P

Place as mine on the left of the tag

Image

Duplicate

Image

Mirror

and move down below the two main tube layers


Open the CharmonaChain-Star

Resize 80% SS

C&P

Place as mine on the left

Duplicate

But don't mirror

just move over so it's under the right hand side bow


Open the TagBack3 - the Black Glitter one

C&P

Place just above the White Background layer in the LP


Open DoodleGelSwirlRed

C&P

Place on the left as mine

then

Image

Duplicate

Image

Mirror


Open the WireHeart

C&P

Place as Mine top left of tag (just above the Black Glitter back in the LP but below the Doodles)

Duplicate

Image

Mirror

Image

Flip


Open GlitterScatterRed from the Wordart folder

C&P

Position as mine Top right of the tag canvas

and move below the tubes and first frame and fill in the LP

Duplicate

Image

Mirror

Image

Flip


Open the Rock This wordart

C&P

Place as prefered on the tag canvas, see mine for ref


Now then, onto Shadows...


For the Glitter Scatters - Minus 4, 3, 18, 8.00 Black

Same for the CharmsonaChain-Stars

For the Bows - 2, 0, 50, 5.00 Black

Same for DoodleSwirls, ChickenWireHearts, GlitterBack,

and Both frame layers

Wordart is already shadowed so don't re-shadow

and

for the main tube layer - apply a favourite tube of choice if liked


OK

So now, add your name as liked

And your artist info

and

then

Crop once more if liked, then delete the White Background

layer and save as a PNG.

Enjoy!! xx

This tutorial was written 6th October 2010.

Wednesday, 18 November 2009

Tag Tutorial - Flaky - FTU


Tube of Choice - I'm using one of the wintery ones

Artwork © Jessica Dougherty

If you'd like to use the same tube, it must be purchased via CILM

However, feel free to use what you'd like to use instead


Scrapkit - FTU - a gorgeous wintery one by Tamie @ Addictive Pleasures

called "Snoeflake" - thanks hun xx

If you download it, please leave a little love

Mask - by Chelle @ weescotslasscreations - called WSL_Mask117
You can download it from Chelle's tut site which is linked in the
Cool Supplies section of this blog

Mura Meister Copies


The Usual

then

Open bg

Image, Resize, 75% SS

C&P

Crop to the canvas size 600 x 600

then apply Chelle's mask WSL_Mask117

Layers, Merge, Merge Group


Open ribbonframe

Image, Resize, 80%

C&P

Place centrally if not already there


Open the bg again

Resize 60%

C&P

Place under the ribbonframe layer

and do a Selection Delete with an expand of 5


Open bench

Image, Resize 60%

C&P

Place as mine


Move under the ribbonframe

and apply a shadow of

0, 7, 17, 30.00, Black

and

Select and expand again using magic wand on the ribbonframe

then

Hit Delete on the bench layer

Selections None


Now add your tube - resized as you like

I resized 90% and made it look like she's sitting on the bench :D

Apply same drop as before to it


Open hangingflake3

70%

C&P

Place on the left

Duplicate

Image

Mirror

Move both under the tube layer in LP

and apply 0, 0, 35.00, 7.00 Black

Open string3

40%

Place in the centre of the left flake

Duplicate

Image

Mirror

Shadow both as before

and make sure both are below your tube layer


Open the icecones

Image, Resize 80%

C&P

Apply same shadow as before

Move under the ribbonframe in the LP

Leave for the minute as we'll do a mass delete in a sec...


Open flower4

50%

C&P

Apply same shadow

then

Place centrally and go to

Mura Meister Copies

look for Encircle

Change the Shift X and Shift Y slider to 60

and the ANGLE slider to -10

Click OK to apply


Move down under the ribbonframe and icecones in LP

Open ribbon3

C&P

Move over to the right a bit

so the bottom of it is lined up with the bottom know

in the ribbonframe

Place above the flowers layer

but below the icecones

Duplicate

Image

Mirror

then

Image, Free Rotate

Left, 90 degrees

then

move up the tag a bit

then

add the dropshadow to both of these


Now using Selection Delete with the same expand

Delete the flowers that are in the frame

and the ribbons that are in the frame

then

Selections Invert

and Delete the icecones that are OUTSIDE of

the frame


Now apply a shadow to the ribbonframe layer

I used 0, 0, 40, 10.26 Black


Open snowflakes

80%

C&P

Place just above the bg layers

and line up as mine on the left

(there should be a flake placed between the trees on the left and the flowers and ribbonframe -

if you get that, you'll be lined up as mine is)

Duplicate

Image

Mirror

Image

Flip


Now, add your name as liked and a phrase/saying if liked too

I used Century Gothic, Black

48 for the phrase and 72 for my name and stretched it, subtle shadow as before

then your artist copyright info

Crop the Canvas

and

Delete the background

and save as a transparent .PNG

All done :) Hope you enjoy xx

Saturday, 14 November 2009

Tag Tutorial - Decisions - FTU


For this tag, you will need...

Tube of Choice - I'm using one of my faves
Artwork © Jessica Dougherty
If you wish to use the same tube you must purchase it from CILM

Scrapkit - FTU - Alone by Bel Vidotti
This kit is available from her blogsite HERE
Thank you Bel for your fab kits x

Mask of Choice - I'm using Chelle's WSL_Mask220 which you
can get from Chelle's tut site - link is in my Cool Supplies section

Mura Meister Copies - optional


___________________


The Usual (except this time the width is 650 pixels)


Open alonee39 bv (Envelope)

C&P

Move over to the left of the tag canvas


Open alonee48 bv (Frame)

80%

C&P

Line it up over the Envelope as mine


Choose one of the flowers

I used alonee33 bv

50%

C&P

Move to the top right of the frame

and down the LP to underneath it


Choose another coloured flower

Repeat as above and move over to the left of the first

flower

Choose another

Repeat as above and place on the bottom left


Open alonee44 bv (the heart element)

50%

C&P

Place as mine


Choose one of the papers

I used alonep14

85%

C&P

Move under the frame layer

and

Using Selection Tool, set to Rectangle

Draw out a selection over the frame

then

Selections Invert

Delete the excess paper


Open alonep19 bv

85%

C&P

Place above the White Background in the LP

and

Apply the WSL_Mask220

Layers, Merge, Merge Group


Open alonep18 bv

85%

Copy

then

Draw out another Selection rectangle

on the left of the frame area

Paste

Selections Invert

Delete

Move down below the Frame


Open alonee42 bv

C&P

Place under the Frame layer

and above the Papers

Line it up with the edge of the 2nd paper section as mine

then

Erase the excess chain which hangs outside the top

and bottom of the frame

(My eraser settings are in the Glossary of Terms section over on the right)

Merge the Chain and 2nd Paper section together


Open your tube

Size if needed

C&P

Place where you want it to be within the Frame

Duplicate

and Move

one down below the Frame, Chain and 2nd Paper section layers in the LP

and apply a shadow to the bottom one

I used 0, 0, 40.00, 10.26 Black

Hide the top one for now

Take your eraser again

and delete the excess tube which hangs

outside of the left and bottom of the frame

Unhide the top tube

and erase as needed so

the tube is emerging from the frame layer

(See my tag for ref)


Apply any extra elements that you might like

to use

I used one of the Teardrops 20%

then Mura Meister Encircle

with the X Shift on 70

and the Y Shift on 60

and then moved this under the frame and paper layers

Flower Branch 60%

Butterfly 30%

and I applied a dropshadow of 2, 2, 45.00, 5.00 Black

to the Butterfly, Flowers, Flower Branch, Chain and

Heart Element

and

To the Envelope and Frame layer

Apply the same shadow as the tube


Crop the Canvas now

to remove the excess canvas not needed


Add any wording you'd like to add - text brush or similar

and your name


Add Artist info

Delete White Background

and

save as transparent .PNG

All done :)

Tag Tutorial - Sweetly - FTU


Tube of Choice - I'm using a beautiful one by Ismael Rac who's
work is available for PSP usage from his store HERE

Scrapkit - FTU - A gorgeous one by Mere @ Scraps by Mere
The kit is called Rouge Delight and can be downloaded
from her blog. Please leave some love if you do xx

Mask of Choice - I used my mask 147 (yes...again hehe!)


Mura Meister Copies

_______________

The Usual

then

Open RougeDelightFrame2

C&P

Place centrally on the tag canvas


Open Frame4

90%

C&P

Place under the frame in the LP

and line up as mine


Open Paper4

C&P

Place under the frame and above the doodle frame in the LP

then

do a Selection Modify Expand by 20

and Delete the excess paper


Open Paper1

C&P

above the other paper layer

Move down the tag canvas

so that the top two thirds of the inner frame is black paper

and bottom third is red

Repeat the Selection Delete for this paper


Back to the Elements

and open the RicRac1

C&P

Merge this Ric Rac down

onto the Red paper segment

And apply a dropshadow of

Minus 10, 10, 30.00, 7.00 Black

Then

Once more, click inside the frame layer

and do a Selection Delete on the merged red paper and ric rac layer


Open your chosen tube now

Paste as a new layer

move over to the right of the tag

and move under the frame and red paper layers

but above the rest

Duplicate

and move above all the other layers


on the Bottom one

Apply a dropshadow of minus 5, 5, 30.00, 7.00 Black

Hide the top one for now

On the bottom one, take your eraser on a medium sized hard setting

and erase the tube that sticks out from the bottom of the main tag area

Unhide the top tube

and

Erase the same again and this time take it right up

to the ric rac area

and erase so the tube looks as though it's

coming out of the frame behind the paper and ricrac layer

Nifty eh?! lol...well, I've always liked it hehe

OK


Open Rouge Delight Flower6

C&P

Place centrally in the tag canvas if not already

and

Mura Meister Copies

Look for the Encircle preset

then

Apply


Move this layer down the LP

to just above the White Background

Make sure the doodle frame layer is above it

and on the flower layer

apply a shadow of

0, 0, 40.00, 10.26, Black


Open Star2

C&P

Place as mine


Open the Tag 1

C&P

Image, Free Rotate, Left 90

then

Move it down below the star layer in the LP

and

take your eraser

and erase the part of the tag that shows

on the other side of the the star

then

Open Paper 6

C&P

Move down the LP to just above the White Background

and apply a favourite mask

I used my mask 147


Crop the canvas now so you

can see what your final size is

Also gets rid of any excess paper or tube that

might be lurking

then

Apply the drop you used for the tube

to the Star and Tag layers

Apply the shadow that you used for the flowers Encircled layer

to the Frame layer now

And finally

Add your name as liked and your artist copyright info as needed

Delete the White Back

Save as .PNG

Enjoy your tag!

Friday, 13 November 2009

Tag Tutorial - Ready for Romance - FTU


For this tag, you'll need...

Tube and Image/Close Up of Choice - I'm using the fab work of Mr Keith Garvey
To use the same - please visit MPT for more details

Scrapkit - FTU - "Night Passion" by Doris Nilsa @ Scraps Dimensions
To get the kit, go HERE and please leave a little thanks when you
take it xx

Mask - by Chelle, WSL_Mask148 - can be downloaded from her site HERE

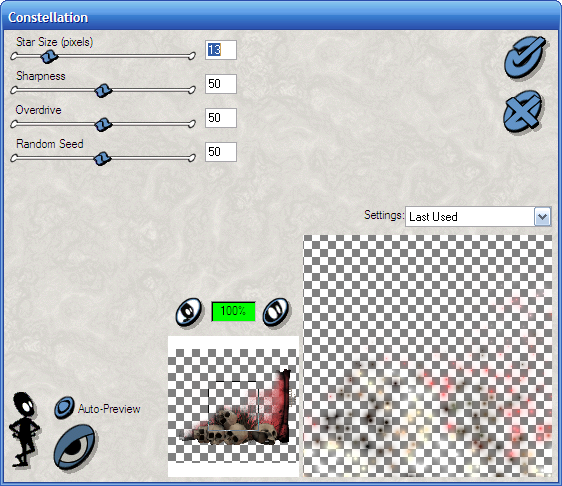
Xenofex 2 Constellation - not a free filter

Xero Graphics Greytinter - free filter


__________________________

The Usual


Open NP Doodle Big

C&P

Place on the canvas


Open NP Butterfly1

Image, Resize 10%

C&P

Place as mine


Open NP Old Clock

Image, Resize 30%

C&P

Place as mine


Open your Close Up

C&P

Paste as a new layer

over the Clock

Xero - Greytinter on the default settings

then

Drop the Opacity

so you can see the clockface underneath

and

take Magic Wand with a Feather of 2

Click outside the Clock face on the clock layer

then

back to the Close Up layer

and hit Delete twice

Selections None


Now Drop the Opacity a bit more on your Close Up layer

I went down to 34


Paste your tube as a new layer now

and move over to the right of the tag

Either resize if needed or

Erase some of the tube if needed

I wanted to keep my tube large

but still wanted the background to show so

just see what it looks like for you


Once you've placed your tube

Xero Greytinter as before

and

Shadow of your choice


Note: If you, like me, keep the tube

largish, but erase the bottom

Use NP Ruffle, Resize 60%

and paste this as a new layer

over the tube layer

so it hides the erased bottom :)


Open the Champagne Bottle

Image, Resize 50%

C&P

Place as mine


Open Flute Glass

Image, Resize 30%

C&P

Place as Mine

Duplicate

and move the other one over to the right


Open Paper 4

Resize 75%

C&P

And Move down the layers to

just above the White Back

Apply Chelle's mask 148

Layers, Merge Group

and

Image, Resize 90%

and move down the tag canvas a bit if needed

then

on the Mask layer

Xenofex 2 Constellation

Look for the Preset called It's Full of Stars

and Drop the Overall Star Density to 1

and

make sure in the Background Fill section

that Keep Original Image is chosen

OK to apply


Open the Rose

Image, Resize 20%

C&P

Place as mine


Now

Apply a shadow to the

Rose

Bottle

Butterfly

Ruffle

Use, 2, 2, 45.00, 5.00 Black

On the Clock layer

use 0, 0, 40.00, 10.26 Black


Now

Using Black Fill and No stroke

Take a favourite font

and add some words behind your tube


I used

Ready for Romance (!) lol!

But use whatever you like

and then dropshadow

1, 1, 20.00, 2.00 Black

for the words

Not too blurry :)


OK

Now your name

Shadow as liked


and add artist info as needed etc


Crop the tag now to elimate some of the no longer needed space

Delete White Back

Save as .PNG

Have fun!

Thursday, 12 November 2009

Tag Tutorial - Obsession - FTU


I am happy to admit, I love Twilight. In fact, it's Edward
who I love hehe. So this gorgeous kit just screamed Twilight
at me. Hence this tag :)

For this, you will need...

Tube or Image of your Choice - I'm using a free - yaaars free lol! -
tube by the fantastic Zindy - get it from her site HERE if you'd
like to use the same

Scrapkit - FTU and it's a complete stunner! It's part
of the Fangtastia blogtrain and this part was created
by Kirsty - it's superb hun, thank you xx
Get it from her blog HERE and please leave some love
if you take it.

Masks - both by me - Vix_Mask307 and Vix_Mask336
both of which can be downloaded from my tut site HERE

That's it - no filters as this kit is so lush it
doesn't need any help hehe xx

_______________

The Usual

then


Open KISM_Fangtasia_Frame2

Image, Resize, 80% Smartsize

C&P

Place centrally to the tag canvas


Open Fangtasta-Paper2

Image, Resize 75% SS

C&P

Move under the Frame layer

Apply my mask Vix_Mask336

Layers, Merge, Merge Group

Move the mask layer up and slightly to the left

Duplicate Mask layer

Move the duplicate down and slightly to the right


Open Fangtasia-Paper10

Image Resize as before

C&P

Take your Selection Tool, on Freehand Selection, Point to Point

and draw around the inner circle part

Once you've got a circle selected

Selections, Invert

and hit Delete on the paper layer


Open your chosen tube, or image

C&P

Place where it looks best for you

Duplicate

Adjust, Blur, Gaussian Blur, 2.00 on the top one

and change the Blend Mode to Soft Light

then

Apply a dropshadow to the bottom tube layer (if needed)

and use Selection again to delete the excess


Open Feather1

C&P

Place as mine

(move it down the Layer Palette so it's under the paper fill layer

but above the masks layers)


Open the FeatherSplatter (stunning!)

Image, Resize 80%

C&P

Tip: for the Moment, floodfill the Background Layer BLACK

so you can see what you're doing but floodfill White when you

see this ***

Move the FeatherSplatter over to the Top left

take care not to touch the edges of the canvas

Once placed,

Duplicate

Image

Mirror

Image

Flip

Now, move both of these layers down the LP

so they're just above the Masks layers

Jiggle them about if necessary so the flecks aren't touching the canvas edge

***

Open GlitterRosePetal-1Shad

Image, Resize, 80% SS

C&P

Place as mine

then

take your Eraser tool on a hard small setting

and erase any of the petals that are overlapping

too much of your tube/image

(I used my eraser on a square setting, Size 102, Hardness 100, Step 5, Density 100, Thickness

100, Rotation 0, and Opacity 100 - this setting is good for leaving nothing behind lol - I

then erase some of the petals that were over Bella's face)


Open GlitterSplatter-1

Image, Resize 90%

C&P

Move down the layer palette to just above

the masks layers


Open Heart3

C&P

Place as mine

Move it under the Petals layers


Open Light1

Image, Resize 30% SS

C&P

Line up under one of the petals over on the right


Open Paper1

Image, Resize 75%

C&P

Drop this layer below all the others

except the White Background layer

and

apply

my mask Vix_Mask307 to this paper layer

and merge group


Open Glitter2

Image, Resize 75%

then

Go to your Materials Palette

and find the KISM_Fangtastia-Glitter2

Move this to the Background Box

Have your Foreground box on Black, 2.00 Stroke

And taking a favourite font of choice

Type out a word to go with your tag

As I'm using Edward and Bella, I used Forever

Type it out

Stretch if needed

and

Convert to Raster

Take care to move this word down the Layer Palette

so that it's below the Petals and Frame layers


Now on the Heart, Word and Light layer

Apply a dropshadow of

0, 6, 35.00, 7.00 Black

or choose one of your own favourites to use


For the Frame layer

0, 0, 35.00, 7.00 Black


Now add your name in Black fill, No Stroke

in a scripty font of choice

I used my full name - for once lol!


Apply your artist info now

Don't forget, if you use Zindy's free tube

and you DON'T have a ZZT license - then use zzt free art

as well as her Copyright info


Crop the excess canvas now - though there isn't much

to crop as there's lots of lovely scattered bits, so take care when chopping!

Delete the background layer

and save as transparent .PNG for

optimum quality

Enjoy!

Wednesday, 28 October 2009

Tag Tutorial - Wanna Be Good - FTU


Tube of Choice - I'm using an outstanding new one by the
eternally generous and awesomely cool Ismael Rac
If you'd like to purchase to use in your own tag,
visit AMI for more details

Scrapkit - a superb freebie! Part of a collab, this
part I've used is by Butter aka ButterflyFlutterby
The kit is called "Good Girls Gone Bad" and it's fabulous.
Download from her blog HERE
and please leave some love if you take it xx

Mask of Choice - I used my mask Vix_Mask147, yes again! lol!

Xero Graphics Greytinter

Font of Choice


________________________

Open a New Image in PSP - 650 wide by 600 high

Add New Layer

Floodfill White


Open Frame6

Image, Resize, 80% Smartsize

C&P

Place centrally to the tag canvas


Open the Large/Close Up tube

C&P

Place under the frame layer


Open Paper 20

Image, Resize 75%

C&P

Place under the other layers on the tag canvas


Repeat this with Paper 8

but place so half of it is showing behind the big tube

within the frame layer

(see my tag for reference)


Now Duplicate the Tube layer

and on the top copy

Adjust, Blur, Gaussian Blur 2.00

then change the blend mode to Overlay

and then

on the bottom copy

Xero Graphics - Greytinter

on the default settings

and apply a favourite dropshadow of choice

to this Greytinter'd tube


Now, use Selection Tool

Rectangle

And stretch it out around the central part of the frame

and include the part of the star and halos bit

that shows the frame contents too

Selections, Invert

and hit Delete on the two paper layers

and the two tube layers

Selections None


Open Paper 10

Resize as before

C&P

Place under the other layers

and apply a favourite mask of choice

(I'm using - yeah again lol! - my mask Vix_Mask147)


Open Glitter Splatter 3

Image, Resize 30%

C&P

Place on the top right of the tag

Move down the layers

to just above the mask layer

and then

Duplicate

Image

Mirror

and move back over a little

See my tag for reference regarding placement


Open the Guitar colour of your choice

Image, Resize 50%

C&P

Place as mine


Open the Musical Notes that

correspond to your guitar colour

Image, Resize 50%

C&P

Place over to the top left as mine


Open RibbonSplatter2 (or one to suit your colour scheme)

Image, Resize 70%

C&P

Place on the tag canvas

and move down the layer palette

to above the Glitter Splatters layers


Optional - Open the Wordart 2

Image, Resize, 60%

C&P

Place as mine


Now

C&P your chosen tube - actual size

or resize as liked/needed

Repeat the duplicate, blur and Xero effect as for

the larger tube


Apply dropshadow of choice to all

the elements

except the Mask layer

or any of the layers you feel don't need it


Crop the tag canvas now

and

add your name in font/style of choice


Add your artist info and any

other info required

Delete the White Back

and save

your work as a transparent PNG

and thank you for trying me tut :) xx

Tuesday, 27 October 2009

Tag Tutorial - Forgiven - FTU


Tube of Choice - I'm using a beautiful one from the artwork of Anne Stokes

www.annestokes.com


Scrapkit - a fantastic freebie by Jessica @ Gothic Inspirations called "Life's Blood"


Xenofex 1 Constellation
(not the very popular Xenofex 2, but the earlier version called Xenofex 1)


Fonts of your choice


_____________________________________


The Usual - EXCEPT, if able/allowed in your forum,

650 wide by 600 height

I did for my example, so if you stick to 600 x 600 then adjust the following

resizes as needed xx


Open Parchment

C&P

Place centrally if your paste hasn't already


Open your tube

Keep Large

C&P

Move over to the left of the parchment layer

Apply a favorite dropshadow to your tube

then

Click outside the Parchment with Magic Wand on

0 Tolerance and 4 FEATHER - yeah, I know, Feather for once lol!

Then

On the tube layer, hit Delete 3 or 4 times

Selections NONE

and on the tube layer

Change the Blend Mode to Screen/Overlay/Multiply/Hard Light or similar

(When you change the Blend mode, watch the edges of the tube

effect, and choose one that "blends" nicely at the edges of the Parchment layer -

or if you like the effect but it takes the tube right up to the edges, use a soft

eraser setting and erase sections of the tube and blend it)

I had mine on Hard Light and blended it - see below for my eraser settings


Now, open the Parchment Cluster

C&P

Place it over the other layers, and line it up exactly on the right side

so it matches the Parchment

layer and sandwiches the tube in between :)

Now, take your Eraser tool on a nice blending setting

Something like Size 140, Hardness 23, Step 5, Density 77, Thickness 100, Rotation 0 and Opacity 36

and

then, Erase the Parts of the Parchment Cluster that compliment the tube placement

You'll also need to erase (if you placed your tube as mine)

the wire on the top of the parchment cluster layer, but you

can leave the one on the right


Right,

Now Paste your tube again and

Image, Resize 80%

C&P

Move it over to the right of the parchment layers

Hide for now


Open the Frame Black

Image, Resize 50%

C&P

Move over to the Top right area of the Parchment layers area

(See mine for ref)

and make sure it's above the other layers


Now, change your Magic Wand to 0 Tolerance and 0 Feather

Click inside the Frame

and do a Selection Delete with an expand of 4

on the smaller tube

Selections Invert

Add a New Layer under the smaller tube layer

and floodfill Black or a colour to suit the tag

Selections None


Open the Candle

Image, Resize 50%

C&P

Place as mine to the left of the tag


Open the Casket

Image, Resize 60%

C&P

Place as mine


Open the Keys

Image, Resize 40%

C&P

Place lined up with the black frame as I've done


Open the Grunge Tagback

Image, Resize 80%

C&P

Move down the Layer Palette under all the other layers

Place as mine


Open the Rose

Image, Resize 20%

C&P

Place as mine


Now

Apply the following dropshadow to all the element layers

EXCEPT the Parchment Cluster (the layer with the skulls)

and none of the tube layers

Dropshadow 2, 2, 45.00, 5.00 Black


Now crop the tag canvas - I managed to get down to 630 x 550

and

now add your name and any phrase you may want to add

I used "Forgiveness is the Key..."

and...well, my name, obviously lol!


Add your copyright info and

any other info you may need


Optional - If liked,

Duplicate your Parchment Cluster layer

and on the top copy

Apply Xenofex 1

Constellation on these settings...


And you'll see it change on your tag, just adds a nice little touch :)

I've used this effect my own tags for years, and love it hehe xx

If it's too much, erase some of the effect with your eraser tool again.


Now,

Delete the White Background

and

save your work as a transparent PNG


Thanks for looking and if you have a go,

enjoy your tag :) xx

Friday, 23 October 2009

Tag Tutorial - Rock Chicks Can Love Pink - FTU


To make this tag, you will need...

Tubes/Close Ups of your choice - I'm using some gorgeous ones by
© Keith Garvey
To purchase Garv's work to use in your own PSP tags - see MPT

Scrapkit - FTU called Rock Baby by Vicki and Tamie @ Pink Pleasures
Absolutely stunning kit, loved it girls, thank you xx
If you download it, please leave a little love

Mask - Vix_Mask147 - available from my tut site HERE

Wordart - by me HERE (Please don't use this for any other purpose
other than your personal tag making - thank you xx)

Mura Meister Copies

Xero Graphics Abstractor

Both these filters are freeware and readily available from the Net

______________________


The Usual

or for a bit of le difference! try 650 x 600


Open ele70 (Black Frame)

Image, Resize 60%

C&P


Place on the tag canvas towards the bottom...ish

See my tag for placement


Open RB_pp2 (Pink Paper)

Image, Resize 85%

C&P

Move down under the Black Frame layer

Duplicate the paper and hide one for now

Click inside the frame with Magic Wand

and do a Selection Delete (Expand by 4)

on one of the papers


Now duplicate the frame layer


and Image, Free Rotate, Left 20 degrees

Move this across so the bottom left corner

lines up with the other bottom left corner on the unrotated one...um...

does that make sense? Hope so, see my tag for ref

And move this rotated one down the Layer Palette

under the Original Frame and paper

Open RB_pp9

Resize as before

C&P

Move down under the rotated frame layer

and do another Selection Delete


Back to the unrotated original frame layer

Duplicate

And on the duplicate

Image, Rotate, Free Rotate 10 degrees to the Right this time

and move it so the bottom left point is just slightly offcentre

to the one underneath (the middle straight one)


Take another paper - you choose this time lol

and Resize and Selection Delete as before

Now move these two down below the straight frame and paper fill


Taking shape!

OK

Unhide the dark pink paper copy

and take a mask of your choice or use my good ol' Mask_147

(It seems to suit a lot of tags and I'm very proud I made it lol!)


Now take your chosen tube/s or close up/s or

a combo of both

I used three close ups for inside the frames

On each one working on the left and right frames

C&P your close up

Place it under the corresponding frame layer

Selection Delete the excess tube

and Apply Xero Abstractor to the tube

(you may need to hit Reset to get it to work when in Xero)

then

Once applied, Change Blend Mode of the tube to Overlay or Soft Light

I used Overlay on my two tubes

then

On the central frame

I used a close up of the main tube I'm going to use

C&P

Selection Delete as before

But this time

Duplicate the tube

Adjust, Blur, Gaussian Blur, 2.00

and then

Apply Abstractor to the top tube

and drop the opacity of this top layer to 30 or thereabouts

(Additional, if like mine you're using the actual tube too, C&P

and place that now so you can see what you're doing)

I duplicated, blurred and abstracted that one too :)

Then add a favourite dropshadow to the main tube if using one

I used my usual at the moment - 2, 2, 45.00, 5.00, Black


Now then, back to the scrapkit for some more elements...


RB_ele49 (white sparkles)

C&P

Move to the top of tag and line up (see mine for ref)

Duplicate

Image

Flip

Jiggle them around to get your prefered placement

(You may need to hide the White Back for the mo, to see what you're doing)

Open RB_ele2 (pink satiny rose)

Image, Resize 25%

C&P

Place on the left frame (see mine for ref)

Duplicate

Image

Mirror


Open RB_ele35 (black glitter splat)

C&P

Move it over to the left of the tag and line up as mine

Duplicate

Image

Mirror

Image

Flip

Move these two layer down the Palette to just above the mask


RB_ele62 (the diamond stars)

Image, Resize 25%

C&P

Move to the centre of the middle frame layer

Mura Meister Copies

Encircle

But change the Shift X slider to 80

and

the Shift Y slider to 65

Apply

and if needed, Adjust, Sharpness, Sharpen

and move down the Layer palette to just above the Black glitter splats


Open the Wordart I've provided for this tut

C&P

Place where you'd prefer it to go or where I've got mine :)


Now, add shadow of 2, 2, 45.00, 5.00 Black to

all the frames, the elements - except the sparkles, glitter splats

and mask layer

But, on the Glitter Splats layers - add a 0, 0, 35.00, 7.00 Black dropshadow

on the Sparkles layer, 0, 0, 20, 5.00 Black dropshadow

and No shadow on mask layer!


Finally, add your name in a font and style of your choice

Add your copyright and artist info


Crop the tag canvas

and

Delete the White background and save as transparent .PNG

Thursday, 22 October 2009

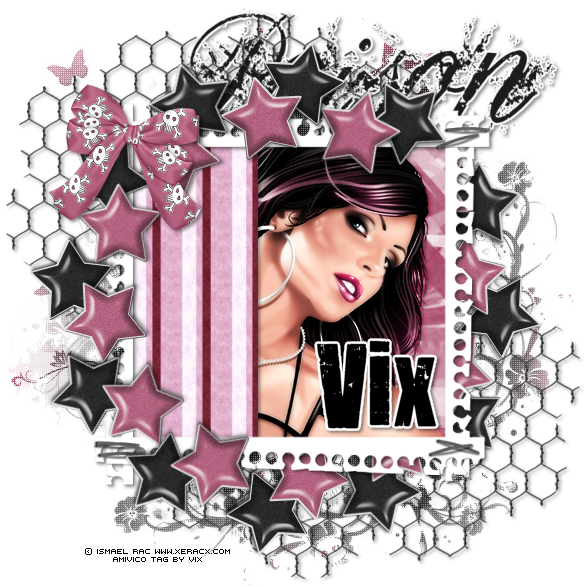
Tag Tutorial - Not Poisonous - FTU


For this tag, you will need

Tube Close Up of Choice - I'm using a gorgeous tube by © Ismael Rac

which I purchased @ AMI


Scrapkit - FTU - Poison Rock Girl by Bel Viddoti

Available for download from her blog HERE

I've seen this one around so I know it's not "new" but

it's fairly new to me, and I think it's cool :)

Note: Bel's TOU very kindly state that she does not

require credit on tags, thank you for that xx


My Mask - Vix_Mask363
which you can get from my tutorial website on the Goodies page


Mura Meister Copies


Penta.com Colour Dot


Xero Graphics Greyscaler


Start with The Usual

then


Open the frame07

Image, Resize 80%

C&P

Place centrally in the tag canvas


Open Paper 15

C&P

Place under the frame layer

Open Paper05

Repeat as above

but

Move the paper over on the left side - see my tag

to get the idea of where you line it up

Add a Dropshadow to this paper

2, 2, 45.00, 5.00, Black

Then take Magic Wand

Click inside the frame and

do a Modify Expand 4 Selection Invert Delete

on both paper layers


Open the Close up (or just the face of a very large tube)

C&P

Move it under the striped paper layer

but above the other paper layer

within the frame


Duplicate the tube

On the top tube layer - Adjust, Blur, Gaussian Blur, 2.00

and on the bottom tube layer - Xero Greyscaler

on the default settings

Then back to the top layer

and change the Blend Mode to Overlay

Nifty, eh! lovely and moody effect -

It's like Minxy's method, but with a slight twist lol!!

Now

Selection Delete the tube excess outside the frames

like you did for the Papers.


Open Paper20

Resize as before

C&P

Move below the other layers to

just above the White Back

and Apply my mask - Vix_Mask363

Layers, Merge Group

then apply Penta.com Colour Dot

on

Value 100

Distance 2


Open the star03

Image, Resize 25%

C&P

Place centrally in the canvas

Bring to Top so you can see it

Repeat this with the star05

so this pink one will be above the black one

Now

Image

Mirror

the pink one only

and then move it down slightly over to the left

so the two stars should compliment each other

Apply a dropshadow to each star - I used 2, 2, 45, 5.00, Black again

then

merge the star layers together

and now

Effects, Mura Meister Copies

Encircle

and change the X and Y Sliders to 65

Apply

and then move into place to compliment the middle

section of the tag

then

Duplicate the stars layer

and move one right down the Layer

Palette to just above the Mask layer


Now take your Eraser and on the top one

Carefully erase from top right

down the edge

to just over from the staple bit of the frame on bottom right

See my tag for ref

Take care when erasing shadows etc


Now add the same shadow to the frame layer


Open one of the bows

Image, Resize 50%

C&P

Place as mine and shadow as before


Open the wire

Image, Resize, 70%

C&P

Move it over and line it up top left as I have

done so it's just touching the butterfly from the mask layer

Duplicate

Image

Mirror

Image

Flip

and move both these wire layers down

to just above the mask layer

and apply shadow as before


Open one of the wordarts

I used Poison

Image, Resize, 70%

C&P

Now, place on the tag under wire layers

lined up with the frame at the top

and apply the same shadow


Add your name in a font and style of your choice


Apply any artist info required


Crop the tag canvas

and

save as a transparent PNG (delete the White Back when ready)


That's it - hope you enjoy

Tag Tutorial - Have a Spooky One - FTU


For this tag you will need...


Tube of Choice - I'm using a beautiful Hallowe'en tube by

© Barbara Jensen


Scrapkit - I'm using Spooky mainly, but one element each from It's Fall and Rock N Roll

All FTU by Bel Vidotti - and are available for download from her blog HERE

Note: Bel's TOU state that she does not require credit on tags :)


Masks - Vix_Mask365 and Vix_Mask147


Both by...well, me lol! And are available from my
tutorial website on the Goodies page HERE


Mura Meister Cloud


Xenofex 2 Constellation

___________________________

Do the usual

then

Open e51 (the black dual frames)

Image, Resize 70%

(a little note, when I say to resize Images that are not

on the current tag canvas - then please assume Resize All layers is ticked...fankees xx)

C&P

Place centrally but towards the bottom of the main tag canvas

You need to leave room for your tube to go in the frame as mine

OK


Open e14 (the fence)

C&P

Place under the Frame layer and move

down so the black edges meet

and the fence looks like part of the frame

Leave this for now we'll do some deleting etc in a mo...


Open e16 (the tree)

Image, Resize, 70%

C&P

Place as mine over to the middle of the left frame

and above the frame layer


Right, let's sort the papers and stuff and then come back

to some more elements and tube...

So

Go to the Papers

and get

p25

Image, Resize, Change to Pixels from Percent

and make it 600 x 600 pixels

C&P

Move down the tag canvas to just above the White Back

and

Apply my Mask 365

Layers, Merge Group

Duplicate Mask layer


Open p30

Resize as before

but don't C&P yet - first, go to

Mura Meister Cloud

look for the Fog preset in the

dropdown menu

and change the Amount slider to 55

Apply

Now, C&P

above the other two mask layers

and apply my Mask_147

Layers, Merge Group

Move this mask layer a little if needed

I moved it down the tag canvas a bit


Open p28

Resize as before

C&P

above the other paper layers

and position within the two frames

Magic Wand on the usual settings

Click inside the frames

Selections, Modify Expand by 6

Invert and hit Delete on the paper layer

Selections None


Right, now then - we're whizzing off to some of Bel's other

kits for some elements :) So go to It's Fall

and find ifel19

(The owl on the branch)

Image, Resize 50%

C&P

and place as mine above the other layers


Now, whip over to her Rock N Roll kit

and find GlitterGel04

Image, Resize 60%

Adjust, Hue and Saturation, Colourize

Hue 11 and Saturation 172

C&P

Place as mine on the top right

Duplicate

Image

Mirror

Image

Flip

and move these two gel layers

below the frames and paper layer

Jiggle the placement around a little if liked - I did :)

Back to Spooky kit

Open e31 (orange bow)

Image, Resize 40%

C&P

Place on the bottom left as mine


Now then, our tube

Open it

C&P

Place over on the right hand side frame

and

then when placed

as liked, move under the fence and frame layer

Note: you can add any tube effects you may use to it now, perhaps

one of the ones in my other tuts (Blessed or Spookyluscious)

Duplicate the tube

Move a copy above the fence and frame layer

Apply a dropshadow to the bottom tube layer if liked

and also

apply to the fence layer too...

Now

take Magic Wand again

Select and Modify as before (right frame only)

then

Selections, Invert

BUT

Take your Eraser tool

on a smallish but hard setting

Size 60

Hardness 100

Step 5

Density 100

Thickness 100

Rotation 0

and

Opacity 100

Hide the top tube

and on the bottom one

Erase any tube that is sticking out under the frame layer

at the bottom

Go right up to the Selected part

Selections None

Now reselect both the inner frames

and modify expand as before

and this time

Now

Activate the Fence layer

and

simply

Selections Invert and

Hit Delete

then

Selections None


Unhide the top tube

Take your eraser again

and erase any parts you want/need to

so your tube looks like it's coming out of the frame and under the fence too

It might be fiddly and you may need to hit Undo if you erase too much etc

So have a few goes and get a result you like

You may need to change the eraser to a gentler setting -

Change the Hardness to 25 if needed

NOTE: If this is far too fiddly and you have problems getting a good erase result

then, delete the fence layer entirely and just have the tube coming out of the frame

using the same erase process as above.


OK

On the Tree layer

Xenofex 2 Constellation

Star Size 2.00

Size Variation 100

Edge Star Density 3.00

Overall Star Density 0

Overdrive 100

Twinkle Amount 75

Twinkle Rotation 45

Apply


Now apply a dropshadow to the tree layer

I used 2, 2, 45.00, 5.00, Black


Apply same shadow to Owl, GelGlitters, Bow

and Frame Layers


Finally,

Add your name taking a colour from the tag as

your fill, Black 2.00 stroke

and apply with shadow too


Add some wording if liked too - Happy Hallowe'en or

similar :)


Then

Artist Copyright info

Crop the tag canvas as liked


and

guess what...yup, delete the White back

and save as transparent .PNG


Have fun blogettes!!