Tuesday, 19 October 2010
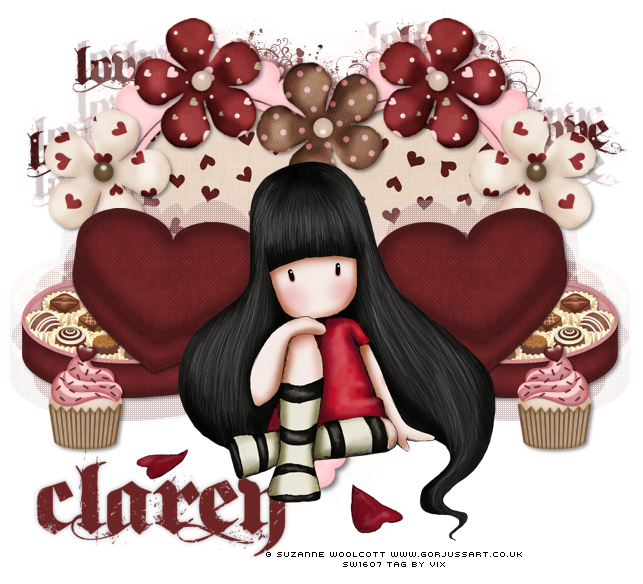
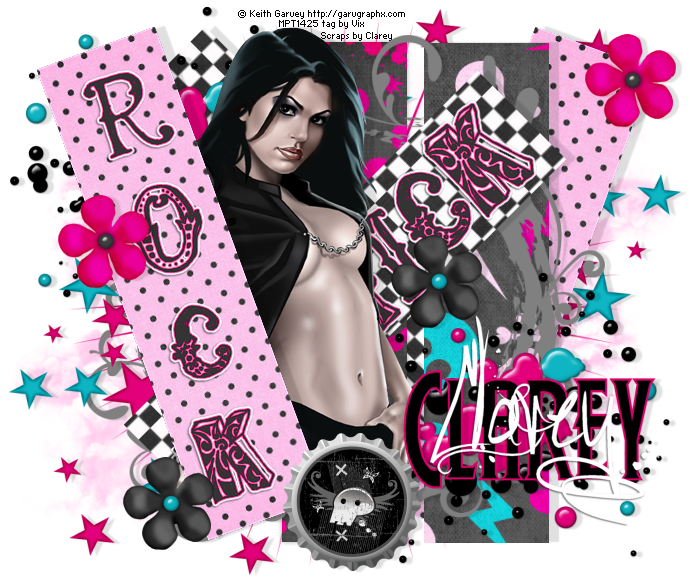
Tag Tutorial - Rockaria - PTU
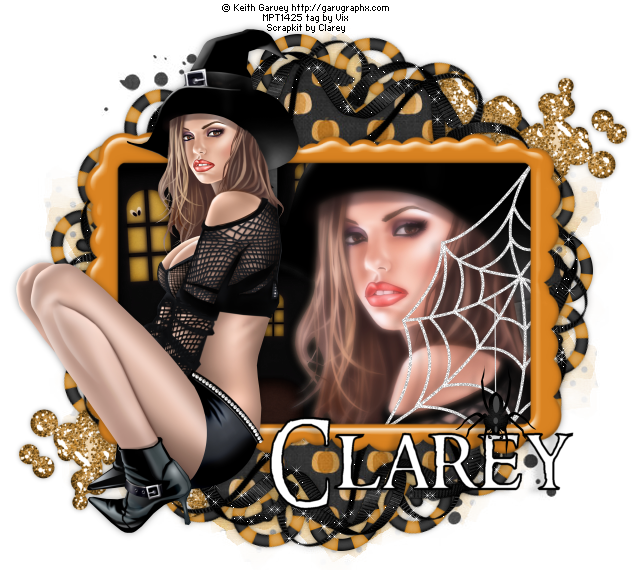
I have absolutely no idea why I called this tut such. I like ELO so
that might have something to do with it lmao!
(I find naming tuts tricky sometimes)
Anyway...
SUPPLIES NEEDED
Tube of Choice - I'm using Goth Chick by Keith Garvey
To use the same you must purchase from MPT, but feel
free to improvise with what you have
Scrapkit - Emo Girls Tag Kit by my mate Clarey - love it!
You can purchase this kit HERE
Wordart by me - I created this specifically to go with this
tutorial. Please do not share it, use in other tuts, in scrapkits,
on templates, in mask or wordart creation...all the etc you know. It's just
for you to use with this tutorial or in any other tags you might
wish to make. But, that's it xx Thank you :)
You can get Rock HERE and Chick HERE
Xero Greyscaler - oh, you know where to find it :)
______________________
The Usual - 700 x 600
Add New Layer
FF White
Now open the Paper12
Resize 86% SS
Then
Taking your Crop tool - crop a section of the paper to
125 wide by 500 high
Tick to crop
Then Edit, Copy and close your Paper - and DON'T save the changes!
then Edit, Paste as a New Layer
It should position the paste fairly centrally - which is fine
OK
Open Paper 13
Repeat as above
(Your Crop Tool should have remembered your Width and Height settings
So move the crop section around the paper to get the area you'd like cropped - and hit Tick to apply)
Repeat for Papers 19 and 18 - not forgetting to resize the paper each time before you crop?
Fab!!
OK - so on the tag canvas - we have 4 strips of Paper
Top one - Pink Spotty paper - Image, Free Rotate, Left, 20 degrees and move it over
to the left of the tag canvas
Adjust, Sharpness, Sharpen
Click on next paper strip down - black and white chequered
Image, Free Rotate, Right, 45 degrees and leave where it is
I didn't feel it needed a sharpen, but if you do - then repeat the Sharpen as above
Click on the next paper down in the LP
It's skulls and bolts and stuff
Using move tool
Move it over on the tag canvas so it's just near the pointy edge of the chequered paper
See my tag for ref
And on the bottom paper strip...leave as it is
So hopefully, your basic tag should look vaguely or similar to mine?
Good-oh!
Right then...
Open your tube
Copy and Paste
Place as mine - line up as I've done and
position in the LP so it's below the pink polkadot paper
Now click on the Pink Polkadot paper
Image, Duplicate, Image, Mirror
and move this duplicated layer right down the LP
so it's just above the White Background
Repeat this for the chequered paper
Open Droplets2
Resize 50% SS
C&P
Place on the top left of the tag
Have it in the LP just above the two vertical paper strips
Now Duplicate it
BUT Don't mirror - just use move tool and move it over to the right
Open StarBurst2
Resize 90%
C&P
Place in the LP just above the White Back
Open bottlecap3
C&P
Place as mine
Now, if you've placed your tube as mine - the combination of the pinky paper
and this bottlecap should cover the tube edge at the bottom - huzzah!
lol!
Right, on we go...
Open swirlyframe5 (or one of the other colours of your choice)
Resize 80%
C&P
Place under the droplets layers in the LP
Open flower1
Resize 50%
C&P
Place as mine
Open flower 2
Repeat as above
Open smoke3
Resize 60% SS
C&P
Place as mine on the bottom left
in the LP below the Starburst layer
Duplicate
Image
Mirror
Image
Flip
Open starcluster2
Resize 60% SS
C&P
Place as mine bottom left
ABOVE the smoke layer in the LP
And repeat the Dup, Mirr and Flip for this
But in the LP, move the left stars above the Swirlyframe and
the right stars, leave where they are
Now open my wordart which I made for this tutorial (just a quick
remind...no sharing, ta)
C&P
Place them on their corresponding paper strips - ROCK goes on Pink
Polkadots and CHICK goes on the chequered one
Place them just above their respective paper strips in the LP
They are already shadowed and angled, you just use them as they are :)
OK
On the tube layer
Duplicate it
On the bottom tube
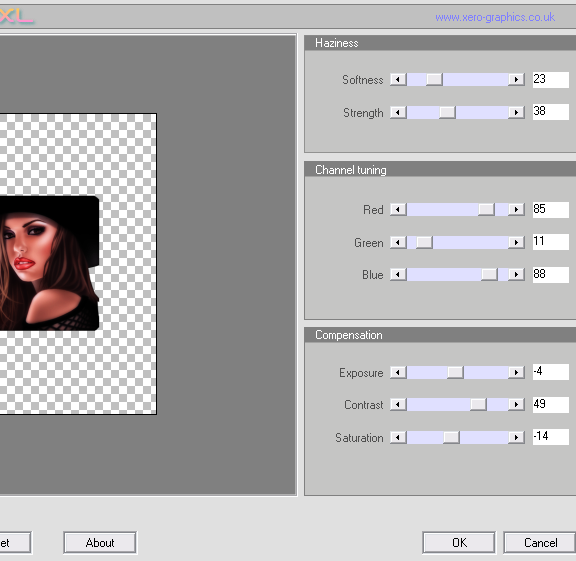
Xero Greyscaler on the default settings
then add a dropshadow of
-1, 10, 12, 2.00 Black
and on the top tube, just drop the opacity down to 44
Use the same shadow for the angled pinky polkadot paper strips and the
angled chequered ones and the right vertical strip too*
*NOTE: At this point, once all my stuff was placed, I moved the back black and white chequered strip UP
the tag canvas so I could see it more. I write these tuts as I make the tags and
I decide to move this strip 'til now lol - so please do the same, it's behind the tube's
head, just use move tool and move it up a bit and shadow
Use this shadow for the swirlyframe, starclusters, flowers, bottlecap and droplets
1, 6, 12, 2.00 Black
Don't shadow the smoke or starburst layers
And finally, add a shadow of
0, 0, 35, 7.00 Black to the back paper strip (the pink splatters one)
Now crop the canvas to a more taggy size - I got down to 690 x 582
but take care when you crop not to take out any shadow or edges of elements
Add your artist info now
and
then
Taking a colour from the tag as your Text tool Stroke Width of 2.00
and your fill on Black
Use the Right droplets as your name position
and
place your name
Use your same shadow as used for the elements
(I also added the name again in White with a contrasting font and a sharper shadow)
Now
Delete the White Back and save as PNG for best quality
Ta...and may I add...Daaaaaaaaaaaaaaa!! ;)
((hugs))
This tutorial was written 19th October 2010
Monday, 18 October 2010
Tag Tutorial - Bite Me! - PTU
Supplies Needed
Tube and Close Up Image of Choice - I'm using a fave from Ismael Rac
I got mine at AMI but you can now get this (I believe?!) from Rac's
Store HERE
Scrapkit - "Pinked" by me,
is now a FTU kit which you now get from HERE
Mask - by me, It's the first of the set HERE
Xero Graphics Greyscaler and Porcelain - fab freeware filters!
Font of Choice
_______________________
The Usual - 700 pixels by 600 pixels
Add New Layer
Floodfill White
Open the Pinked Frame - CircleGlitter
C&P
Move over to the right of the tag canvas
Duplicate
Image
Mirror
Open Pinked Paper13 or another from the kit
Resize 86% SS
C&P
Move over to the left of the tag canvas and
place below the frame on the left
Do a Selection Delete with an expand of 6
and hit Delete on the paper layer
then
Duplicate the paper part
Image
Mirror
Position as needed so both paper parts are
directly below their respective frames
Paste your large tube as a new layer
below the frame and position within the left one*
Duplicate
Image
Mirror
You may need to paste your main tube and position centrally so you
get a good idea where to place your image tubes
OK
Now repeat the Selection Delete for the tube layers
Now
on the left tube
Duplicate
and on the top copy - Adjust, Blur, Gaussian Blur 3.00
and change the Blend Mode to Overlay
and on the bottom tube layer
Apply Xero Greyscaler on the default settings
Repeat this for the right tube
Once you done this for the two big tubes - you
might want to do a canvas crop to
get rid of excess blurred tube that was hanging outside
of the tag canvas - so just crop the canvas then
Image
Canvas Size
and put it back to 700 x 600
And floodfill the White Background again :D
OK
Copy and Paste your main tube (if you haven't already done so)
and place centrally to the two frames (see my tag for ref)
Duplicate
and on the top tube - Adjust, Blur, Gaussian, 3.00 and set the blend mode to Overlay
then
On the bottom tube - Xero Porcelain on the default settings
Open PinkedPaper17
C&P
Move down the tag canvas so it's just above the White Back
Crop to canvas size 700 x 600
then
Apply my mask - Layers, Merge Group
Open the BradCluster (yeah, I know I used it in my last scrap tut - but me likes lol!)
C&P
Place under all the layer except the mask layer
and position as mine on the right
Image
Duplicate
Image
Mirror
Open the Circle of Pearls
70% SS
C&P
Place just below the main tubes layers in the LP
and on the left of the circle frames
Duplicate
DON'T mirror
Just move across to fit the right frame
Open the PinkedFrame-CircleBeads
Resize 70% SS
C&P
Place this just below the Brad Clusters in the LP
Move over and place to the top left (see my tag for ref)
Im, Dup, Im, Mirror
Open the Dotty Doodle
C&P
Place under all the circle frames in the LP
and position as mine on the top right
Right click the layer in the LP and choose Duplicate
then, Image Mirror
Open the Pussycat png
Resize 70%
C&P
Place to the left of the tag
Im, Dup, Im, Mirr
Open the paper flower
50%
C&P
Place as mine on the left
Im, Dup, Im, Mirr
I also flipped these but that's optional :)
Open the Scatter-GlitterSparkles
C&P
Place just above the BradCluster layer
and position as mine
Open the PinkedTagBackStudStrips
Cut out the bottom or top strip (doesn't matter which, they're the same lol!)
C&P
And place as mine, front and bottom centre of the tag canvas
Excellent for covering tube edges
Now, crop the canvas taking care not to edge off any mask or
glitter or any of the layers
I only cropped to 693 x 587 - big tag!
Now add some shadows of choice to the elements you'd
like to shadow
I'd suggest cats, flowers, bradclusters, frames, NOT the pearls (already shadowed)
and of course, the main tube bottom copy
I also added the White Sparkles but this is optional
then Add your name as liked
Add your artist info
Delete white Background
and
Ta-daaaaaaaaaaaaaaaaaa!! All done :) xx
I hope you enjoyed this simple tut, and if you purchase my
kit in order to make it the same as mine - then huge hugs and many thanks xx
You have no idea how much I appreciate it ((hugs))
This tutorial was written 16th October 2010
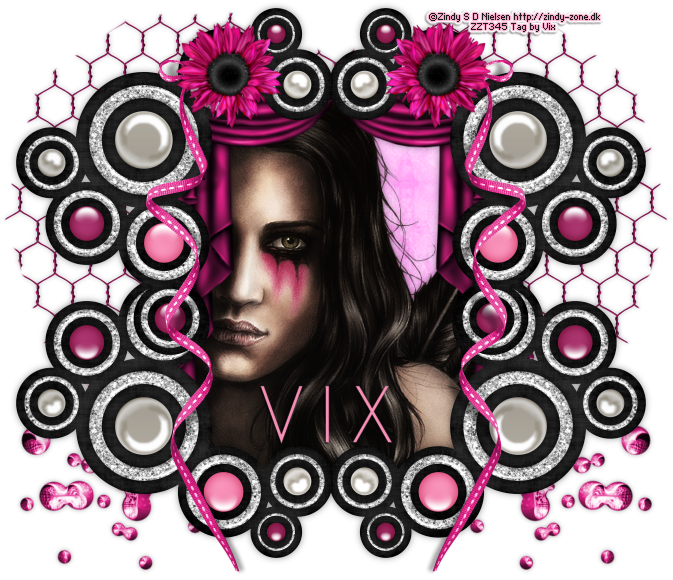
Tag Tutorial - Rememberance - Was PTU now FTU
Supplies Needed
Image or Tube of Choice - I'm using a fantastic one by Zindy Zone
Please visit her site and purchase IF you'd like to use the same one
Scrapkit -
for the next week, not sure where it'll be after that lol - so if you'd
like it - please go HERE
This kit is now a FTU - freebie!! Go HERE
Basic Sans Serif Font of Choice
This tut is a copy and paste tut, no filters needed
________________
The Usual - but make your Tag Canvas 700 x 600 pixels
You can either crop later or start smaller :)
Add New Layer
FF White
Open Pinked BradCluster
C&P
Place to the top right of the tag canvas
Duplicate
Image
Mirror
and move this one over a little more to the left
Hide Background Layer
Merge Visible the two cluster layers
Keep hidden for the moment
Then
Duplicate this merged layer
Image
Flip
and
Move this flipped layer down the LP so it's below the first cluster layer
Merge visible these two cluster layers
Now, unhide background layer
Open Paper12 (or another of your choice)
C&P
Move under the frame layer in the LP and position as liked
then
Do a Selection Delete on the frame layer expanding by 6
and hitting Delete on the Paper layer
Open PinkedCurtains
Resize 80% SS
and then
C&P
Place under the frame layer in the LP
and apply a favourite shadow to it
I used 0, 0, 40, 10.00 Black
No need to do a Selection Delete on this layer, it doesn't show under the frame :)
OK
Open ChickenWire
C&P
Place to the top right of the tag canvas under all layers
except the White Back
then
Duplicate
Image
Mirror
Open the PinkedFlower (the action made one, it's pink!)
Resize 60% SS
C&P
Place as mine to the top right of the tag canvas between
over the pink brad part of the cluster
Duplicate
Image
Mirror
Open the PinkedRibbonBow
It comes pre-shadowed
C&P
Place it under the right flower
Duplicate
Image
Mirror
I erased the pieces of ribbon that were showing above the flowers
but this is personal choice - if you'd like them to stay, then fab :)
OK
Open SplatPinkGlitterBall
C&P
Image
Flip
Place to the right of the tag canvas
Under all layers except the White Back...well, obviously lol!
Duplicate
Image
Mirror
Now
Open your chosen Image or Tube if you're using one instead
Then
C&P
Place under the frame AND curtain layers in the LP
and do a Selection Delete as before for the tube layer
Crop the tag canvas now - I got down to 673 pixels by 580 pixels
Tick to Crop
Now - shadows!
OK, add a shadow of - 0, 0, 35, 7.00 Black to
the flowers, chicken wire and splats layers
and
Add the same shadow used for the curtains layer, to the frame layer
Using your dropper tool
Find a light colour in the tag you like (or dark, we're going
to be placing this across the middle section of the frame so
choose what will look good with your image)
and
add this to the Background Materials box
Have the Foreground box on Null
Go to Text Tool - and find a good basic sans serif font (plain, no squigglies lol!)
and
If you've a short tag name like mine, up the Kerning as needed - I went to 200
then
Type your name
and once happy with size and placement
Add a dropshadow, I used 1, -1, 52, 2.00 Black
Add your artists info
then
Delete the white back
and
save as a PNG!
All done :)
This tutorial was written 14th October 2010
Wednesday, 6 October 2010
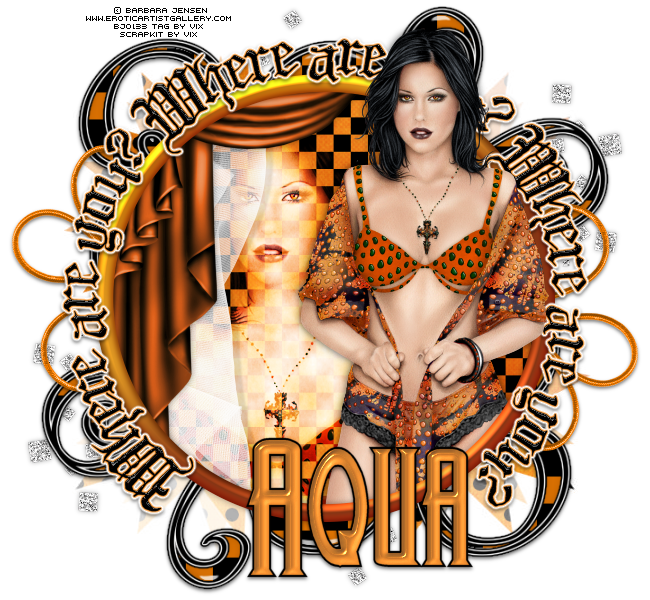
Tag Tutorial - Lost - PTU
And now I can't stop singing that Michael Buble song!!
Supplies Needed
Tube and Image of Choice - I'm using one of last year's Hallowe'en ones by Barbara Jensen
Barb has some new ones out for this year so check them out too! But I love this tube
so am using it hehe
Scrapkit - yeeerrrrs! It's mine again -
purchased from Clarey's store HERE - Thank you if you do, it's very appreciated xx
and it's now a FREEBIE! FTU kit - you can get it HERE
Mura Meister Clouds
Mask - Vix_Mask341 available from my
tutorial site under Goodies HERE
Wordart - by me, made specially for this tutorial - please do
not use it in any other tag tutorials, or in the creation of
templates, masks, scraps, etc...you know the score :) PU only xx Thank you
You can get it HERE
____________________
Open a New Image in PSP
650 wide by 600 high in 72 pixels/inch resolution
Add new Layer
Floodfill White
then
Open FrameCircle
C&P
Open the GreenCurtains
C&P
Place under the frame layer
and move slightly off centre then
Add a good dropshadow of choice
and
do a Selection Delete with an Expand of 6
Note: you can adjust the colour of the curtains if liked - I did :)
Then open Paper5 (Orange Chequered Pattern)
Image Resize 86% SS
C&P
Place under the Frame and Curtain layers
and
repeat the Selection Delete for this layer
Open Paper 21
Resize as before
C&P
Move down the Layer Palette just above the White Back
and Crop the Canvas to it's size (this gets rid of the 2 pixels excess from the paper lol!)
and the apply Vix_Mask341 to this paper layer
OK So now open your chosen image and tube
Place them as mine
If you want to have your tube emerging from the frame
please see my previous tut on the method for doing this
then
Move the image tube under the frame and curtain layers
but above the paper fill layer
then
Take your magic wand
Click outside the tube area on that layer
then
Selections Invert
then
In your Materials Palette, have your top box on a colour from the
tag and the bottom box on Black
then go to
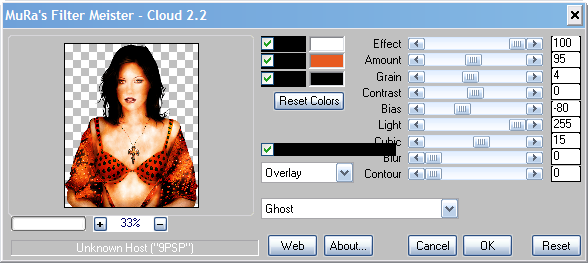
Mura Meister Clouds
and
look for the Ghost Preset
Apply as mine below
(you may need to hit Reset Colours before applying)
then when applied
Change the Blend Mode to Screen
and
Do a Selection Delete for the excess image area
See what's happened, the Ghost effect has added some lush shading
around the tube's face...well, it did on my one, I hope it does on yours too :)
Open OrangeDoodleSwirl
C&P
Place as Mine
Above the mask layer in the LP
and position as mine
Then I erased the pointy part of the doodle that was showing
at the bottom left
then
Duplicate
Image
Mirror
Image
Flip
Open the Piece of Tulle
C&P
Place as mine under the curtain layer
and have it sticking out over the tube image face
but in a subtle way :D
Then
Do a Selection Delete to get rid of the excess
(No need to shadow, the element is pre-shadowed)
Open StringFlower2 (the orange one)
Position as mine on the left
then
Duplicate
Image
Mirror
Image
Flip
and move these two flowers layers down the LP to just above the
Doodle swirls layers
Then optional - add some sparkles or glitters from the kit
I used the Silver Scatter, I resized 70% and Adjust, Sharpness, Sharpen
then positioned, dupl, mirrored and flipped
Open my Wordart as provided
Recolour if needed and C&P and place as mine
So now - shadows!
Apply a dropshadow of 0, 0, 40, 10.00 Black to the frame layer
also apply to your bottom tube layer
then
for the Doodle Swirl and String Flowers - 2, 0, 50, 5.00 Black
So now crop your tag canvas if needed
Add your name in a font and style of choice
Add Artist info
Delete White Background
and
Save as a PNG
Ta-daaaaaaaaaaaaaaa!!!
Simple, but nice :) xx
This tutorial was written 6th October 2010.
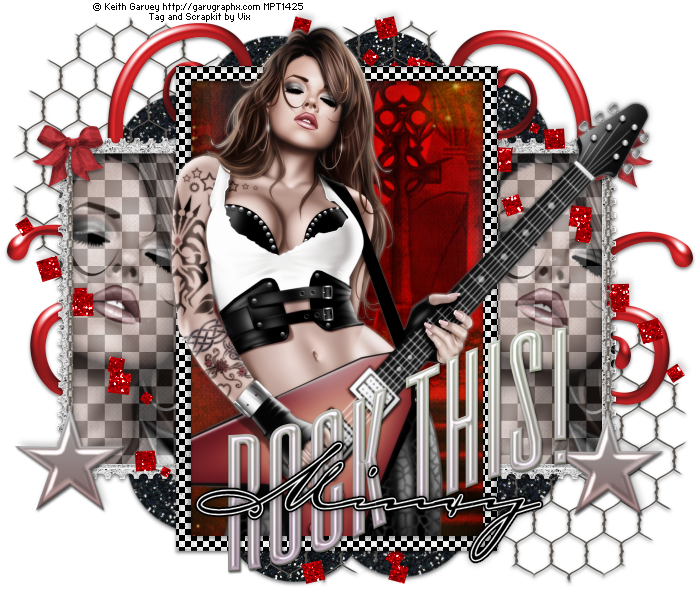
Tag Tutorial - Oh She Rocks! - PTU
SUPPLIES NEEDED
Tube/Images of Choice - I'm using Rocker by Keith Garvey...love it!
You must buy Keith's work if you wish to use it in PSP tags - so go HERE for more details
But of course, feel free to use whatever tube/images you like
Scrapkit - by er..me :) It's called "Hallo-Rockin'-We'en"
it from Clarey's store HERE
and it's now a freebie FTU kit - go HERE
Xero Graphics Greytinter
That's it!
_______________________________
Open a New Image in PSP - 700 pixels wide by 600 pixels high 72.00 pixels/inch resolution
Add New layer
Floodfill White
Right, now for the good stuff
Open FrameChequeredPlain
C&P
Image, Free Rotate, Right 90
Open GlitterFrame
C&P
Move down the LP so it's under the first frame
Open Paper14 (the red altar)
Image Resize 86% SS
C&P
Line up under the chequered frame but above the glittered one
and position as liked within - I had the altar slightly off to the right
then
Do a Selection Delete to remove the excess paper, with an expand of 6
Open Image 4 - (Chequered)
Resize as before
C&P
Place under the glitter frame layer in the LP
And repeat the Selection Delete
Open your tube now
Position as liked above all the other layers
Once happy with position, duplicate
and on the top copy
Adjust, Blur, BLUR MORE - aha!! You thought I was gonna say Gaussian?!?!!! hehe
Nope, for this, we just want blurred detail - So it's Adjust, Blur, Blur More
then on the bottom tube layer
Xero Graphics - Greytinter and change the Overall Tint slider to 85
Apply
then
on the top tube layer
Change the Blend Mode to Overlay or Soft Light - whichever you prefer
I used Soft Light
Now right click on the Tinted tube in the LP - and choose View, Current Only
Unhide the tube above, then click on the tinted layer again and
and choose Merge, Merge Visible
then
Right click on it again and choose View, All
Now, if you want you tube to look neatly
tucked into the frame in parts...read on, if not - skip to *
OK, so duplicate the tube layer
and move one layer down below the Chequered frame layer
Hide the top tube layer
Take Eraser on my hard settings - See Glossary of Terms over on the right
for good eraser settings
and all I did was erase part of the guitar wing.
But if you're using a different tube, see if there's a bit of it you want to erase
for it to look like it's emerging from the frame
Once you've erased, unhide the top tube
and I repeated the erase of the guitar wing - so it looks like it's tucked "in" the frame
and I also
got rid of the bottom edge of her legs and the guitar so again, it looks neatly tucked into the frame
BUT this is something I love to do, if you are happy with your tube as it is - well, then don't do any of the erasing part lol!!
*OK
Open your large tube image
C&P
Position on the left of the tag under the glitter frame layer
Then
Duplicate
BUT don't Image Mirror
Just
Move the duplicated one over to the right
(See my tag for ref)
and then
once happy with placement, do a Selection Delete for these two layers
with an Expansion of 6 like before
Then
Crop the tag now to get rid of excess image tube - I had loads overhanging the canvas lol!
Once you've cropped, Image, Canvas Size and put it back to 700 x 600
You'll need to floodfill the White background layer again
OK
Now
Apply Greytinter as before to the two image layers
and drop the Opacity of the layers to 75
Open the Red Bow (Bow3) from my Elements folder
Resize 20% SS
C&P
Place as mine on the left of the tag
Image
Duplicate
Image
Mirror
and move down below the two main tube layers
Open the CharmonaChain-Star
Resize 80% SS
C&P
Place as mine on the left
Duplicate
But don't mirror
just move over so it's under the right hand side bow
Open the TagBack3 - the Black Glitter one
C&P
Place just above the White Background layer in the LP
Open DoodleGelSwirlRed
C&P
Place on the left as mine
then
Image
Duplicate
Image
Mirror
Open the WireHeart
C&P
Place as Mine top left of tag (just above the Black Glitter back in the LP but below the Doodles)
Duplicate
Image
Mirror
Image
Flip
Open GlitterScatterRed from the Wordart folder
C&P
Position as mine Top right of the tag canvas
and move below the tubes and first frame and fill in the LP
Duplicate
Image
Mirror
Image
Flip
Open the Rock This wordart
C&P
Place as prefered on the tag canvas, see mine for ref
Now then, onto Shadows...
For the Glitter Scatters - Minus 4, 3, 18, 8.00 Black
Same for the CharmsonaChain-Stars
For the Bows - 2, 0, 50, 5.00 Black
Same for DoodleSwirls, ChickenWireHearts, GlitterBack,
and Both frame layers
Wordart is already shadowed so don't re-shadow
and
for the main tube layer - apply a favourite tube of choice if liked
OK
So now, add your name as liked
And your artist info
and
then
Crop once more if liked, then delete the White Background
layer and save as a PNG.
Enjoy!! xx
This tutorial was written 6th October 2010.
Tuesday, 5 October 2010
Tag Tutorial - Eeeeks! - PTU
Tube/Image of Choice - I'm using my ol' favourite - Tabitha by Keith Garvey. It's just superb and you can purchase it from MPT
Scrapkit - again, I'm using Ghost Town by my pal Clarey HERE
Xero Graphics Soft Mood XL - yup, the XL version - if you haven't
already got it - grab it HERE
Mura Meister Copies - use your search engine to find and download
Xenofex 2 Constellation (optional)
Masks - Chelle Weescotslass WSL_Mask220 and my mask Vix_Mask286
______________________________
Open a New Image in PSP - 650 wide by 600 high
Add New Layer
Floodfill White
Open acrylic frame
Resize 80% SS
C&P
Place on the tag canvas
S'nice innit? But we're going to recolour this in a min :D
Open curledribbon2
Resize 50% SS
C&P
Then
Image, Free Rotate, Right 90
and
Mura Meister Copies - on the Encircle preset - default settings
Apply
Move this layer below the acrylicframe layer
Open Paper14 (pumpkins one)
Resize 86% SS
C&P
Place under the ribbon frame we just made
then
Click inside the Ribbonframe layer centrally with Magic Wand
and Selections, Modify, Expand by 2
Invert
and hit Delete on the paper layer
Selections None
Make sure your paper is below the ribbonframe layer
Now, on the acrylicframe layer
Adjust, Hue and Saturation, Colourize
and choose
Hue 24 and Saturation 192
Click OK to apply
then
Open Paper2 (the black one)
Resize as before
C&P
Place under the acrylicframe in the LP
but above the rest
and repeat the Selection Expand Delete
BUT this time Expand by 4
then
Invert, and Delete the Excess black paper
Selections None
Open Paper10 (spotty)
Resize as before
C&P
Place just above the White Background in the LP
and
Crop Tool - Snap Crop Rectangle to: Merge Opaque
and it will get rid of the slight bit of paper overhanging the tag canvas
Then
Apply Chelle's WSL_Mask220 (one of my all-time faves!)
and
Layers, Merge, Merge Group
Open Paper 2 again (the black one)
Repeat the resize, C&P and Crop
then
Apply to this black paper - my mask Vix_Mask286
Layers, Merge, Merge Group
And make sure this mask layer is above the spotty one in the LP
OK
Onwards!!
Open your chosen tube
(I know I use Tabitha every Hallowe'en season - but she is such a rockin' tube!!!)
C&P
Place as liked - either left or right of the tag canvas as mine
Open the Close Up/Image tube if you're using one
C&P
And place on the opposite side to your tube
So, mines on the right
Do a Selection Delete to get rid of the excess tube and
make sure this layer is below the acrylic frame but above the black paper fill
Open GlitterSplat 2
Resize 60% SS
C&P
Place over on the right of the tag canvas (see mine for ref)
and move down
so it's just above the mask layers in the LP
(Do this on the opposite side if you placed main tube right etc)
Duplicate
Image
Mirror
Image
Flip
Open spidersweb2
C&P
Place as mine - line it up under the acrylicframe layer
but above your tube image
and place so it's "sticking" to the sides of the frame
On this web layer
Adjust, Add/Remove Noise, Add Noise, 30 Uniform with Monochrome Ticked
and apply a Drop Shadow to the web of
2
Minus 9
18
8.00
Black
Now click inside the acrylicframe with Magic Wand and do a
Selection Delete for the excess web
Duplicate your Image layer that's within the frame
And on the top copy
Adjust, Blur, Gaussian Blur 3.00
then
Go to the bottom image and apply Xero Soft Mood XL on these settings
of mine...
Then
On the Top copy of the Image
Change the Blend Mode to Screen and drop the Opacity to 67
Back to the bottom tube image and apply the same dropshadow we used for the web
(Note: if needed, do a Selection Delete to remove any blurred tube image that may poke out under the frame edge
but there wasn't any when I made mine, so it'll depend on tube placement and amount of expansion you use)
Hide your main tube for now
Open hauntedhouse2
Resize 60% SS
C&P
Place under the acrylicframe layer, and the two image layers but above the black fill in the LP
and position as mine within the frame
Apply the same Soft Mood settings
then
Do a Selection Delete to get rid of the excess house
Unhide your Main tube layer
and check you're still happy with placement
if not, move it about :D
Open stripedswirly3
Image, Resize 30% SS
C&P
Layers, Arrange, Bring to the Top so you can see what you're doing
then
Image, Free Rotate, Right 90
and
Apply Mura Meister Copies
BUT
Change the Shift X and Y sliders to 60
and the Number to 20
Apply
then
Move down the LP so it's just above the masks layers
Apply a subtle dropshadow to the two glitter splat layers
0, 0, 35, 7.00 Black
Same for the swirly circled layer you just made
then
Apply a good tube shadow to the curledribbon frame layer
I used 0, 0, 40, 10.00 Black
Optional: add a Xenofex 2 Constellation
setting to this layer - BUT do it BEFORE you apply shadow
or it'll look odd lol!
Apply same dropshadow to the acrylicframe layer
and to your main tube layer
Now
Add your name in a style and font of choice
THEN if you're adding the spider - see * below
Apply the same shadow as for the web
Add Artist info
Crop the Canvas
Delete the White Background
and save as PNG
Hope you enjoyed this tut :) xx
*NOTE: For added spookiness, I took the Spider from the SpookyTree in Clarey's kit
and added it to the finished tag above (Simples, just open the Tree - take Selection Tool
Draw out a Rectangle around the spider and some of his trail - then Cut, Selections None, close
the tree and DON'T save changes then Paste your cut selection
onto your current tag canvas and place where liked and shadow as for the web erasing any excess
trail if needed) but this is optional as I know a few taggers who
don't like the eight legged beasties lol!!
This tutorial was written 5th October 2010
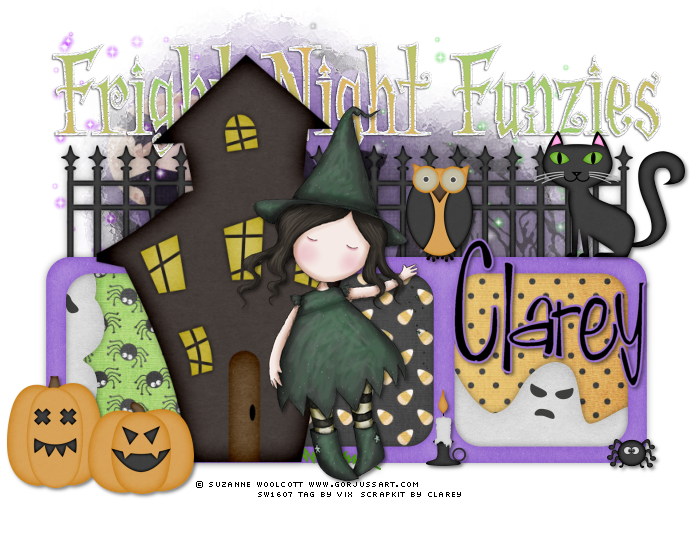
Tag Tutorial - Fright Night - PTU
Tube of Choice - I'm using one of my favourites by Suzanne Woolcott - you can purchase it HERE at the Gorjuss store.
Scrapkit - Ghost Town by Clarey- I love this! You can get it HERE at Clarey's store.
Mask - my own Mask - Vix_Mask452 which you can get at my blogsite HERE
Wordart - by me, created specifically for use with this tutorial. Please do not share this wordart around, use for any other tag tuts or use in your
kits, masks, templates, stuff that you share. It's PU only for you. Okely-dokely?? Thank you xx
Get the wordart HERE
It's a PNG so just right click and save to your own computers :)
_____________________
This kit is rockingly good - so we're making a BIG tag!!
Again, as with any of my tuts, if you prefer smaller tags then start smaller and
adjust the resizings as needed...
OK
So - open a New Image in PSP - 700 pixels wide by 600 pixels high with a 72.00 pixels/inch Resolution (always a 72.00 resolution
when making signature tags)
Add a New Layer and guess what? Correct! Floodfill White
Now
Open your chosen tube, C&P and place as a New Layer on the canvas
then
Open purpleframe
Image, Rotate Right
C&P as a New Layer on the tag canvas
Close the original purpleframe file and don't save changes
Line up the frame centrally to the tag canvas (you may need to just move it up or down a little)
so it lines up with the bottom of your tube's feet...if it has any :)
Open hauntedhouse2
Image Resize
80% Smartsize
C&P
and line it up as I have done with the bottom edge of the frame
Make sure the house is under the tube but above the frame layer in the LP
Open fence
Image Resize 70%
C&P
Move this layer UNDER the frame layer in the LP
Right, that's the bones of the tag....let's get onto the meat lol
Open paper7 (the spiders)
Image, Resize 86% SS
C&P
Place under the frame layer in the LP
then take Magic Wand on the usual selection settings
and click inside the left frame square
Selections, Modify, Expand by 4
Selections Invert
and hit Delete on the paper layer
Selections None
Take Paper10 (the spotty one)
Repeat as above for the right section of frame
then
Open Paper16 (candycorn)
and repeat above for the middle section
OK
So that's the frames filled
Now
Open Paper15 (hauntedhouse)
Resize
C&P
Then
Apply my mask Vix_Mask452
Layers, Merge, Merge Group
and make sure you move this layer below all the other but above the White Background
Take your Selection Tool, on Rectangle
And draw out a Rectangle horizontally along the bottom of your tag canvas
and then when on the Masked layer, hit Delete
We want to get rid of the mask that pokes out underneath the frame at the bottom
Selections None
Again, with Selection Tool - draw out a smallish square on the Haunted House layer
to include the small moon and bats - then hit Delete (gorgeous though it is, we've got a moon from the paper beautifully showing behind the house lol!)
Selections None
Open ghost3
C&P
Place within the area of the right frame square
Dropshadow it as prefered for your tubes
then
Do a Selection Delete to get rid of the excess ghost (now, there's a sentence ya don't say everyday lol!!)
Open ghost2
and repeat as above for the left
Open cat
Image Resize 30% SS
C&P
Place on the right of the frame as mine
So this layer will be at the top of the LP
Open owl
Resize as for cat
then
C&P
and place as mine with his little claws
overhanging the frame
Again, he'll be above the other layers in the LP
Open pumpkin1
Resize 40%
C&P
Place as mine over on the left of the tag
Open pumpkin3
Resize as before and place as mine
Open spider
Resize 20%
C&P
Place as mine
Open candle
Image Resize 20% SS
C&P
Place as mine - IF you use the same tube as me, you'll need to erase the tube's candle
Now
Open the Sparkles 1 2 and 3
Place as liked just above the Masked Layer in the LP
Resize if needed/liked
If any stick out under the frame layer at the bottom - erase them
Open the Wordart I've provided for this tutorial...ONLY!
C&P
Line it up as mine
and
Move it down the layer palette (LP) to just below the Haunted House layer
Now
Tube - Shadow 2, 2, 50, 5.00 Black
Apply this same shadow to pumpkins, spider, candle, cat and owl
House - 0, 0, 40, 10.00 Black
Apply this same shadow to frame and fence layers
Now add your name in a font and style as liked
And place it over the right side above the ghost's head :)
Dropshadow as for the tube
Add your artist info now
then
Go to Crop Tool
And clicking on the Nodes, move the crop inwardly taking care
not to crop any shadow, mask etc
Tick to Crop
then
Delete White Background
and
Save as a PNG
All done!!
Enjoy :) xx
This tutorial was written on 5th October 2010
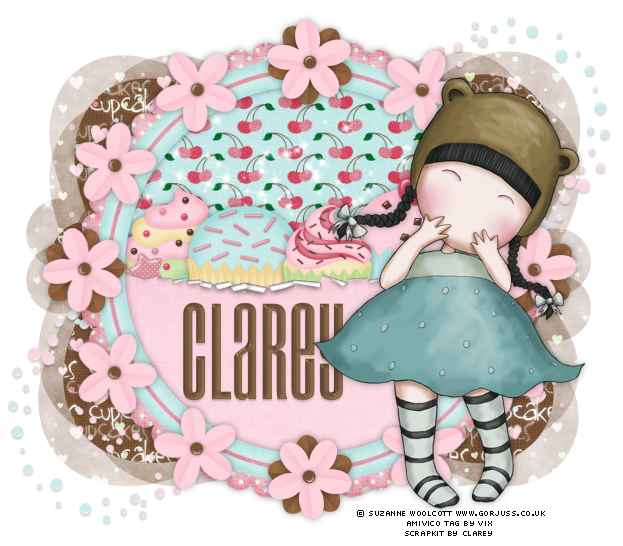
Tag Tutorial - Clareycakes - PTU
SUPPLIES NEEDED
Tube of Choice - I used a PTU one by Suzanne Woolcott aka gorjuss
Scrapkit - Cupcake Party Tag Kit by Clarey - you can purchase it HERE
Xenofex 2 Rip Open
Mura Meister Copies
Mask of your Choice - a rectangular one would be good
************************
OK - We're going to make a nice big tag :D So if you need to start
smaller - cool, just adjust the following sizings as in proportion to your start size :)
The Usual - but make it a 650 x 600 pixel New Image
Add New Layer
Floodfill White
Open roundframe1 from Clarey's kit
C&P
Resize 80% Smartsize
Using Magic Wand on your usual selection settings - see my Glossary of Terms section over on the right if you're not sure what settings to use
Click inside the roundframe1 and Selections, Modify, Expand by 6
then find the paper12
Image, Resize 86% Smartsize
C&P on the tag canvas
Place as liked within the frame
Selections, Invert, Delete
Selections, Invert
and then find paper6
Resize as before
C&P
But, move this down the tag canvas
so it's just under halfway up the frame centre - see my tag for ref
Once happy with placement - repeat the Selections, Invert and Delete
Selections, None
Now, move both of these paper layers down the LP
so both are under the frame layer
Whole paper nearest the bottom
So, on the pink half filled paper layer
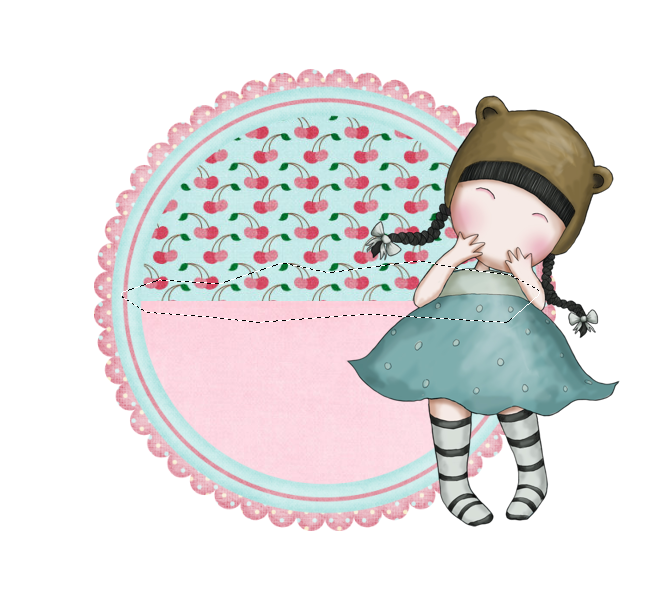
Take your Freehand Selection Tool
Have it set to 3 Feather - Add - Point to Point
And select the top horizontal edge of the paper
Start at the left side - go across the top of the pink paper area and slightly beyond
then back over to the left side again to join it - jaggedy as you like - from one
side of the paper to the other
See this example below to show you how I selected it
Keep Selected
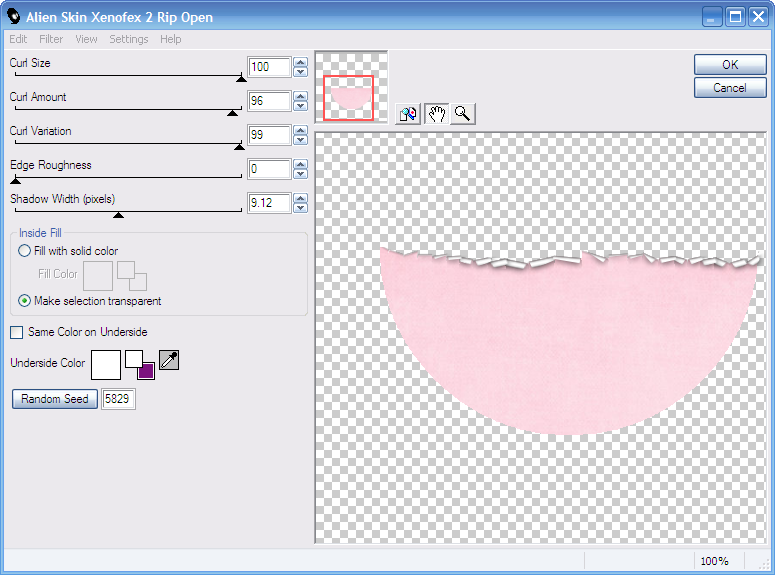
then
Xenofex 2 - Rip Open and apply the following settings
So now, see the gorgeous cupcakes that come with this kit?
We're going to stuff our pink paper pocket with cakes! :D
Choose which you'd like to go with the tube you're using
Resize the cakes 50% or so, make them different sizes if prefered
then
C&P
Move down the LP so they're below the Pink Paper layer
and place as liked
Once happy with placement of the cakes
Apply a dropshadow of your choice to them to give some depth
I used 0, 0, 40.00, 10.00, Black
Then, open paperflower3
C&P
Then
Go to Mura Meister Copies - look for the Encircle Preset
and change the X and Y Sliders to 70 each
Apply
Open paperflower6
C&P
Image Free Rotate, 90 degrees to the right
then move this flower - over the tag canvas so it's lined up with
the pink flower on the middle of the left side
Move down the LP so it's below it
Duplicate
Image
Mirror
Line up on the right side
Duplicate this flower on the right
Image
Free Rotate, LEFT, 90 Degrees
And place as mine under the top central flower
Duplicate this one
Image
Flip
Now
Open a chosen paper to go with your tag so far - I used Paper11
Don't Resize this one
just C&P
then
Crop to canvas size 650 x 600 tick crop tool
Make sure the paper is just above the white background
then
Take your mask of choice - a rectangle shaped dimension one would be best, and then apply
Layers, Merge, Merge Group
Now open your chosen tube
C&P
Place as liked
Add effects as liked and shadow as prefered :)
Now on the flowers and frame layer
Apply a dropshadow as liked
I used the same one I did for the cupcakes earlier
Open scatterswirl2
Image
Resize 60%
C&P
Now
Line this swirl up with the top right area of the mask layer
See my tag for reference
Now
Move the swirls down the LP to just above the Mask Layer
Duplicate
Image
Flip
Image
Mirror
Now merge these two layers together
and apply a subtle shadow
I used
2
0
16
1.98
Black
Add your name in a colour and font of choice
Apply a Bevel or (as I did) a SuperBladePro preset
and
Shadow as before
Apply any other bits you might like to use - I added some sparkles which I love at the moment, am obsessed with sparkles lol!
Now, add your artist info
and Crop the tag canvas
I got down to
623 x 546
Then
Delete the White Background
and
save your work as a PNG file - so it's transparent backed
and when posting in your forums, will not have a white background :)
Hope you enjoyed this simple, copy and paste tut - simple, maybe...but effective? I think so hehe xx
This tutorial was written on 1st October 2010 by Vix
All of my tutorials are registered with TWI
Sunday, 7 March 2010
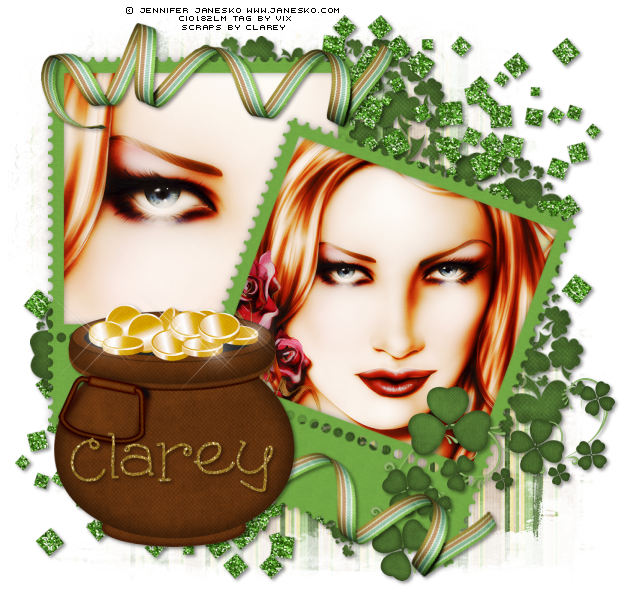
Tag Tutorial - When Irish Eyes - PTU
Tubes/Images of your Choice - I'm using a Tube and Close up
Artwork © Jennifer Janesko
If you wish to use the same tube you must purchase it from CILM
However feel free to use whatever you have
Scrapkit - A superb St Pats kit by my pal Clarey called "Luck of the Irish"
It's PTU and available from her store HERE
Xero Graphics Radiance
Mask of your Choice - I used one of my own Mask403
__________________
Open a New Image in PSP - 650 x 600
Add New Layer
Floodfill White
then
Open clarey_luckoftheirish_stamp frame2
C&P
Place centrally in the tag canvas
Image, Resize 70%
then
Adjust, Hue and Saturation, Colourize,
and then change the Hue to 65 and the Saturation to 105
Now
Move this stamp frame over to the top left of the canvas
Leave plenty of room on the top left and middle left though
Duplicate the frame layer
Image, Free Rotate, Right 20 degrees
then
move down the tag canvas to place as mine
Open Paper 4
C&P
Place under the rotated frame in the LP
then use Magic Wand on the usual selection settings
and do a Selection Delete with an Expand of 4
Open Paper 7
C&P
Place under the first frame in the LP
and repeat the Magic Wand Selection Delete as before
Open your Chosen Tube/Image/Close up
C&P
Place on the tag canvas
and move between the chosen frame and paper in the LP
so it's sandwiched in between - then
on the Image/Tube/Close Up layer
Apply Xero Radiance on these settings...
Strangeness - 103
Charm - 73
Truth - 82
Beauty - 131
Apply a favourite dropshadow if using a tube
then
use Selection Delete as before to get rid of the excess tube
Repeat for the other frame with either a close up or
different tube/image of your choice
This time, I didn't add the Radiance as my image was so light already
Open shamrockofshamrocks1
Resize 90%
C&P
Move down the LP so it's just above the White Background
Open Paper 9
C&P
Place below the shamrocks layer in the LP
and
Apply Vix_Mask403 to the Paper layer
Open the Emerald Glitter
Resize 60%
C&P
Move to the top right of the tag canvas
(see mine for placement)
then
Duplicate
Image
Mirror
Image
Flip
Move both of these Glitter layers down the LP so that the bottom left on
is below the shamrock layer but above the masked paper layer
and the top right one is above the shamrock layer
Open curledribbon
60%
C&P
Line it up with the top of the straight frame (see my tag for placement)
then
Duplicate the ribbon
Image, Free Rotate, 20 degrees right
and place along the bottom of the rotated frame
Open the potofgold
Resize 60%
C&P
Place as mine
Open shamrockdecoration
50%
C&P
Place as mine
Now add dropshadows to the two frames
I used
0, 0, 38.00, 10.00 Black
Then, on the elements - I used 2, 2, 45, 5.00 Black
Now crop the tag canvas to remove any excess paper or tube/image that may be outside the canvas
and
add your name in a style and font of your liking
I used a glitter fill and added the name to the pot and used
the element dropshadow
Finally,
Add your artist info
Delete the White Background and
Save as PNG
Hope you enjoy and if you celebrate St Patrick's Day - have a happy one!
Thursday, 25 February 2010
Tag Tutorial - Viva - PTU
Tube of Choice - I'm using a gorgeous one by Ted Hammond
Artwork © Ted Hammond
If you wish to use the same tube you must purchase it from CILM
However feel free to use whatever you have in your collection
Scrapkit - PTU - I'm using the superb "Sin City" by Jessica over @ Gothic Inspirations - thank you sweetie xx
Please go HERE for more details
Background Image of choice - preferably a Las Vegas shot - I used one
from Stock Xchng www.sxc.hu - I used Las Vegas as the search word
and found one I liked by getjustin on (I think) about Page 6 or so.
Two masks by Chelle WeeScotsLass - Mask 145 and 220
Xero Graphics - Pastellise
Xenofex 1 - Shower Door
(both of these filter plug ins are freely available from the Net)
Lokas Shadow (optional)
Sparkles of Choice also optional
Font of Choice - I used a FontDiner.com font called Loungy
________________________________
OK - so
The Usual, a new Canvas in PSP
I used 680 x 600 (nice and big but if you'd like to start smaller
or you have forum restrictions where you post, then just adjust as needed and
do the same for the following element percentages too)
Then
C&P your chosen tube as a New Layer
Place centrally to the tag canvas, resize if needed
then hide the tube layer for now
Open Paper5
Leave for the moment
Now, open the Nightlife photo/image you've chosen to use - a landscape image
works better than a portait one
IF you've used the same one as me, resize image 30%
then
C&P as a new layer on our tag canvas(ideally you
want the image size to be not as massive as the canvas, but
large enough to take the mask) just above the White Background
Now unhide your tube so we can build the tag around it
Now
On the Background image,
Use Chelle's mask WSL_Mask145
Layers, Merge, Merge Group
Make sure it's below your tube layer
then
duplicate the mask layer
and on the bottom copy,
Adjust, Blur, Gaussian Blur by 10
then
go to Xenofex 1 - Look for Shower Door
and apply the Collage preset from the drop down menu
Now duplicate the untouched mask layer again
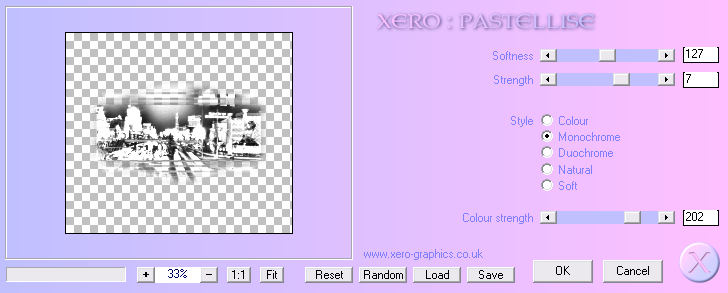
and on the top copy
Apply Xero Graphics Pastellise - on these settings of mine
Hope you get the same effect as me - you shouldn't have any extra background
added to the layer - if it's applied right, the preview window hopefully will show
as mine
Anyway, once applied
Change the Blend Mode of this mask layer in the LP to either Soft Light or Overlay -
whichever you prefer
So you should have 3 masked layers
the Top one in the LP should be the Pastellised one
the middle should be the untouched mask one
and the bottom should be the Shower Doored one
Yes?
Cool!
OK
Duplicate your tube layer
and
On the top one - apply Pastellise as we did for the mask layer
Same settings
but this time
Change the Blend Mode in the LP to Burn or similar, we want a nice darkened effect
OK?
Cool
Now, let's element this baby up lol!
Open Vegas Sign
Image Resize 50%
C&P
Place as mine
Open Dice 2
50%
C&P
Place to the right of your tube
Duplicate
Image
Mirror
Open Scatter Bling
70%
C&P
Place to the left of the tag as mine
Move this down the LP below all the mask layers
then
Duplicate
Image
Mirror
Open Poker Chips
30%
C&P
Place to the left
Duplicate
Image
Mirror
Open Money
50%
C&P
Place to the right of the tag as mine
just under the right dice layer
Then
Open Money Bag
40%
C&P
Place above your tube layer
and duplicate
Use to cover any half body or leg chop off from your tube
or (in my case) the furry carpet (yikes! lol!)
Anyway, use it as mine, but don't mirror image the bag
Just duplicate and move over as needed
Now - remember our paper from way back? lol!
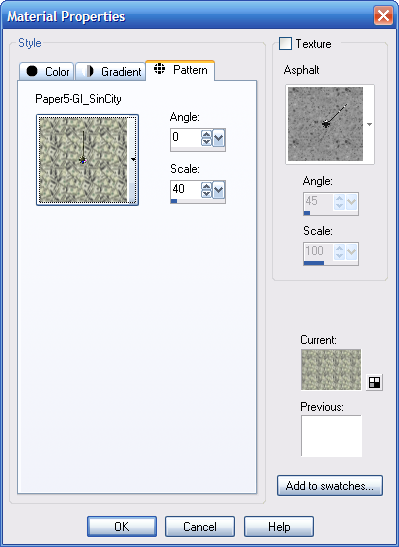
Go to Pattern (in the Materials Palette, next one along from Colour/Gradient)
Find the Money Paper - but change
the Scale to 40
See my settings here
Click OK
and you should now have the Pattern in your Foreground (or Background) box
Good
So add a New layer just above the White Background
and Floodfill this new layer with your Money pattern :D
OK
Now you can close the Paper - we're done with that
And
On this money layer
Apply Chelle's Mask - WSL_Mask220
Layers, Merge, Merge Group
and
Duplicate this layer for added emphasis
Now then - dropshadows!
One of the best finishing touches for any tag imho :D
So...
Don't shadow any of the mask layers
but for all the elements use
2, 2, 45.00, 5.00 Black
Apply to all elements
and
On your bottom copy of your tube - not the Pastellised one
Apply
a favourite dropshadow that you'd usually use for tubes
I used one from Lokas Shadow called Flat Faint Shadow (it's a preset in there)
Now, crop the canvas again to the size you'd like it (it
also helps to get rid of any overhangs, if there are any)
I just cropped to the size it is - 680 x 600
Add your Artist info now and if using photo/image
that needs a courtesy mention, add that too.
And if liked, add some sparklies you may have
I added a New layer
and looked in my Picture Tube tool and found Sparkle (dunno if
it's a preset or one that I obtained but I used that)
and placed various sizes of it to compliment the Sparkle Bling layers
I also used some other sparkles I had :D Improvise with what you have
and see what you like
then
finally -
Using one of the fabulous Font Diner retro Vegas style fonts
(I used Loungy)
I added the name in a glitter fill and black stroke
Place in the blank space top right
and added the element dropshadow
All done :D
Hope you enjoy xx
_______________________
This tutorial was written on 25th February 2010 by VixIt is a tutorial based on a tag of my own design created
this morning and
any potential similarities to other tag tutorials that
may be available is wholly unintended and completely coincidental.
Links to tube/scrap blogs or sites are added either through necessity or creator courtesy,
and it is entirely up to the individual (ie. You!) if you choose to visit these sites and/or download/purchase from them.
Scraps used in my tutorials that I've obtained from PTU purchased scrap kits are NOT supplied in my tutorials supplies.
NO linking to my tut examples, screen shots, files or graphics permitted
All of my tutorials are registered with TWI
Tuesday, 9 February 2010
Tag Tutorial - Sweet Love - PTU
Tube of Choice - I'm using a cutie by Suzanne Woolcott
If you'd like to use the same - please visit her site HERE
Scrapkit - PTU - a completely gorgeous one called Love is In the Air by my pal Clarey
You can purchase it from her store HERE
Masks - 445 and 446 by me :) Both are available to save from my blog HERE
Toadies - What Are You
Penta.com - Colour Dot
__________________________________
The Usual - but make the canvas size 650 x 600
If you'd like a smaller tag, adjust your canvas size accordingly
and the same goes for the following resize percentages
Adjust to what you'd need instead...
OK
Open the Chocolates
C&P
Place to the middle left of the canvas
Duplicate
Image
Mirror
Open the SW tube (if you're using a different tube, adjust placement to suit your tag)
C&P
Place as mine
Open the HeartFrame2
80%
C&P
Place as mine
under the other layers and above the White Background
Change both colour boxes to White
and
Duplicate the Heart Frame
Apply Toadies - What are You on
the default settings
then
Penta.com Colour Dot on
the default settings
Make sure this frame is below the original frame in the LP
Duplicate the chocolate box layers
and repeat the Toadies and Penta for the bottom copies
BUT
Change the X-Dose slider in Toadies to 10 from 20
Click inside the non Toadied heart frame with Magic Wand
Selections, Modify, Expand by 5
Open Paper 9 - or another delicious one of your choosing
C&P
Move between the two heart frame layers
and do a Selection Delete on the Paper layer
Selections None
Crop the canvas using Crop Tool - Snap Crop Rectangle to: Merged Opaque
(Should be the same size as your canvas)
Just above the White Background
C&P Paper 7
then
Apply my mask - Vix_Mask446 to it
Layers, Merge, Merge Group
and move across the canvas to line up with the heart frame a little more
See my placement for reference
Open the Cupcake
Resize 20%
C&P
Place to the left in front of the chocolates
Duplicate
Image
Mirror
Open Flower 6
70%
C&P
Place as mine to the left of the tag at the top left
of the heart frame then
Duplicate
Image
Mirror
Open another of the flowers
70%
C&P
Image
Flip
then place in the centre of the heart frame as mine
Open another of the flowers
Resize as before
C&P
Image
Mirror
But, move this over to the left of the tag and place underneath the
left side flower
Duplicate
Image
Mirror
and
move these under the chocolate box layer (the non Toadied one)
in the LP
Use Dropper Tool
Choose a colour from the tag
Place in Background Material Palette colour box
Have Foreground on Nill
Type out your name in a font of choice
Stretch out to fit where liked
then
Apply a simple and subtle dropshadow to it
I used 0, 0 ,35, 7.00 Black
and now
on the Cupcake, Chocs and
the flowers layer - add a shadow of
2, 2, 45, 5.00 Black
or a shadow of your choice
and on the heart frame, apply a shadow like
3, 3, 54, 7.00 Black
or one of your choice
and on the tube layer - shadow as prefered
Add your Artist info now
Crop the canvas
Delete the White Background
and
save as a PNG
All done xx
Subscribe to:
Posts (Atom)