Pages

Wednesday, 28 October 2009

Tag Tutorial - Wanna Be Good - FTU


Tube of Choice - I'm using an outstanding new one by the
eternally generous and awesomely cool Ismael Rac
If you'd like to purchase to use in your own tag,
visit AMI for more details

Scrapkit - a superb freebie! Part of a collab, this
part I've used is by Butter aka ButterflyFlutterby
The kit is called "Good Girls Gone Bad" and it's fabulous.
Download from her blog HERE
and please leave some love if you take it xx

Mask of Choice - I used my mask Vix_Mask147, yes again! lol!

Xero Graphics Greytinter

Font of Choice


________________________

Open a New Image in PSP - 650 wide by 600 high

Add New Layer

Floodfill White


Open Frame6

Image, Resize, 80% Smartsize

C&P

Place centrally to the tag canvas


Open the Large/Close Up tube

C&P

Place under the frame layer


Open Paper 20

Image, Resize 75%

C&P

Place under the other layers on the tag canvas


Repeat this with Paper 8

but place so half of it is showing behind the big tube

within the frame layer

(see my tag for reference)


Now Duplicate the Tube layer

and on the top copy

Adjust, Blur, Gaussian Blur 2.00

then change the blend mode to Overlay

and then

on the bottom copy

Xero Graphics - Greytinter

on the default settings

and apply a favourite dropshadow of choice

to this Greytinter'd tube


Now, use Selection Tool

Rectangle

And stretch it out around the central part of the frame

and include the part of the star and halos bit

that shows the frame contents too

Selections, Invert

and hit Delete on the two paper layers

and the two tube layers

Selections None


Open Paper 10

Resize as before

C&P

Place under the other layers

and apply a favourite mask of choice

(I'm using - yeah again lol! - my mask Vix_Mask147)


Open Glitter Splatter 3

Image, Resize 30%

C&P

Place on the top right of the tag

Move down the layers

to just above the mask layer

and then

Duplicate

Image

Mirror

and move back over a little

See my tag for reference regarding placement


Open the Guitar colour of your choice

Image, Resize 50%

C&P

Place as mine


Open the Musical Notes that

correspond to your guitar colour

Image, Resize 50%

C&P

Place over to the top left as mine


Open RibbonSplatter2 (or one to suit your colour scheme)

Image, Resize 70%

C&P

Place on the tag canvas

and move down the layer palette

to above the Glitter Splatters layers


Optional - Open the Wordart 2

Image, Resize, 60%

C&P

Place as mine


Now

C&P your chosen tube - actual size

or resize as liked/needed

Repeat the duplicate, blur and Xero effect as for

the larger tube


Apply dropshadow of choice to all

the elements

except the Mask layer

or any of the layers you feel don't need it


Crop the tag canvas now

and

add your name in font/style of choice


Add your artist info and any

other info required

Delete the White Back

and save

your work as a transparent PNG

and thank you for trying me tut :) xx
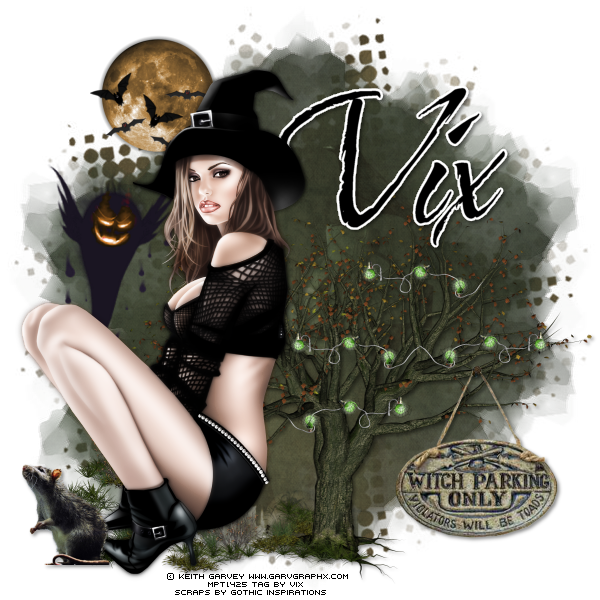
Tag Tutorial - Witch Time - PTU


Tube of your Choice - I'm using one of my absolute favourites

from a couple of Hallowe'ens ago - it's Tabitha by the wonderful

Keith Garvey


His work is PTU and can be obtained via MPT


Scrapkit - I'm using a gorgeous PTU kit called "Eerie Hauntings" by
Jessica @ Gothic Inspirations
- thank you hunny xx


Masks - Chelle's WSL_Mask220 and my mask Vix_Mask147

Both are freely available from our respective tutorial sites :)


Eye Candy 4000 Gradient Glow


Font of Choice


______________________


The Usual

then


Open Paper 4

Image, Resize, 71%

C&P

then

using Crop Tool - crop to the canvas size 600 x 600

then

Apply Chelle's mask WSL_220

Layers, Merge Group


Open Paper 6

C&P

and repeat the above steps

Make sure this mask layer is above the first one


and now either Drop the Opacity on the 2nd mask layer to about

59 or

change the Blend Mode to Overlay


then (optional)

Open Paper 7

Same as before but this time

apply my mask Vix_Mask147

and

move this masked layer below all the others

apart from the White Background


Open the MoonWBats

Image, Resize, 35%

C&P

Place as mine


Open Tree2

C&P

You'll see it over hangs the current canvas size so

Select the small clumps of grass that you

can see are seperate from the main tree

using your Selection Tool on Freehand (Lasso) Point to Point

Select around them

and then Edit, CUT

and you'll see them disappear

Edit, PASTE

and there they are again :)

So, now you can move the tree into position

and not lose any of the cool grass clumps or have

to resize the tree

Move into position as mine


Open the Witches Sign

Image, Resize 50%

C&P

Place as if nailed to the tree as mine


Open your Chosen tube now

C&P

Place as liked

and finish with an effect or dropshadow of your choice


Now

Dropshadow all the elements except

the mask layers

I used 2, 2, 45, 5.00 Black


Open the Bulbs

Image, Resize 20%

C&P

and place on the tree

Duplicate

Image

Mirror

and line up as mine

Duplicate the ones you just duplicated

and move this set up the tree

then duplicate the first ones

and move this set down the tree loL!

Don't dropshadow these

and Tip: take your eraser tool on a small, soft setting

and "blend" the edges of the single string of bulbs string into the tree more


Optional - open the cute wee rat - a raaaaat lol!

And resize 30% and C&P if you'd like

Shadow as before


Open Ghost1

Image, Resize 70%

C&P

Place as mine


Now take your chosen font

Black fill and no stroke

and then

add a Gradient Glow finish of your choice if liked

and dropshadow as before


Crop the canvas now

and

save as a transparent .PNG file

Thanks for looking

and

if you do the tut - enjoy! xx

Tuesday, 27 October 2009

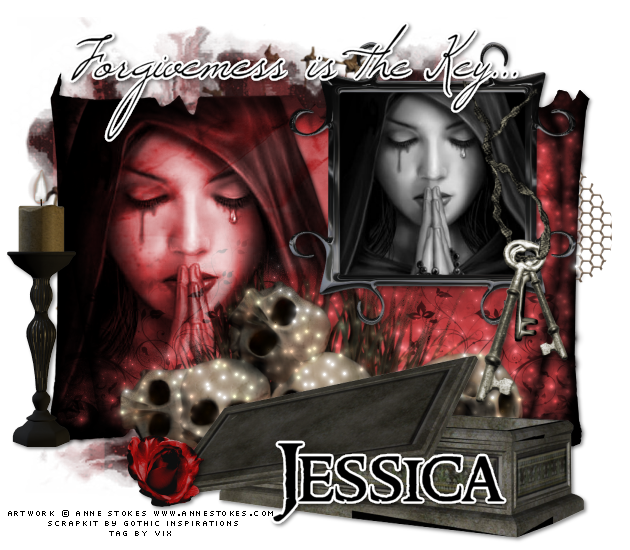
Tag Tutorial - Forgiven - FTU


Tube of Choice - I'm using a beautiful one from the artwork of Anne Stokes

www.annestokes.com


Scrapkit - a fantastic freebie by Jessica @ Gothic Inspirations called "Life's Blood"


Xenofex 1 Constellation
(not the very popular Xenofex 2, but the earlier version called Xenofex 1)


Fonts of your choice


_____________________________________


The Usual - EXCEPT, if able/allowed in your forum,

650 wide by 600 height

I did for my example, so if you stick to 600 x 600 then adjust the following

resizes as needed xx


Open Parchment

C&P

Place centrally if your paste hasn't already


Open your tube

Keep Large

C&P

Move over to the left of the parchment layer

Apply a favorite dropshadow to your tube

then

Click outside the Parchment with Magic Wand on

0 Tolerance and 4 FEATHER - yeah, I know, Feather for once lol!

Then

On the tube layer, hit Delete 3 or 4 times

Selections NONE

and on the tube layer

Change the Blend Mode to Screen/Overlay/Multiply/Hard Light or similar

(When you change the Blend mode, watch the edges of the tube

effect, and choose one that "blends" nicely at the edges of the Parchment layer -

or if you like the effect but it takes the tube right up to the edges, use a soft

eraser setting and erase sections of the tube and blend it)

I had mine on Hard Light and blended it - see below for my eraser settings


Now, open the Parchment Cluster

C&P

Place it over the other layers, and line it up exactly on the right side

so it matches the Parchment

layer and sandwiches the tube in between :)

Now, take your Eraser tool on a nice blending setting

Something like Size 140, Hardness 23, Step 5, Density 77, Thickness 100, Rotation 0 and Opacity 36

and

then, Erase the Parts of the Parchment Cluster that compliment the tube placement

You'll also need to erase (if you placed your tube as mine)

the wire on the top of the parchment cluster layer, but you

can leave the one on the right


Right,

Now Paste your tube again and

Image, Resize 80%

C&P

Move it over to the right of the parchment layers

Hide for now


Open the Frame Black

Image, Resize 50%

C&P

Move over to the Top right area of the Parchment layers area

(See mine for ref)

and make sure it's above the other layers


Now, change your Magic Wand to 0 Tolerance and 0 Feather

Click inside the Frame

and do a Selection Delete with an expand of 4

on the smaller tube

Selections Invert

Add a New Layer under the smaller tube layer

and floodfill Black or a colour to suit the tag

Selections None


Open the Candle

Image, Resize 50%

C&P

Place as mine to the left of the tag


Open the Casket

Image, Resize 60%

C&P

Place as mine


Open the Keys

Image, Resize 40%

C&P

Place lined up with the black frame as I've done


Open the Grunge Tagback

Image, Resize 80%

C&P

Move down the Layer Palette under all the other layers

Place as mine


Open the Rose

Image, Resize 20%

C&P

Place as mine


Now

Apply the following dropshadow to all the element layers

EXCEPT the Parchment Cluster (the layer with the skulls)

and none of the tube layers

Dropshadow 2, 2, 45.00, 5.00 Black


Now crop the tag canvas - I managed to get down to 630 x 550

and

now add your name and any phrase you may want to add

I used "Forgiveness is the Key..."

and...well, my name, obviously lol!


Add your copyright info and

any other info you may need


Optional - If liked,

Duplicate your Parchment Cluster layer

and on the top copy

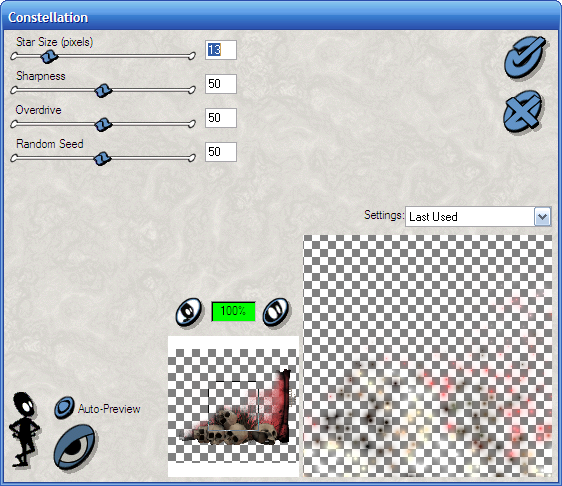
Apply Xenofex 1

Constellation on these settings...


And you'll see it change on your tag, just adds a nice little touch :)

I've used this effect my own tags for years, and love it hehe xx

If it's too much, erase some of the effect with your eraser tool again.


Now,

Delete the White Background

and

save your work as a transparent PNG


Thanks for looking and if you have a go,

enjoy your tag :) xx

Friday, 23 October 2009

Tag Tutorial - Rock Chicks Can Love Pink - FTU


To make this tag, you will need...

Tubes/Close Ups of your choice - I'm using some gorgeous ones by
© Keith Garvey
To purchase Garv's work to use in your own PSP tags - see MPT

Scrapkit - FTU called Rock Baby by Vicki and Tamie @ Pink Pleasures
Absolutely stunning kit, loved it girls, thank you xx
If you download it, please leave a little love

Mask - Vix_Mask147 - available from my tut site HERE

Wordart - by me HERE (Please don't use this for any other purpose
other than your personal tag making - thank you xx)

Mura Meister Copies

Xero Graphics Abstractor

Both these filters are freeware and readily available from the Net

______________________


The Usual

or for a bit of le difference! try 650 x 600


Open ele70 (Black Frame)

Image, Resize 60%

C&P


Place on the tag canvas towards the bottom...ish

See my tag for placement


Open RB_pp2 (Pink Paper)

Image, Resize 85%

C&P

Move down under the Black Frame layer

Duplicate the paper and hide one for now

Click inside the frame with Magic Wand

and do a Selection Delete (Expand by 4)

on one of the papers


Now duplicate the frame layer


and Image, Free Rotate, Left 20 degrees

Move this across so the bottom left corner

lines up with the other bottom left corner on the unrotated one...um...

does that make sense? Hope so, see my tag for ref

And move this rotated one down the Layer Palette

under the Original Frame and paper

Open RB_pp9

Resize as before

C&P

Move down under the rotated frame layer

and do another Selection Delete


Back to the unrotated original frame layer

Duplicate

And on the duplicate

Image, Rotate, Free Rotate 10 degrees to the Right this time

and move it so the bottom left point is just slightly offcentre

to the one underneath (the middle straight one)


Take another paper - you choose this time lol

and Resize and Selection Delete as before

Now move these two down below the straight frame and paper fill


Taking shape!

OK

Unhide the dark pink paper copy

and take a mask of your choice or use my good ol' Mask_147

(It seems to suit a lot of tags and I'm very proud I made it lol!)


Now take your chosen tube/s or close up/s or

a combo of both

I used three close ups for inside the frames

On each one working on the left and right frames

C&P your close up

Place it under the corresponding frame layer

Selection Delete the excess tube

and Apply Xero Abstractor to the tube

(you may need to hit Reset to get it to work when in Xero)

then

Once applied, Change Blend Mode of the tube to Overlay or Soft Light

I used Overlay on my two tubes

then

On the central frame

I used a close up of the main tube I'm going to use

C&P

Selection Delete as before

But this time

Duplicate the tube

Adjust, Blur, Gaussian Blur, 2.00

and then

Apply Abstractor to the top tube

and drop the opacity of this top layer to 30 or thereabouts

(Additional, if like mine you're using the actual tube too, C&P

and place that now so you can see what you're doing)

I duplicated, blurred and abstracted that one too :)

Then add a favourite dropshadow to the main tube if using one

I used my usual at the moment - 2, 2, 45.00, 5.00, Black


Now then, back to the scrapkit for some more elements...


RB_ele49 (white sparkles)

C&P

Move to the top of tag and line up (see mine for ref)

Duplicate

Image

Flip

Jiggle them around to get your prefered placement

(You may need to hide the White Back for the mo, to see what you're doing)

Open RB_ele2 (pink satiny rose)

Image, Resize 25%

C&P

Place on the left frame (see mine for ref)

Duplicate

Image

Mirror


Open RB_ele35 (black glitter splat)

C&P

Move it over to the left of the tag and line up as mine

Duplicate

Image

Mirror

Image

Flip

Move these two layer down the Palette to just above the mask


RB_ele62 (the diamond stars)

Image, Resize 25%

C&P

Move to the centre of the middle frame layer

Mura Meister Copies

Encircle

But change the Shift X slider to 80

and

the Shift Y slider to 65

Apply

and if needed, Adjust, Sharpness, Sharpen

and move down the Layer palette to just above the Black glitter splats


Open the Wordart I've provided for this tut

C&P

Place where you'd prefer it to go or where I've got mine :)


Now, add shadow of 2, 2, 45.00, 5.00 Black to

all the frames, the elements - except the sparkles, glitter splats

and mask layer

But, on the Glitter Splats layers - add a 0, 0, 35.00, 7.00 Black dropshadow

on the Sparkles layer, 0, 0, 20, 5.00 Black dropshadow

and No shadow on mask layer!


Finally, add your name in a font and style of your choice

Add your copyright and artist info


Crop the tag canvas

and

Delete the White background and save as transparent .PNG

Thursday, 22 October 2009

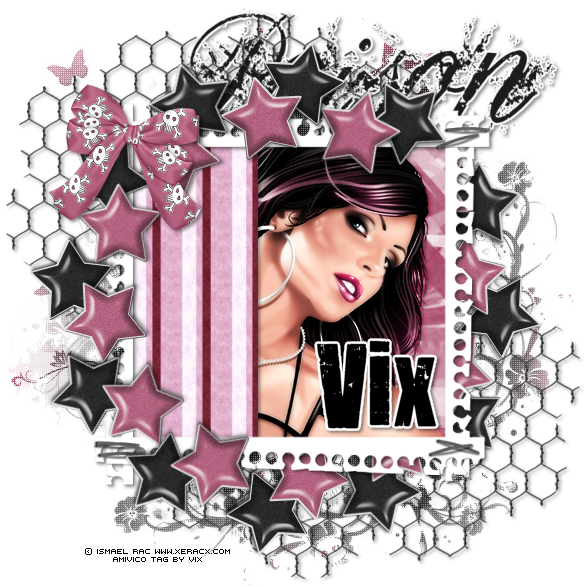
Tag Tutorial - Not Poisonous - FTU


For this tag, you will need

Tube Close Up of Choice - I'm using a gorgeous tube by © Ismael Rac

which I purchased @ AMI


Scrapkit - FTU - Poison Rock Girl by Bel Viddoti

Available for download from her blog HERE

I've seen this one around so I know it's not "new" but

it's fairly new to me, and I think it's cool :)

Note: Bel's TOU very kindly state that she does not

require credit on tags, thank you for that xx


My Mask - Vix_Mask363
which you can get from my tutorial website on the Goodies page


Mura Meister Copies


Penta.com Colour Dot


Xero Graphics Greyscaler


Start with The Usual

then


Open the frame07

Image, Resize 80%

C&P

Place centrally in the tag canvas


Open Paper 15

C&P

Place under the frame layer

Open Paper05

Repeat as above

but

Move the paper over on the left side - see my tag

to get the idea of where you line it up

Add a Dropshadow to this paper

2, 2, 45.00, 5.00, Black

Then take Magic Wand

Click inside the frame and

do a Modify Expand 4 Selection Invert Delete

on both paper layers


Open the Close up (or just the face of a very large tube)

C&P

Move it under the striped paper layer

but above the other paper layer

within the frame


Duplicate the tube

On the top tube layer - Adjust, Blur, Gaussian Blur, 2.00

and on the bottom tube layer - Xero Greyscaler

on the default settings

Then back to the top layer

and change the Blend Mode to Overlay

Nifty, eh! lovely and moody effect -

It's like Minxy's method, but with a slight twist lol!!

Now

Selection Delete the tube excess outside the frames

like you did for the Papers.


Open Paper20

Resize as before

C&P

Move below the other layers to

just above the White Back

and Apply my mask - Vix_Mask363

Layers, Merge Group

then apply Penta.com Colour Dot

on

Value 100

Distance 2


Open the star03

Image, Resize 25%

C&P

Place centrally in the canvas

Bring to Top so you can see it

Repeat this with the star05

so this pink one will be above the black one

Now

Image

Mirror

the pink one only

and then move it down slightly over to the left

so the two stars should compliment each other

Apply a dropshadow to each star - I used 2, 2, 45, 5.00, Black again

then

merge the star layers together

and now

Effects, Mura Meister Copies

Encircle

and change the X and Y Sliders to 65

Apply

and then move into place to compliment the middle

section of the tag

then

Duplicate the stars layer

and move one right down the Layer

Palette to just above the Mask layer


Now take your Eraser and on the top one

Carefully erase from top right

down the edge

to just over from the staple bit of the frame on bottom right

See my tag for ref

Take care when erasing shadows etc


Now add the same shadow to the frame layer


Open one of the bows

Image, Resize 50%

C&P

Place as mine and shadow as before


Open the wire

Image, Resize, 70%

C&P

Move it over and line it up top left as I have

done so it's just touching the butterfly from the mask layer

Duplicate

Image

Mirror

Image

Flip

and move both these wire layers down

to just above the mask layer

and apply shadow as before


Open one of the wordarts

I used Poison

Image, Resize, 70%

C&P

Now, place on the tag under wire layers

lined up with the frame at the top

and apply the same shadow


Add your name in a font and style of your choice


Apply any artist info required


Crop the tag canvas

and

save as a transparent PNG (delete the White Back when ready)


That's it - hope you enjoy

Tag Tutorial - Have a Spooky One - FTU


For this tag you will need...


Tube of Choice - I'm using a beautiful Hallowe'en tube by

© Barbara Jensen


Scrapkit - I'm using Spooky mainly, but one element each from It's Fall and Rock N Roll

All FTU by Bel Vidotti - and are available for download from her blog HERE

Note: Bel's TOU state that she does not require credit on tags :)


Masks - Vix_Mask365 and Vix_Mask147


Both by...well, me lol! And are available from my
tutorial website on the Goodies page HERE


Mura Meister Cloud


Xenofex 2 Constellation

___________________________

Do the usual

then

Open e51 (the black dual frames)

Image, Resize 70%

(a little note, when I say to resize Images that are not

on the current tag canvas - then please assume Resize All layers is ticked...fankees xx)

C&P

Place centrally but towards the bottom of the main tag canvas

You need to leave room for your tube to go in the frame as mine

OK


Open e14 (the fence)

C&P

Place under the Frame layer and move

down so the black edges meet

and the fence looks like part of the frame

Leave this for now we'll do some deleting etc in a mo...


Open e16 (the tree)

Image, Resize, 70%

C&P

Place as mine over to the middle of the left frame

and above the frame layer


Right, let's sort the papers and stuff and then come back

to some more elements and tube...

So

Go to the Papers

and get

p25

Image, Resize, Change to Pixels from Percent

and make it 600 x 600 pixels

C&P

Move down the tag canvas to just above the White Back

and

Apply my Mask 365

Layers, Merge Group

Duplicate Mask layer


Open p30

Resize as before

but don't C&P yet - first, go to

Mura Meister Cloud

look for the Fog preset in the

dropdown menu

and change the Amount slider to 55

Apply

Now, C&P

above the other two mask layers

and apply my Mask_147

Layers, Merge Group

Move this mask layer a little if needed

I moved it down the tag canvas a bit


Open p28

Resize as before

C&P

above the other paper layers

and position within the two frames

Magic Wand on the usual settings

Click inside the frames

Selections, Modify Expand by 6

Invert and hit Delete on the paper layer

Selections None


Right, now then - we're whizzing off to some of Bel's other

kits for some elements :) So go to It's Fall

and find ifel19

(The owl on the branch)

Image, Resize 50%

C&P

and place as mine above the other layers


Now, whip over to her Rock N Roll kit

and find GlitterGel04

Image, Resize 60%

Adjust, Hue and Saturation, Colourize

Hue 11 and Saturation 172

C&P

Place as mine on the top right

Duplicate

Image

Mirror

Image

Flip

and move these two gel layers

below the frames and paper layer

Jiggle the placement around a little if liked - I did :)

Back to Spooky kit

Open e31 (orange bow)

Image, Resize 40%

C&P

Place on the bottom left as mine


Now then, our tube

Open it

C&P

Place over on the right hand side frame

and

then when placed

as liked, move under the fence and frame layer

Note: you can add any tube effects you may use to it now, perhaps

one of the ones in my other tuts (Blessed or Spookyluscious)

Duplicate the tube

Move a copy above the fence and frame layer

Apply a dropshadow to the bottom tube layer if liked

and also

apply to the fence layer too...

Now

take Magic Wand again

Select and Modify as before (right frame only)

then

Selections, Invert

BUT

Take your Eraser tool

on a smallish but hard setting

Size 60

Hardness 100

Step 5

Density 100

Thickness 100

Rotation 0

and

Opacity 100

Hide the top tube

and on the bottom one

Erase any tube that is sticking out under the frame layer

at the bottom

Go right up to the Selected part

Selections None

Now reselect both the inner frames

and modify expand as before

and this time

Now

Activate the Fence layer

and

simply

Selections Invert and

Hit Delete

then

Selections None


Unhide the top tube

Take your eraser again

and erase any parts you want/need to

so your tube looks like it's coming out of the frame and under the fence too

It might be fiddly and you may need to hit Undo if you erase too much etc

So have a few goes and get a result you like

You may need to change the eraser to a gentler setting -

Change the Hardness to 25 if needed

NOTE: If this is far too fiddly and you have problems getting a good erase result

then, delete the fence layer entirely and just have the tube coming out of the frame

using the same erase process as above.


OK

On the Tree layer

Xenofex 2 Constellation

Star Size 2.00

Size Variation 100

Edge Star Density 3.00

Overall Star Density 0

Overdrive 100

Twinkle Amount 75

Twinkle Rotation 45

Apply


Now apply a dropshadow to the tree layer

I used 2, 2, 45.00, 5.00, Black


Apply same shadow to Owl, GelGlitters, Bow

and Frame Layers


Finally,

Add your name taking a colour from the tag as

your fill, Black 2.00 stroke

and apply with shadow too


Add some wording if liked too - Happy Hallowe'en or

similar :)


Then

Artist Copyright info

Crop the tag canvas as liked


and

guess what...yup, delete the White back

and save as transparent .PNG


Have fun blogettes!!

Wednesday, 21 October 2009

Tag Tutorial - Blessed - PTU


Tube of Choice - I'm using one

Artwork © Jennifer Janesko

If you wish to use the same tube you must purchase it from CILM

However feel free to use whatever you have in your tube collections


Scrapkit - PTU - I'm using a beautiful kit by Jessica

@ Gothic Inspirations
. The kit is called "Autumn's Blessings"

Thank you hun xx


Mask - Chelle's mask WSL_219
available for download from her tut site HERE

Font of your choice

No other filters required for this tut...for once lol!

_________________________


The Usual

then

Open Paper 2

Image, Resize, change to Pixels and resize

600 x 600 pixels

C&P

Apply the Mask to this Paper layer

Layers, Merge Group


Open Frame 3

Image, Resize, 80%

C&P

Place centrally to the tag


Open Paper 1

Image, Resize 600 x 600 pixels

C&P

Move it down the Layer Palette

below the Frame and above Mask Layer


Take your Magic Wand on 0 Tolerance and Feather

Click inside the Frame layer

Selections, Modify, Expand by 6

Selections, Invert

and hit Delete on the Paper Layer

Selections None


Open the Glitter Bling

C&P

Place above the Mask layer but below the others


Open the Grass

Image, Resize 80%

C&P

Place as mine on the left of the frame


Open the Leaves 2

Image, Resize 50%

C&P

Line them up as mine


Open the Candle 3

Image, Resize 50%

C&P

Place over the leaves as mine is


Open the Sunflower 1

Image, Resize 20%

C&P

Place as mine on the top right


Open the Tree 2

Image, Resize 70%

C&P

Now place so the bottom of the tree is lined up with the

bottom of the candlestick

then

Move the tree down the Layer Palette so it's behind

the Paper and Frame but

above the Bling and Mask


and open Wordart Autumn

Image, Resize 50%

C&P

Place as mine


Open your chosen tube

C&P

Place within the frame

above the paper layer

and under the frame layer


Duplicate

and on the

top tube

Adjust, Blur, Gaussian Blur, 2.00

then

change the Blend Mode to Soft Light or Overlay etc


Now

Using Magic Wand as before

Delete the excess tube on both tube layers

and apply a subtle dropshadow to the bottom copy

of the tube

I used 0, 0, 35.00, 7.00


So - add a dropshadow to all the elements except the Bling, Paper and Mask layers

I used 2, 2, 45.00, 5.00, Black

on the Bling Layer I used the previous dropshadow

and used no dropshadow on the Mask or Paper layer


Now

Open Badge Leather 2

Image, Resize 40%

C&P

Place as mine under the elements on the left but

above the frame layer etc


Open Glitter Trail

Image, Resize 50%

C&P

Place as mine above the other layers

Line up where you like it

and use the subtle shadow if you'd like


Then finally,

Crop the Canvas to it's current size 600 x 600

or use Crop Tool and bring it in to crop where you

like - I got down to

578 x 585 pixels

Crop


Add your Artist Info etc

and

finally, your name in a font and style of your choice

Delete the White Background

and

save your work as a transparent PNG file

(If your forum is coloured, and most of the ones I'm in are lol!)

Hope you enjoyed this tut

Thanks for Looking xx

This tutorial was written 21st October 2009 by Vix
It is a tag designed from a scrapkit and any possible
similarities to other tag tutorials that may
be available is wholly unintentional and completely coincidental.
All of my tutorials are registered with TWI.

Tuesday, 20 October 2009

Tag Tutorial - Do I Scare You? - FTU


Tube of Choice - I'm using one by © Cane Hoyer which

can be found @ MPT


Scrapkit - I'm using a fabulous FTU kit by Digicats (and Dogs)

http://digicats.blogspot.com
- Thank you xx

It was part of a superb Fangtasia Blog Train and at

the time of this tutorial going up, it was freely available at

her blogsite HERE

Note: if it's not available when you come to do this tut, I can't actually
do anything about that xx But hopefully, it'll be up for a while :)


Mask - yup, it's Chelle's WSL_Mask220 which is fantastic!
If you haven't got it, you can get it at Chelle's site HERE


Xenofex 2 Lightning


Filters Unlimited 2 - Photo Aging Kit


Additional scraps if liked or needed.
I used some cool GelGlitters from Bel Vidotti.
And yes, I managed to get her on my tag credits too...but
I think I'm drawing at the line at no more that two
scrap designers in my tag credits!?! lol!!!
Otherwise this is going to start getting completely daft
(just my own opinion, lovely folks xx)

__________________


Right then ladies, the usual first...need a remind?

OK - New Image, 600 x 600 pixels, Add New Layer, Floodfill White

then

Floodfill a new layer with Black and another colour

of your choice Gradient

I used Red and Black Foreground/Background gradient

Angle 45 and Repeats 3

Floodfilled the layer

and then

I went to Filters Unlimited 2, Photo Aging Kit, Old Colour and applied that

to the layer


Open DCD_Fog

Image, Resize, 75% Smartsize

C&P

Move over to the Left side of the tag

Duplicate

Image

Mirror

Image

Flip

Merge the two fog layers together

Important: Crop to the canvas size as there will

be excess fog outside the canvas and

the mask won't apply properly if this happens

So, now

Apply Chelle's fabby mask WSL_Mask220

Layers, Merge Group

and also

apply this mask to the Floodfilled layer


Open Spooky Tree 5

Image, Resize 60%

C&P

Position as mine


Open Tombstone 02

Image, Resize 40%

C&P

Position as mine


Open the Leaves Border

Image, Resize 70%

C&P

Make sure it's above the tree layer but below the tombstone layer

Position lined up over the tree at the bottom

Duplicate

Image

Mirror

and apply the Old Colour filter to both of these layers


Open Skull Candle Black

Image, Resize 40%

C&P

Position as mine


Now at this point, add any more bits and bobs you

might like to use

I added some Gel Glitter by Bel Viddoti to this tag of mine

which I obtained from a fantastic kit she made for a challenge over @ Creative Misfits

and which - I believe - is still on both her blog and the Misfits blog too.

But, use what you have at your disposal if you'd prefer or have something

that will go well with the theme.

Right then, add a dropshadow to all of the element layers

(Don't add it to the fog or masked floodfill layer)

I used my current fave of mine - 2, 2, 45.00, 5.00 but

it's pretty gopping so you might want a more subtle one.

You choose :)


OK

Now

Let's add some lightning to the fog layer

do this by activating the fog layer

Then

Xenofex 2 Lightning

look for the preset Old Horror Movie

and

Drop the Arc Thickness Slider to 10

and click on the Glow tab in there

Drop the flash size to 0

Now, you'll need to move the position of the Lightning before you apply

so in the big Preview

Left Click and hold on the top left start point of the lightning

and now drag it down so it's more on the Fog layer bit?

cool huh!? lol!!

Do the same to the bottom right end point of the lightning (you find this by moving the

small preview square which is outlined in red)

Click OK to apply


See what it looks like?

Is it in the right place for you?

Mine was just behind the tree so the start point was nice and hidden

IF it's not - simply click Undo in PSP

then go back into Xenofex and retry your placement and apply again

You can add it a couple of times for emphasis if you'd like

or perhaps a couple of flashes in different places

Whatever you'd like - see what looks best :)


OK

Last bits now...

Add your tube

Resize and place where looks best

Finish off the tube in a style of your liking

(Missy Minx, I can't stop using your way babes lol!!)

and add a shadow of your choice


Now add your name in a spooky font and finish of choice

I used a purchased glitter fill which I can't share - sorry xx

But, see what you've got in your stash and add your name

And apply dropshadow as before

Now add artist copyright info etc

Crop the canvas

Delete the White

and save as Transparent PNG

Finished! Hope you

enjoyed my tutorial

Tag Tutorial - Spookyluscious - FTU


Tube of Choice - I'm using a gorgeous one by Ismael Rac

His artwork is available for purchase via AMI


Scrapkit - FTU kit by Ziggy called Trick or Treat

Download from her blog HERE

Thank you for the fabby kit


Mask - by Chelle WeeScotsLass - Mask_220


Wordart - by me HERE


Penta.com Colour Dot


Xero Graphics Greyscaler


Eye Candy 4000 Gradient Glow (optional)


Open a New Image in PSP - 600 x 600 pixels

Add New Layer

Floodfill White


Open Frame 4

Image, Resize 50% Smartsize

C&P

Move more centrally to the tag canvas


Open Paper 2

It's fabby!

Image, Resize, 75% Smartsize

which should make the paper 600 x 600 pixels

C&P

Move down below the frame layer

Load Mask - WSL_Mask220

Layers, Merge Group


on the Mask Layer

Penta.com - Colour Dot

Value 45 - Distance 6

OK


Open Paper 1

Resize as before

Paste as a New layer under the frame and above the mask

Use Magic Wand to click inside each of the frame layer inner parts

Selections, Modify, Expand by 6

Selections, Invert

and on the Paper 1 layer - hit Delete

Selections None


Now, take your tube or chosen tubes

C&P each one on a new layer

Place the tube/tubes within the frame layer

Shadow if liked

then

Use Magic Wand Delete as before


Duplicate each tube layer

on the top copy Adjust, Blur, Gaussian Blur, 2.00

then

Change the Blend Mode to Soft Light or Overlay (I used Overlay)

But to get the effect I've got

on the bottom copy of the tube

Go to Xero - Greyscaler

on the default settings


Note: This setting is possible thanks to Ismael's very cool TOU which

allows colour changes this way - thank you Ismael, you're amazing!

If you are using tubes that are more strict in what colour changes or shade changes

are allowed (MPT's or CILM's or such like) check first before doing this Greyscaler effect.

If you're not allowed to do so - then don't greyscale it, leave it as it is.


Now, Ismael's Lady Pumpkin comes with little pumpkins to use

So, I used one of them

But you can use the one supplied in the kit or another of your choice

Place as mine

I also applied the same effect as my tubes to this layer


Open the Candy

Image, Resize 25%

C&P

Place to the right of the tag canvas as mine

Duplicate

Image

Mirror

Dropshadow 2, 2, 45, 5.00 Black


Open Button 1

Image, Resize, 30%

C&P

Place on the right as the sweeties

Duplicate

Image

Mirror

Same shadow


Open Bat 2

Image Resize as before

C&P

Place to the left as mine

Duplicate

Image

Mirror

Shadow as before


Apply the dropshadow to the frame layer too


Open the Spookyluscious wordart I've provided

C&P

Line up and place as mine

Apply a Eye Candy Gradient Glow if liked

and

shadow as before


Add your name in a font style of choice

Place where suits

Add your cr info etc

Crop the tag canvas to

get rid of excess overlay from tubes or anything else

You may well need to do this, 'cos I had to. I had

lines left over at the side from the shadow of the tube which remained

after I Magic Wand Deleted the excess tubes. And nothing can ruin

a tag more than that!

Anyway...

Delete the White Background

and

Save as a transparent PNG

Thanks for Looking xx

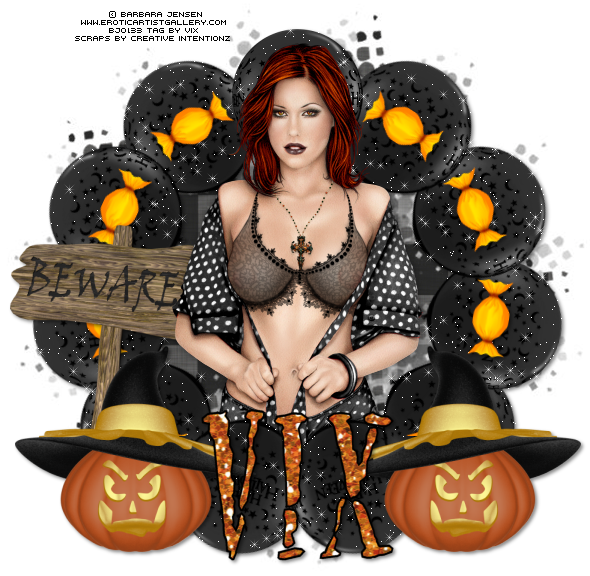
Tag Tutorial - Halloweeny Sweetie - FTU


Tube of Choice - I'm using a beautiful Halloween version of Barb's work :)

Artwork © Barbara Jensen and used with license

Please go to Barb's site for more info on obtaining her tubes (note: her site has some adult content)


Scrapkit - FTU called Muwahahahaha by Creative Intentionz
You can download it from her blog


Mask - Vix_Mask147 - it's still my most popular mask to date :D

Thanks to everyone who has used and enjoyed it xx

If you don't have it already - go to my tutorial site

and look at the Goodies page, Masks


Mura Meister Copies - freely available on the Net


Xenofex 2 Constellation (optional) - not a free filter


________________


Open a New Image - cop a guess how big?

600 x 600 pixels! Yeeeeees lol!

Then what?

That's right - add a New Layer

and floodfill White

Oh, never let it be said I'm nothing if not constant lmao!

Sorry, having a funny 5 mins...right...on we go...


Open Paper 13

Image, Resize and change to Pixels as opposed to Percent

then resize 600 x 600 Pixels

C&P

Then Apply my Mask - Vix_Mask147

to this paper layer

Layers, Merge Group


Open Balloon 1 (the black balloon)

Image, Resize (change it back to Percent from Pixels)

40% Smartsize

C&P

Position in the centre of the tag canvas

then

Mura Meister Copies

Have it on the Encircle preset

and change the Shift X and Shift Y sliders to 65

and the Number slider to

11

Apply


Open the Jack O Lantern

Image, Resize 60%

C&P

Position over to the left of the tag canvas (see mine for ref)

Duplicate

Image

Mirror


Open the Beware Sign

Image, Resize 60%

C&P

Move over to the left and below the Jack O Lantern layer


Open your chosen tube

C&P

Make sure it's above the balloon frame layer

Duplicate

and move the duplicate down below the balloon frame layer

in the Layer Palette


Add a good dropshadow to the bottom tube (hide the top tube for now)

then

using Magic Wand

Click inside the Balloon frame layer

Selections, Modify, Expand by 6

Selections, Invert

and

Taking your Eraser tool

Erase the bottom tube where it's at the bottom of the tag canvas (you

might want to hide the Balloon frame layer so you can see what you're doing)

Selections None

Unhide the Balloon Frame layer and top tube layer

and now, on the top tube layer, erase the legs of your tube so it looks

as though it's coming out of the frame :D This is a method very

familiar to my tutorial site followers lol! But hey! It works hehe xx


Right then, some finishing touches...


On the Balloon Frame Layer

Xenofex 2 Constellation on the Glimmer Preset

but change the Star Size to 2.00

and the Overall Star Density to 1

and

(optional)

Open one of the Sweets elements (I used Sweet 4)

Image, Resize 20%

C&P

then Apply the Mura's as before

then

Move down the Layer Palette to just above the Balloon Frame

and then

erase the couple of sweeties at the bottom between the Jack O Lanterns


Now on all layers except tube and mask layers

- apply a drop shadow of

2, 2, 45.00, 5.00, Black


Now, crop the canvas


Apply your name in a spooky font and style of your choice

(I use a glitter fill which I can't supply - sorry xx)

then shadow as before


Now,

add your Artist/Copyright information

and

save your work as a Transparent PNG (delete the White Background)

All done xx

This tutorial was written on 20th October 2009 by Vix
It is a tutorial based on a tag of my own design created
this morning and
any potential similarities to other tag tutorials that
may be available is wholly unintended and completely coincidental.
Links to tube/scrap blogs or sites are added either through necessity or creator courtesy,
and it is entirely up to the individual (ie. You!) if you choose to visit these sites and/or download/purchase from them.

Monday, 19 October 2009

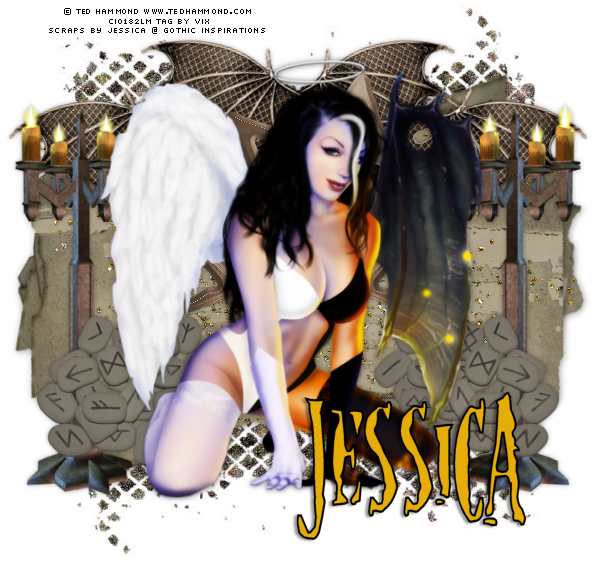
Tag Tutorial - Hellaciously Angelic - PTU


For this tutorial, I used -

Tube - by Ted Hammond which I purchased @ CILM
Artwork © Ted Hammond
If you wish to use the same tube you must purchase it from CILM
However feel free to use whatever you wish xx

Scrapkit - PTU kit called HellScream by Jessica @ Gothic Inspirations
Thanks hun xx
I've written this tut with this kit in mind, but if you don't have it,
feel free to improvise with kits at your disposal :)

Eye Candy 4000 HSB Noise

Font of your Choice


_________________

Open a New Image in PSP

600 x 600 pixels

Add a New layer

Flood Fill White


Open the Parchment Piece

Now...before we go any further, I shan't sport with your intelligence

by continuously repeating the phrase "Copy and Paste"

I'll drive meself bonkers if I do that!!!

So,

If and when you see the initials

C&P

Then you'll know what I mean :)

So, Open the Parchment Piece

C&P

Place centrally to the tag canvas if not already placed there

Duplicate layer by right clicking in the Layer Palette and hitting Duplicate


On the Bottom Copy

Image, Free Rotate 10 degrees to the right

Duplicate the Top copy (the straight one)

and on the Middle parchment layer - Image, Free Rotate, 20 degrees to the left

Back to the kit

Find - Backdrop Pattern (It's the first element you come to)

And it opens at 71% size

So, we're going to resize

Note: Please note that ALL my resizing that I do is SmartSize option in PSP

I never use Bicubic Sample, maybe I should...but I don't lol!

Anyway - once you've opened the backdrop

Image, Resize 70% Smartsize ALL layers ticked

(again, this is something I do all the time unless I say otherwise. I'm just

putting this in now so I don't end up repeating meself like a soddin' parrot

*cackle*)

C&P

Move down the Layer Palette to just above the White Background and line up as mine

Duplicate

Image

Flip

Image

Mirror


Now, on each of these backdrop layers

Go to Eye Candy 4000 and apply HSB Noise

by hitting Reset to Factory Default

and you should get a nice assorted colour setting on the backdrop

Do this again for the other copy of backdrop


Open Cluster 2

C&P

Position as Mine on top left

Duplicate

Image

Mirror


Open the Drunes

Image Resize 30%

C&P

Place to the left of the tag as mine

Duplicate

Image

Mirror


Open the Glitter 1

Image, Resize 80%

C&P

Move it down the Layer Palette under

the Drunes and Cluster

but above the Parchment pieces etc


Now, open the SkullCabl (the candles on stand element)

Image, Resize 80%

C&P

Move over to the left of the tag canvas

below the Drunes layers

and position as mine

Duplicate

Image

Mirror


Open your chosen tube to use

C&P

Resize as needed

Place where looks best

Feel free to add an effect to the tube layer

(I know blur overlays/soft light is popular at the moment - I love it lol!)


Now then - dropshadows

For the Parchment piece layers - use 1, 1, 40, 10.26, Black

For all other elements (except the Glitter and Backdrop layers) - 0, 0. 35.00, 7.00, Black

and for the tube layer

Add a favourite tube shadow of your choice


Finally

Add your name in a font style of your choice

Shadow as liked too


Apply Artist Copyright info etc


Crop the canvas if needed

Delete the White Background

and save your tag as a transparent .PNG

Enjoy your tag and thanks for looking xx

This tutorial was written on 19th October 2009 by Vix
It is a tutorial based on a tag of my own design and any potential similarities to other tag tutorials that
may be available is wholly unintended and completely coincidental.
Links to tube/scrap blogs or sites are added either through necessity or creator courtesy,
and it is entirely up to the individual (ie. You!) if you choose to visit these sites and/or download/purchase from them.
Scraps used in my tutorials that I've obtained from PTU purchased scrap kits are NOT supplied
in my tutorials supplies. So please do not ask, 'cos the answer will be no.
This website is intended for educational/entertainment purposes only
NO linking to my tut examples, screen shots, files or graphics permitted