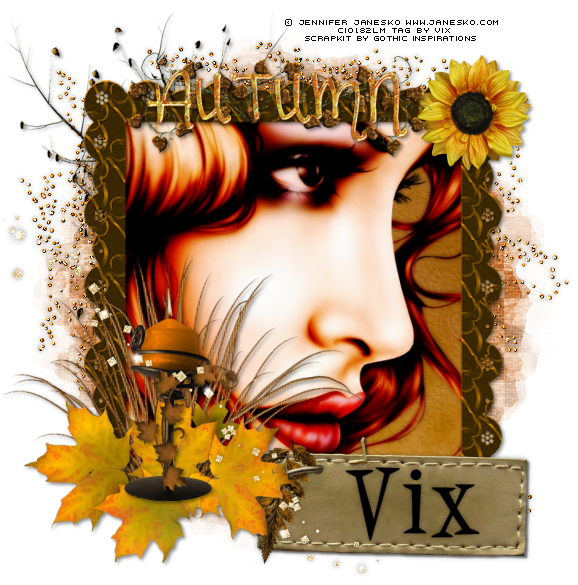
Tube of Choice - I'm using one
Artwork © Jennifer Janesko
If you wish to use the same tube you must purchase it from CILM
However feel free to use whatever you have in your tube collections
Scrapkit - PTU - I'm using a beautiful kit by Jessica
@ Gothic Inspirations. The kit is called "Autumn's Blessings"
Thank you hun xx
Mask - Chelle's mask WSL_219
available for download from her tut site HERE
Font of your choice
No other filters required for this tut...for once lol!
_________________________
The Usual
then
Open Paper 2
Image, Resize, change to Pixels and resize
600 x 600 pixels
C&P
Apply the Mask to this Paper layer
Layers, Merge Group
Open Frame 3
Image, Resize, 80%
C&P
Place centrally to the tag
Open Paper 1
Image, Resize 600 x 600 pixels
C&P
Move it down the Layer Palette
below the Frame and above Mask Layer
Take your Magic Wand on 0 Tolerance and Feather
Click inside the Frame layer
Selections, Modify, Expand by 6
Selections, Invert
and hit Delete on the Paper Layer
Selections None
Open the Glitter Bling
C&P
Place above the Mask layer but below the others
Open the Grass
Image, Resize 80%
C&P
Place as mine on the left of the frame
Open the Leaves 2
Image, Resize 50%
C&P
Line them up as mine
Open the Candle 3
Image, Resize 50%
C&P
Place over the leaves as mine is
Open the Sunflower 1
Image, Resize 20%
C&P
Place as mine on the top right
Open the Tree 2
Image, Resize 70%
C&P
Now place so the bottom of the tree is lined up with the
bottom of the candlestick
then
Move the tree down the Layer Palette so it's behind
the Paper and Frame but
above the Bling and Mask
and open Wordart Autumn
Image, Resize 50%
C&P
Place as mine
Open your chosen tube
C&P
Place within the frame
above the paper layer
and under the frame layer
Duplicate
and on the
top tube
Adjust, Blur, Gaussian Blur, 2.00
then
change the Blend Mode to Soft Light or Overlay etc
Now
Using Magic Wand as before
Delete the excess tube on both tube layers
and apply a subtle dropshadow to the bottom copy
of the tube
I used 0, 0, 35.00, 7.00
So - add a dropshadow to all the elements except the Bling, Paper and Mask layers
I used 2, 2, 45.00, 5.00, Black
on the Bling Layer I used the previous dropshadow
and used no dropshadow on the Mask or Paper layer
Now
Open Badge Leather 2
Image, Resize 40%
C&P
Place as mine under the elements on the left but
above the frame layer etc
Open Glitter Trail
Image, Resize 50%
C&P
Place as mine above the other layers
Line up where you like it
and use the subtle shadow if you'd like
Then finally,
Crop the Canvas to it's current size 600 x 600
or use Crop Tool and bring it in to crop where you
like - I got down to
578 x 585 pixels
Crop
Add your Artist Info etc
and
finally, your name in a font and style of your choice
Delete the White Background
and
save your work as a transparent PNG file
(If your forum is coloured, and most of the ones I'm in are lol!)
Hope you enjoyed this tut
Thanks for Looking xx
This tutorial was written 21st October 2009 by Vix
It is a tag designed from a scrapkit and any possible
similarities to other tag tutorials that may
be available is wholly unintentional and completely coincidental.
All of my tutorials are registered with TWI.