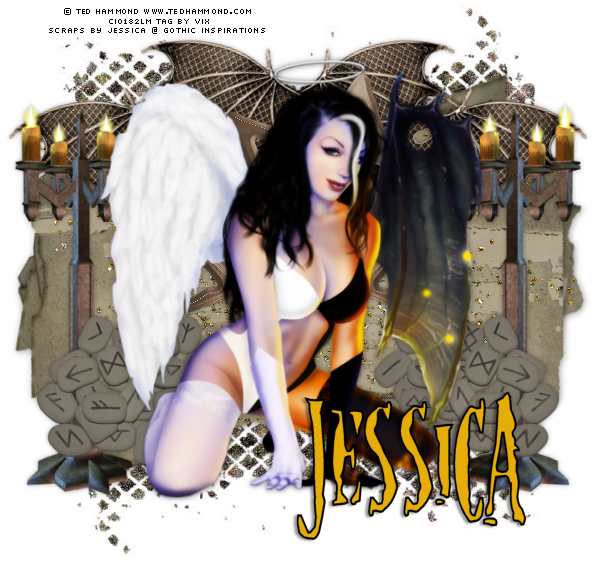
For this tutorial, I used -
Tube - by Ted Hammond which I purchased @ CILM
Artwork © Ted Hammond
If you wish to use the same tube you must purchase it from CILM
However feel free to use whatever you wish xx
Scrapkit - PTU kit called HellScream by Jessica @ Gothic Inspirations
Thanks hun xx
I've written this tut with this kit in mind, but if you don't have it,
feel free to improvise with kits at your disposal :)
Eye Candy 4000 HSB Noise
Font of your Choice
_________________
Open a New Image in PSP
600 x 600 pixels
Add a New layer
Flood Fill White
Open the Parchment Piece
Now...before we go any further, I shan't sport with your intelligence
by continuously repeating the phrase "Copy and Paste"
I'll drive meself bonkers if I do that!!!
So,
If and when you see the initials
C&P
Then you'll know what I mean :)
So, Open the Parchment Piece
C&P
Place centrally to the tag canvas if not already placed there
Duplicate layer by right clicking in the Layer Palette and hitting Duplicate
On the Bottom Copy
Image, Free Rotate 10 degrees to the right
Duplicate the Top copy (the straight one)
and on the Middle parchment layer - Image, Free Rotate, 20 degrees to the left
Back to the kit
Find - Backdrop Pattern (It's the first element you come to)
And it opens at 71% size
So, we're going to resize
Note: Please note that ALL my resizing that I do is SmartSize option in PSP
I never use Bicubic Sample, maybe I should...but I don't lol!
Anyway - once you've opened the backdrop
Image, Resize 70% Smartsize ALL layers ticked
(again, this is something I do all the time unless I say otherwise. I'm just
putting this in now so I don't end up repeating meself like a soddin' parrot
*cackle*)
C&P
Move down the Layer Palette to just above the White Background and line up as mine
Duplicate
Image
Flip
Image
Mirror
Now, on each of these backdrop layers
Go to Eye Candy 4000 and apply HSB Noise
by hitting Reset to Factory Default
and you should get a nice assorted colour setting on the backdrop
Do this again for the other copy of backdrop
Open Cluster 2
C&P
Position as Mine on top left
Duplicate
Image
Mirror
Open the Drunes
Image Resize 30%
C&P
Place to the left of the tag as mine
Duplicate
Image
Mirror
Open the Glitter 1
Image, Resize 80%
C&P
Move it down the Layer Palette under
the Drunes and Cluster
but above the Parchment pieces etc
Now, open the SkullCabl (the candles on stand element)
Image, Resize 80%
C&P
Move over to the left of the tag canvas
below the Drunes layers
and position as mine
Duplicate
Image
Mirror
Open your chosen tube to use
C&P
Resize as needed
Place where looks best
Feel free to add an effect to the tube layer
(I know blur overlays/soft light is popular at the moment - I love it lol!)
Now then - dropshadows
For the Parchment piece layers - use 1, 1, 40, 10.26, Black
For all other elements (except the Glitter and Backdrop layers) - 0, 0. 35.00, 7.00, Black
and for the tube layer
Add a favourite tube shadow of your choice
Finally
Add your name in a font style of your choice
Shadow as liked too
Apply Artist Copyright info etc
Crop the canvas if needed
Delete the White Background
and save your tag as a transparent .PNG
Enjoy your tag and thanks for looking xx
This tutorial was written on 19th October 2009 by Vix
It is a tutorial based on a tag of my own design and any potential similarities to other tag tutorials that
may be available is wholly unintended and completely coincidental.
Links to tube/scrap blogs or sites are added either through necessity or creator courtesy,
and it is entirely up to the individual (ie. You!) if you choose to visit these sites and/or download/purchase from them.
Scraps used in my tutorials that I've obtained from PTU purchased scrap kits are NOT supplied
in my tutorials supplies. So please do not ask, 'cos the answer will be no.
This website is intended for educational/entertainment purposes only
NO linking to my tut examples, screen shots, files or graphics permitted